


ApexSQL Monitor is a web based application that utilizes a single main menu.
The main menu allows navigation to various application pages including Home page, instances dashboard, alerts review, reporting on collected data, monitoring configuration, application administration, resources, and Add server for adding the new SQL Server instance for monitoring:
![]()
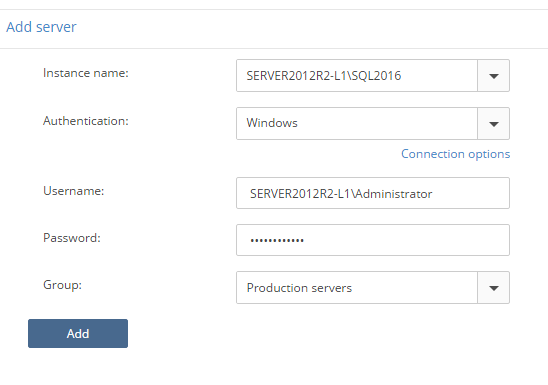
Adding an instance for performance monitoring is a one-step task. Users need to click on the “Add server” link in the main menu, then select SQL Server or type the name directly in the combo box, provide login credentials and optionally select the group where the instance will be added. Click on the “Add” button will add the instance for monitoring:
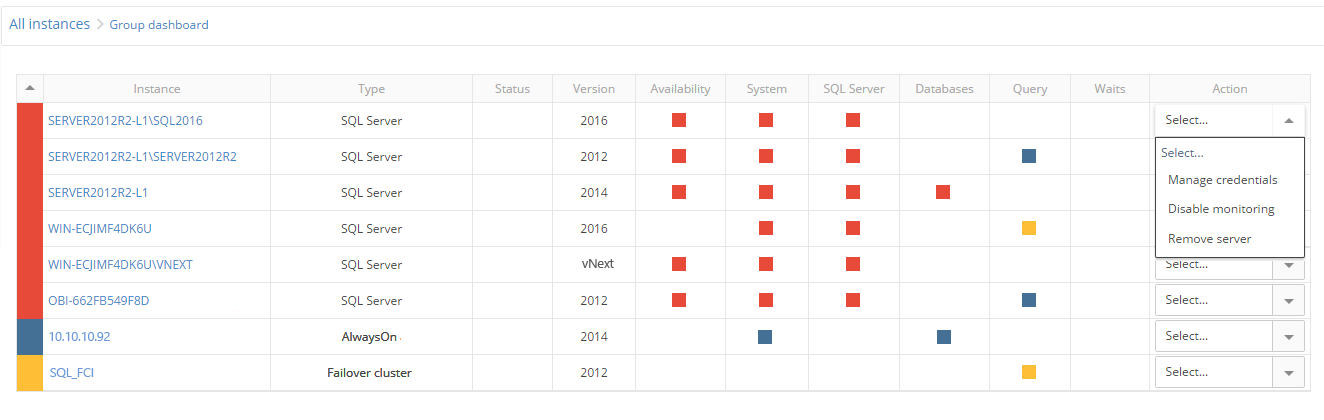
The global information about added instances is available from the group dashboard page. This is the default page on opening ApexSQL Monitor and it can be also accessed by pressing the “Home” link in the main menu. It provides various information about all monitored instances such as type, status, version, but also global alerts info for instance availability, system, SQL Server, database, query waits and wait statistic performance categories.
The Group dashboard is also used to manage the instance credentials, disable/enable instance monitoring or to remove the instance from the application
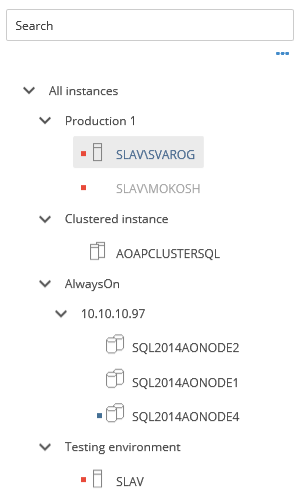
The tree view allows the user to view monitored instances, basic information on the instance status, alerts and the instance type Quick search of the monitored server is available for easier handling of situations where the large number of servers are monitored:
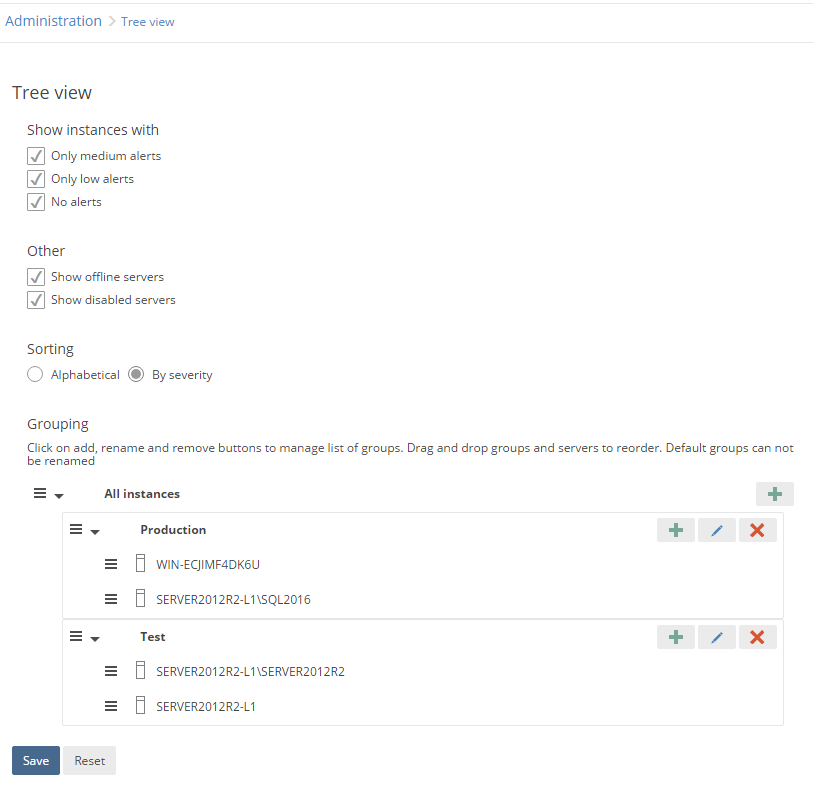
By selecting the “…” button in the tree view it is possible to configure the tree view itself. Here the user can set what instances will be visible in regards of the alert severity, whether the offline and disabled servers will be displayed and how the servers will be sorted. The tree view configuration is also used for grouping of the monitored instances:
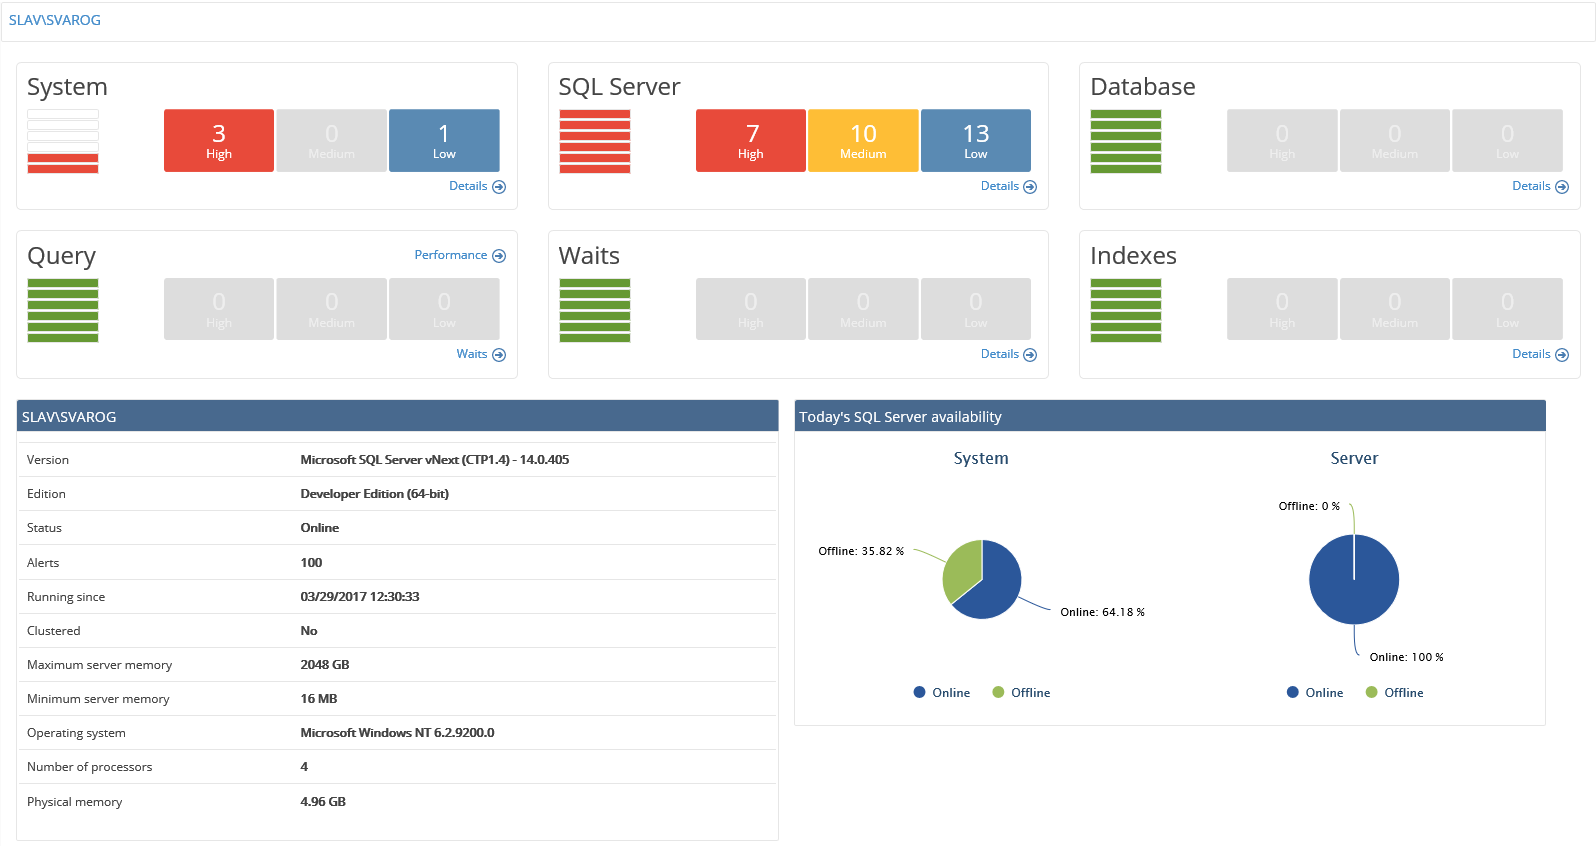
The instance dashboard displays various information for the selected monitored instance. It provides the general information on the system and SQL Server on global and local level, availability of the hosting system and SQL Server, as well as information about the alerts occurred on that instance including where the alert occurred, severity and the number of alerts triggered for each category
The instance dashboard is the starting point for drilling down to various performance pages via provided links, where user can get precise performance details for each performance category:
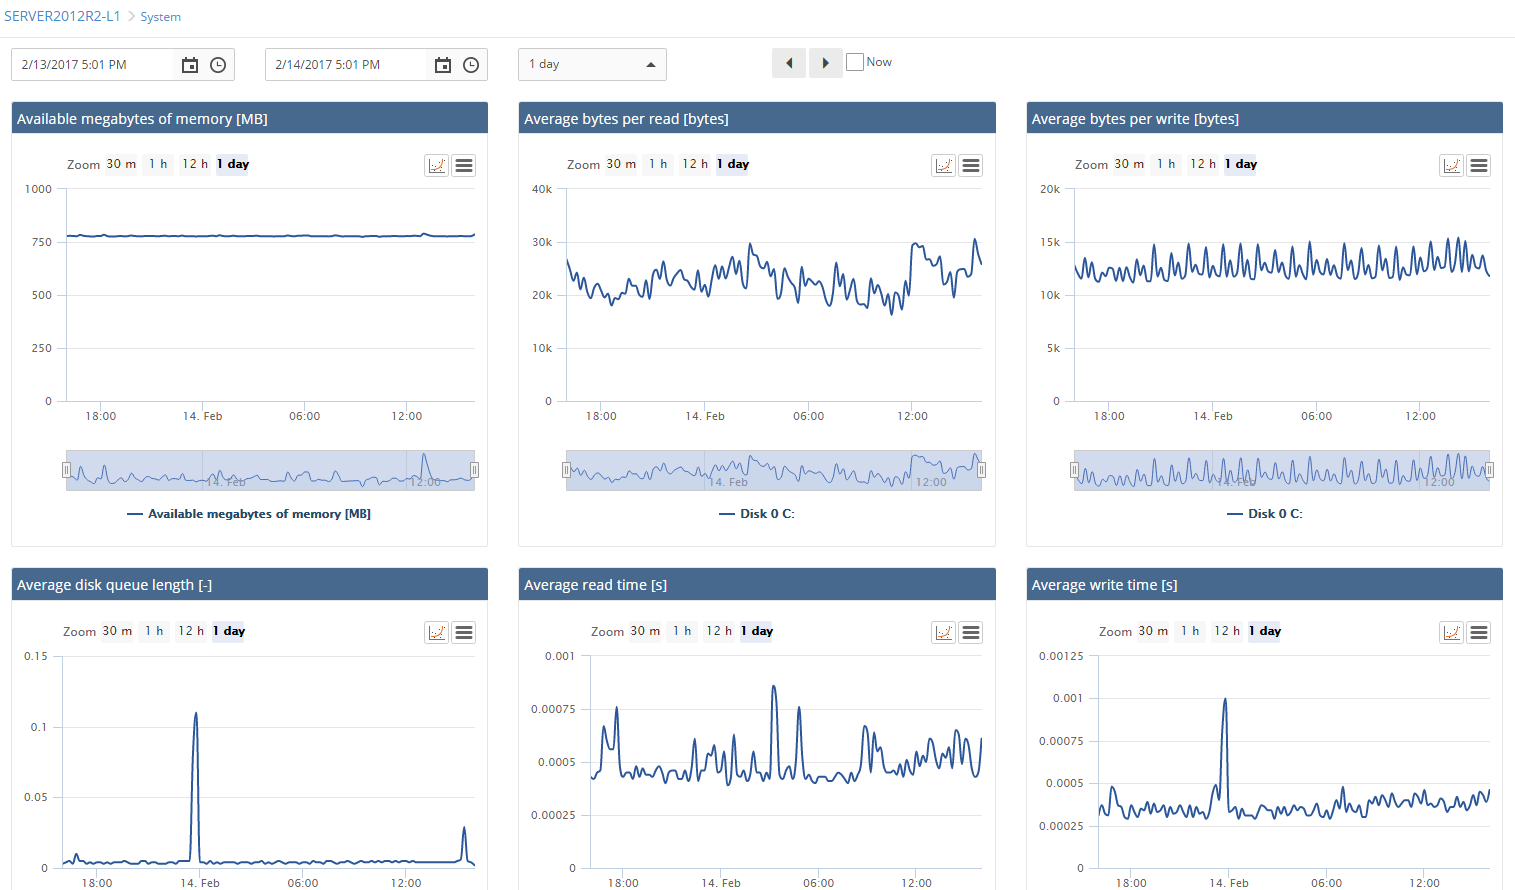
The system, SQL Server and the database charts page allows users insight into graphically conveyed performance metrics data. The charts page allows historical overview of the performance metrics collected over time. The user can select various chart time spans, from 30 minutes which can provide the full precision of the metric data up to 7 days for the global view of the performance data changes over the time:
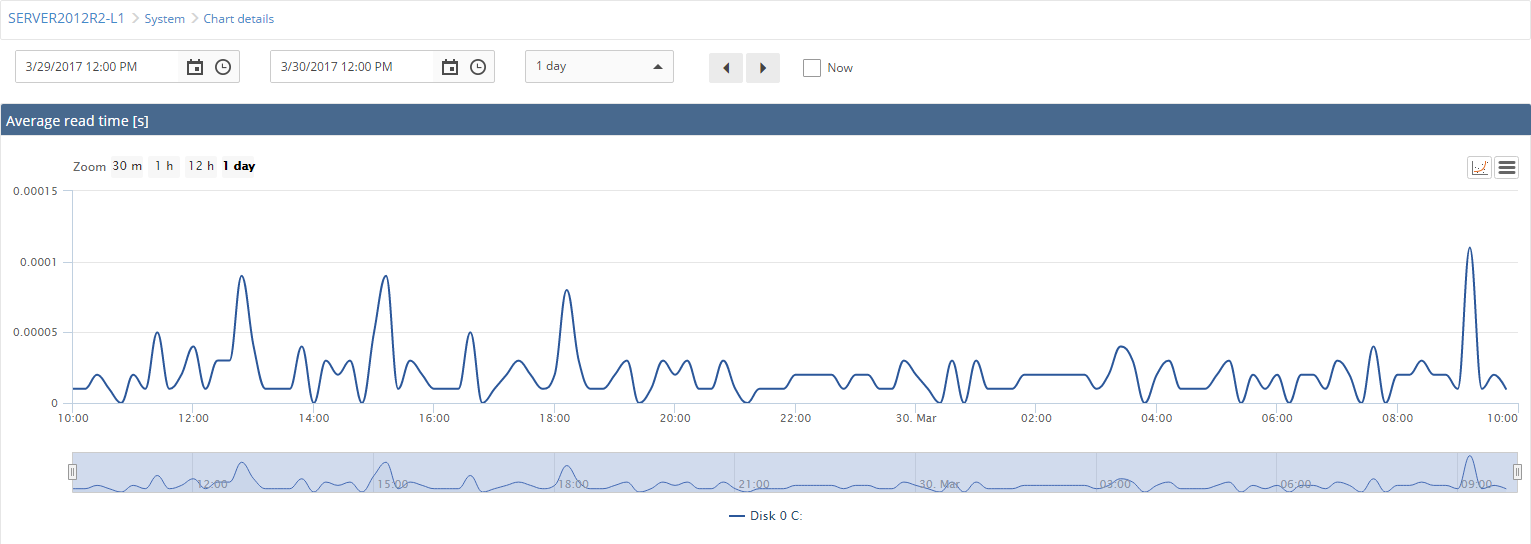
Clicking on the chart will display it in the full-page size to ensure easier review of the performance metric data:
ApexSQL Monitor displays the full graphically conveyed topology of all AlwaysOn Availability Groups after adding just one of them. The user can get immediate insights into the full AlwaysOn infrastructure including how replicas are distributed across the WSFC nodes.

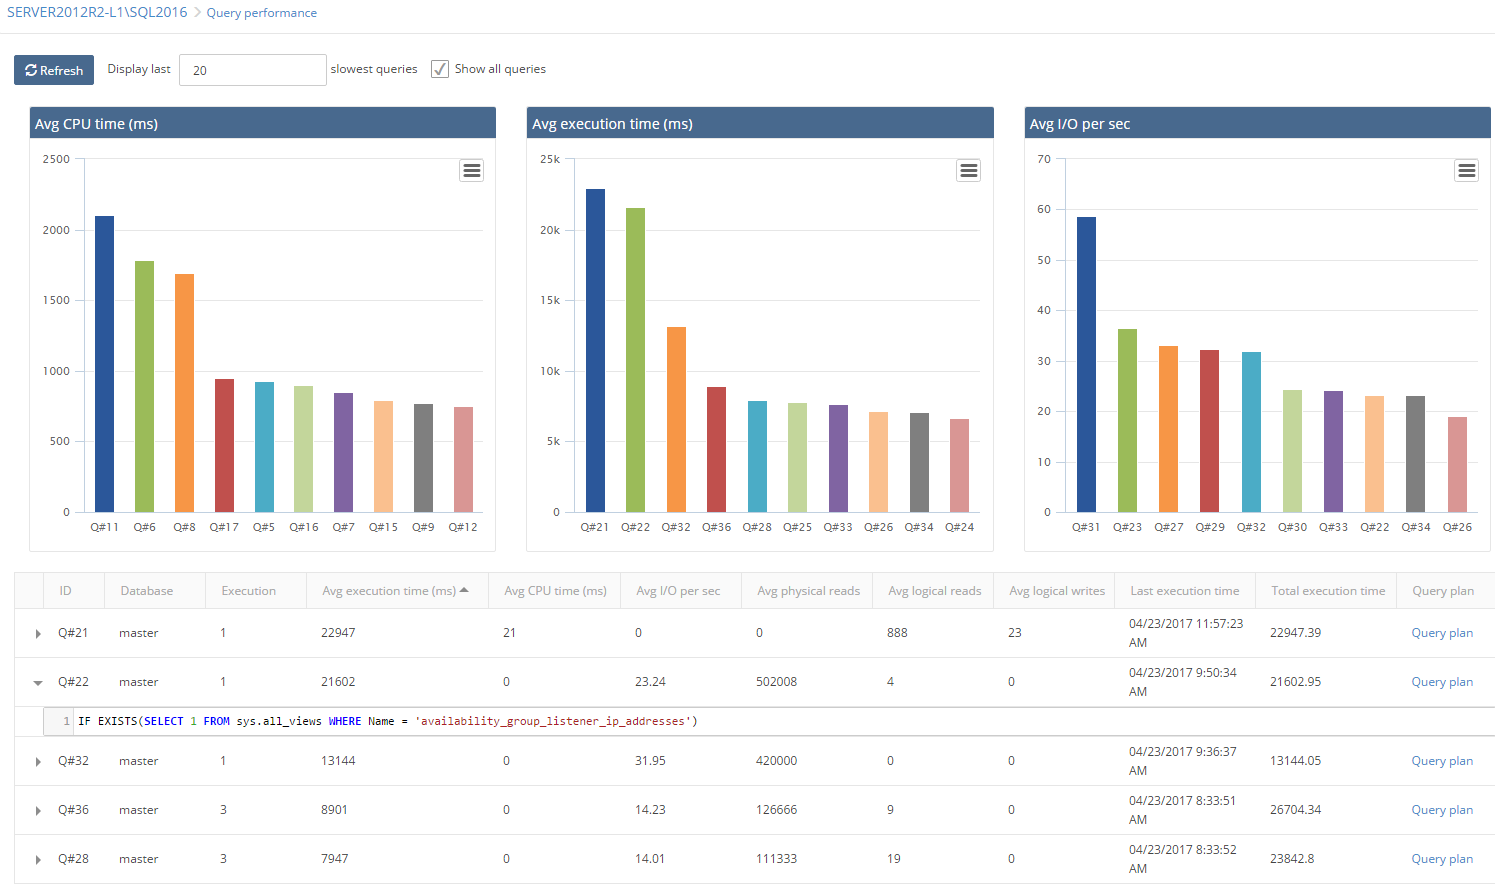
The Query performance page displays the instant information about the slowest queries executed on the selected SQL Server. Slowest queries can be evaluated in ApexSQL Monitor in three different charts that show slowest queries sorted by the execution time needed by a query to accomplish the task, average CPU usage of the query, and by the query average I/O activity:
The Query waits page displays the necessary information about the queries which wait time exceeds the time threshold configured by the user. The query wait allows the user to display collected queries as grouped or as individual ones, but also the blocked queries information. The chart allows drill down by time via chart bars down to the period as low as 30 minutes. The table below provides the additional information about the selected query:

By selecting an individual query in the grid, the page with the detail wait statistic and other related information about that specific query execution will be displayed:

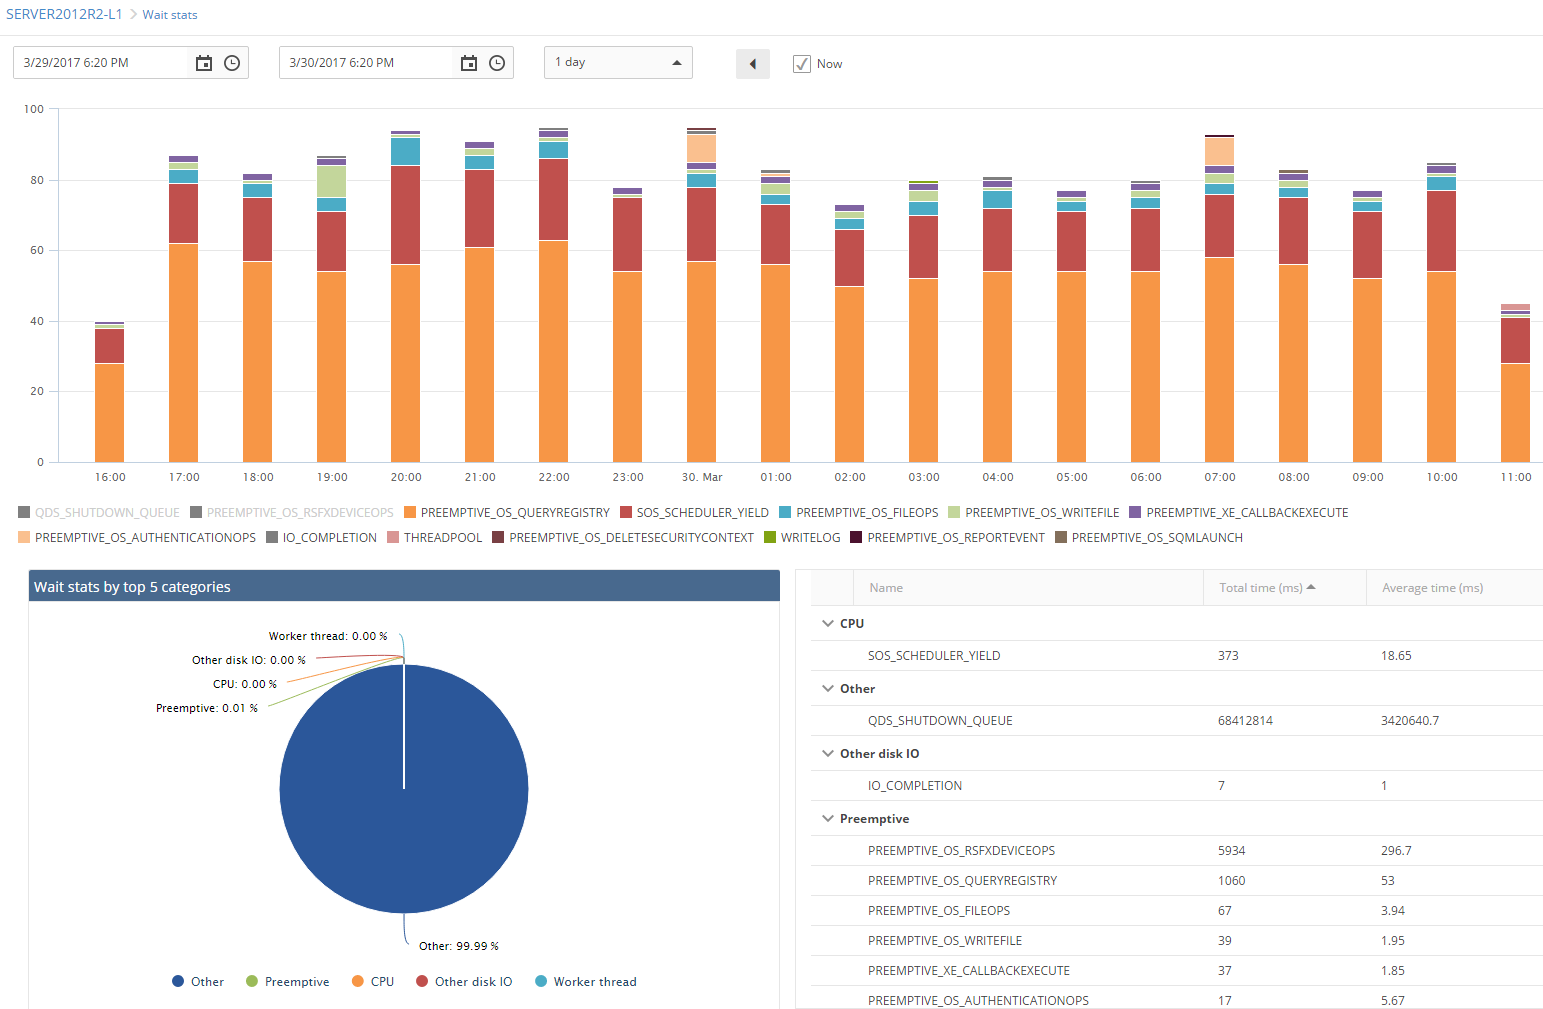
The wait stats page is designed to provide insight in the global wait type statistic for the selected SQL Server. The page allows the historical review of the wait statistic data and the chart is designed to allow hiding the unwanted wait types up to a single wait type displayed:
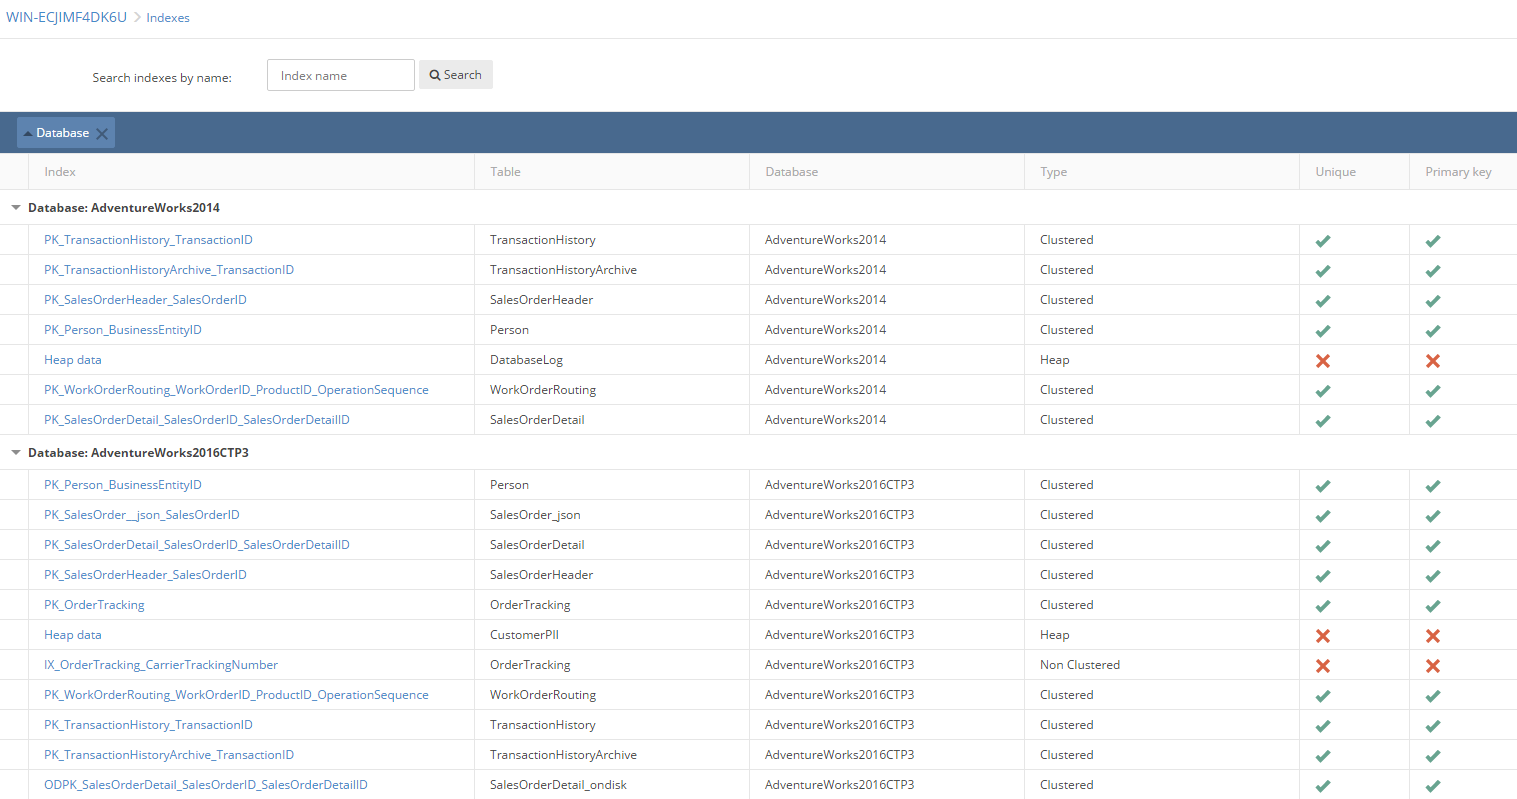
The index page provides the list of indexes which size is larger than the user specified threshold:
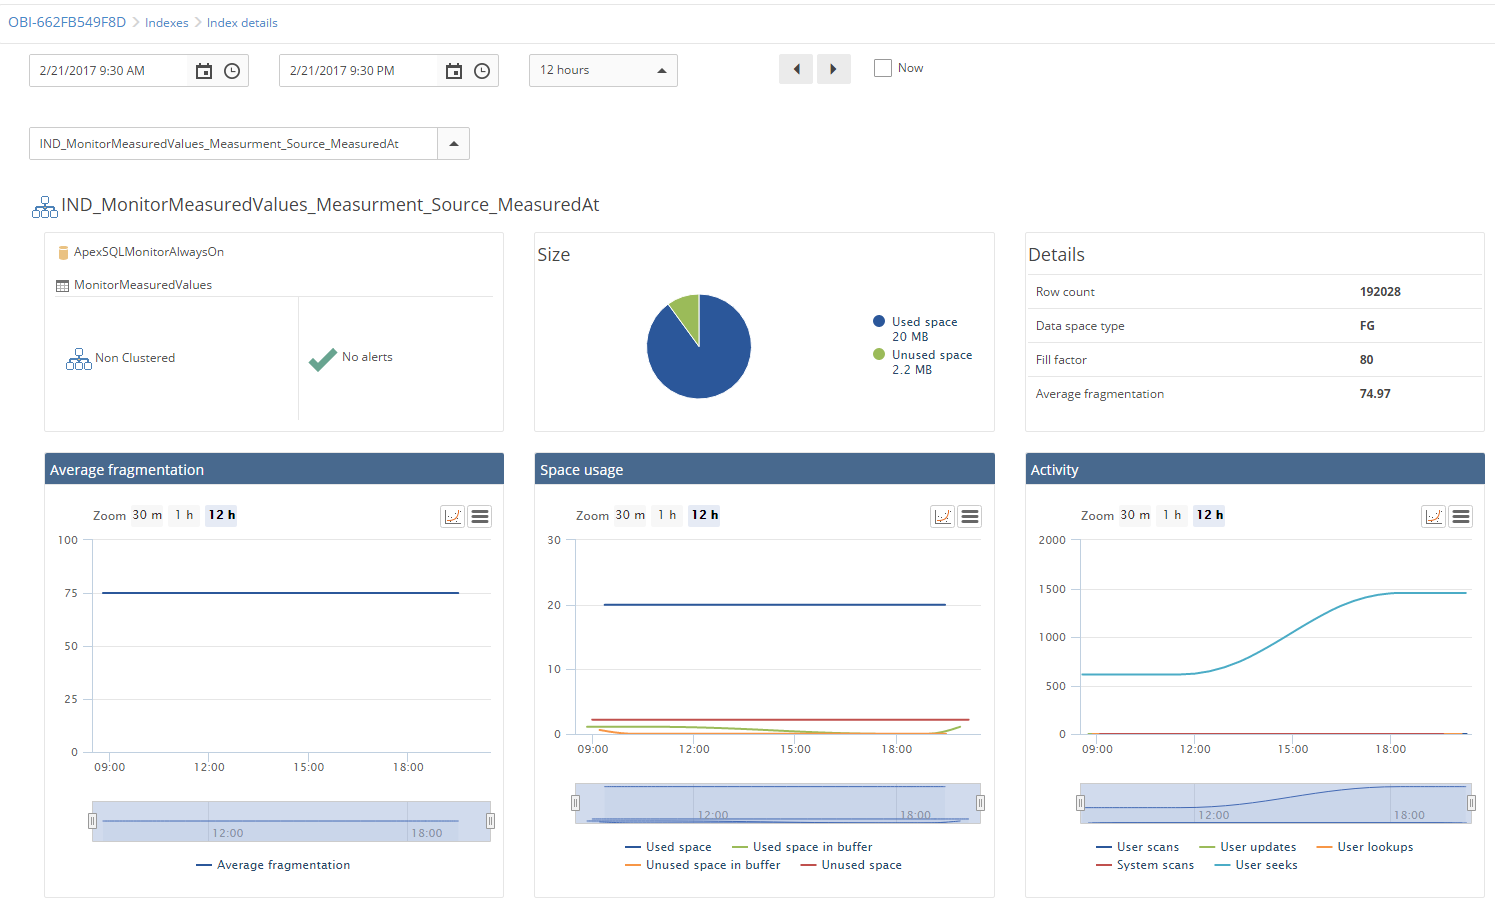
By clicking on the specific index in the table, the page with full details of the selected index is shown:
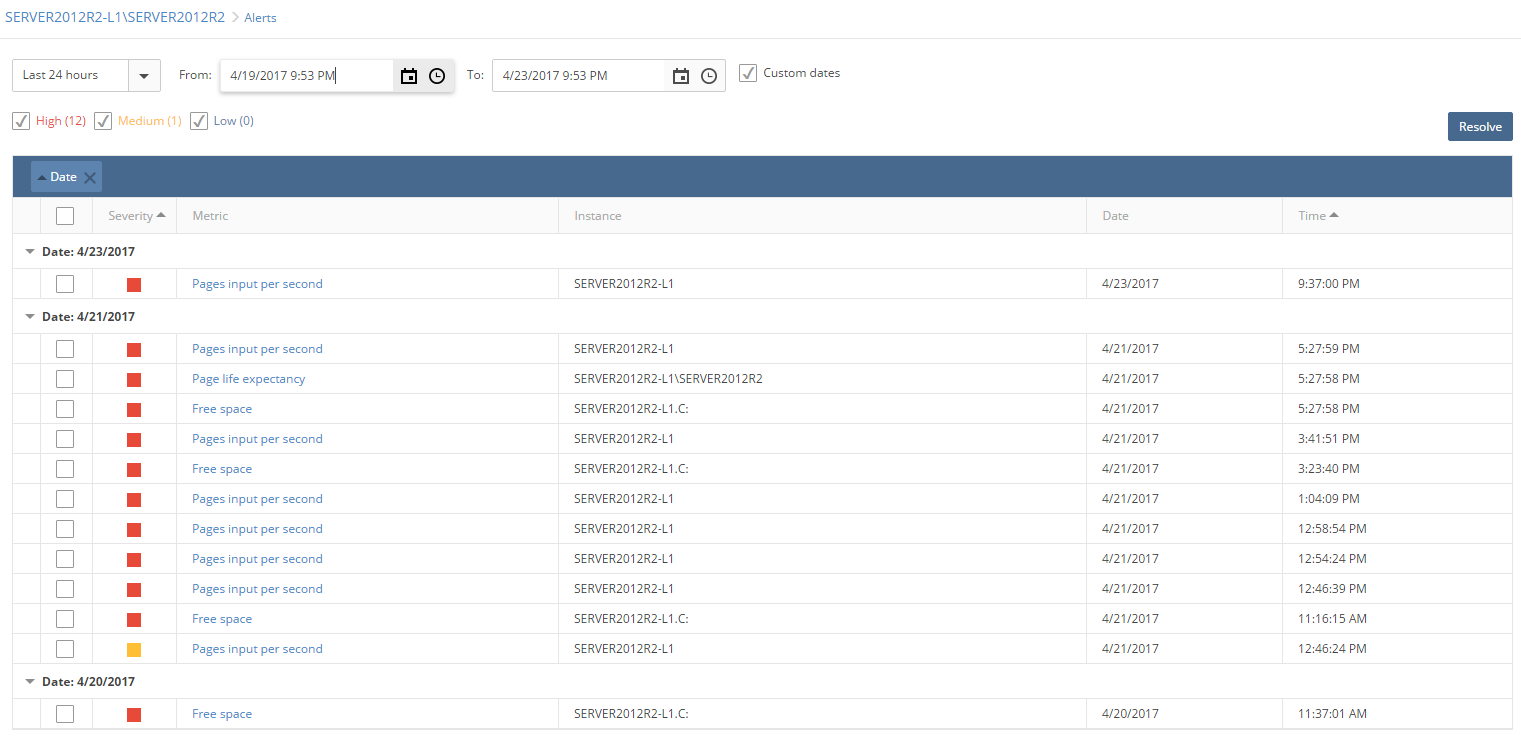
Selecting the “Alerts” link from the main menu will open the alerts page which list the alerts raised for the specific instance. The page allows previewing the alerts list for the user defined time period:
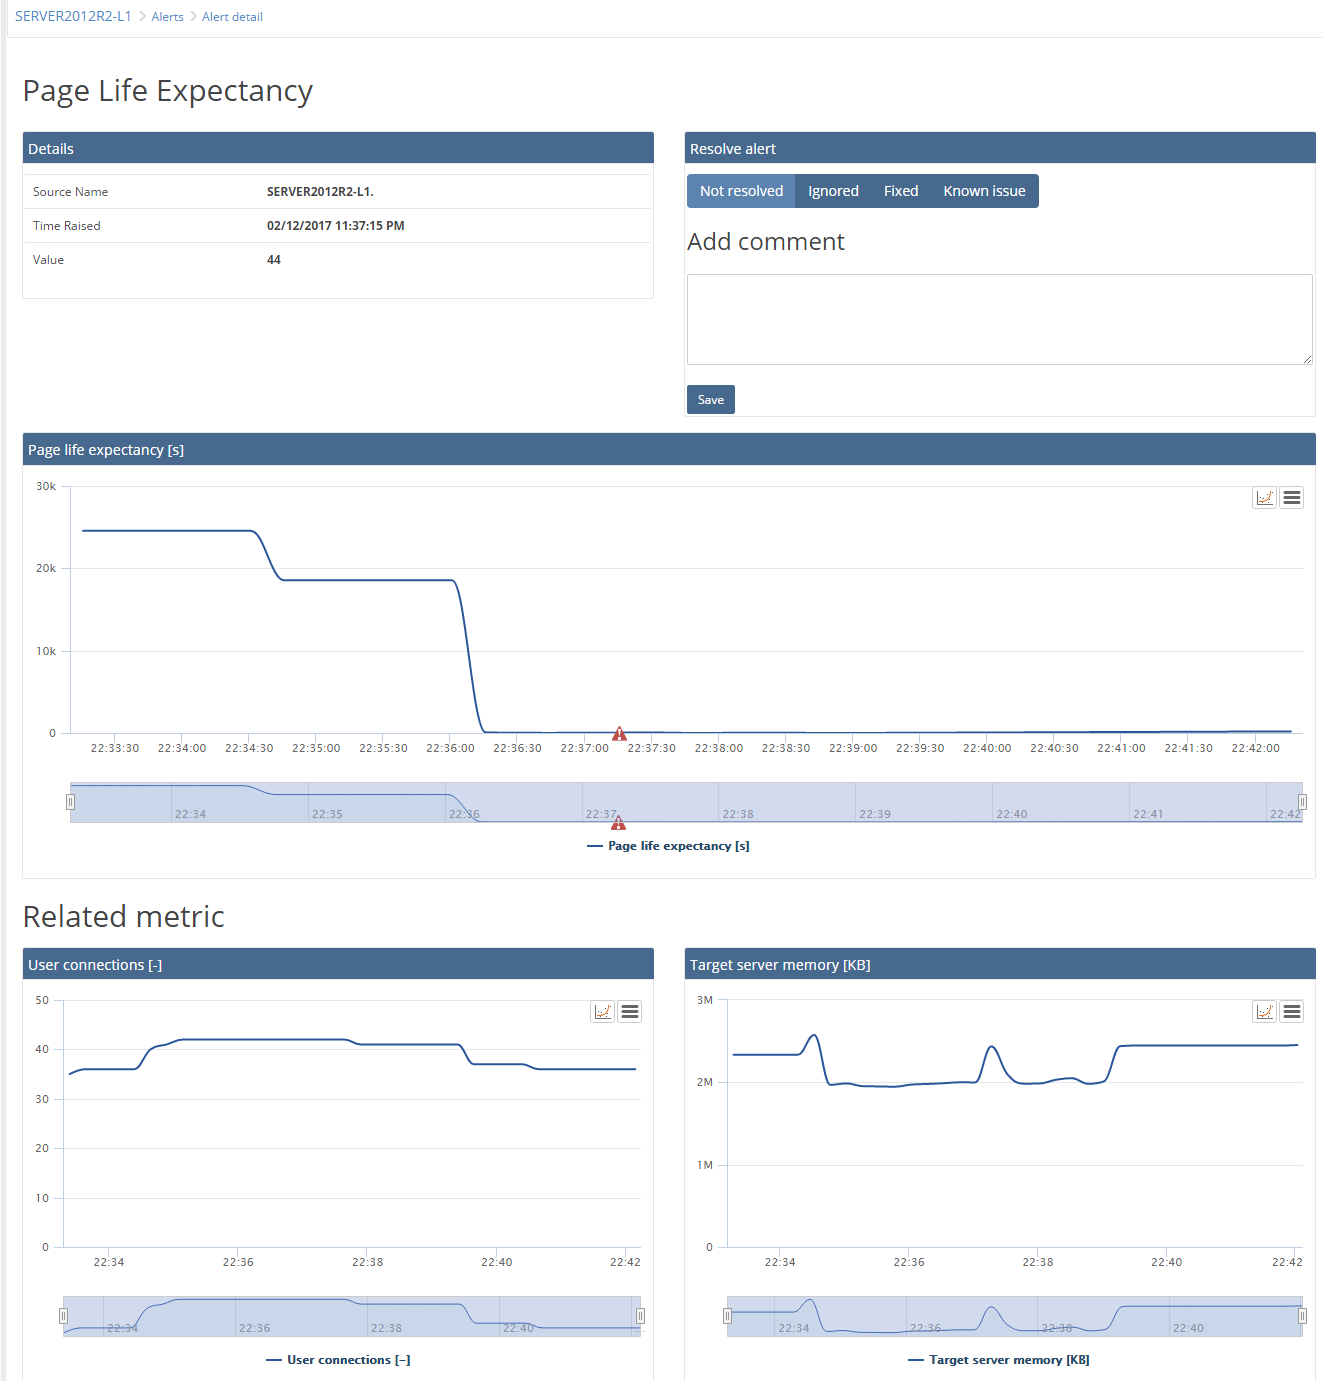
Selecting the specific alert will display the alert details page. The metric chart with the marked moment when the alert was raised will be displayed, as well as additional related metric charts, which values were fluctuated in the same time when the alert was triggered are displayed to ensure more relevant alert analysis. Once reviewed, the alert can be also resolved by the user:
The Report page allows creation of various predefined metric reports. Reports can be customized by allowing the user to select one or multiple server and/or databases (depending on selected report) and to specify time range for which the report is needed. The report can be instantly previewed or downloaded:

By selecting “Add custom report” in the reports page, the various custom reports on System, SQL Server and database metrics can be created by the user and saved for the further use:

The Configuration page contains multiple subpages for configuring various parts of the performance monitoring process, accessible via the provided configuration page submenu:

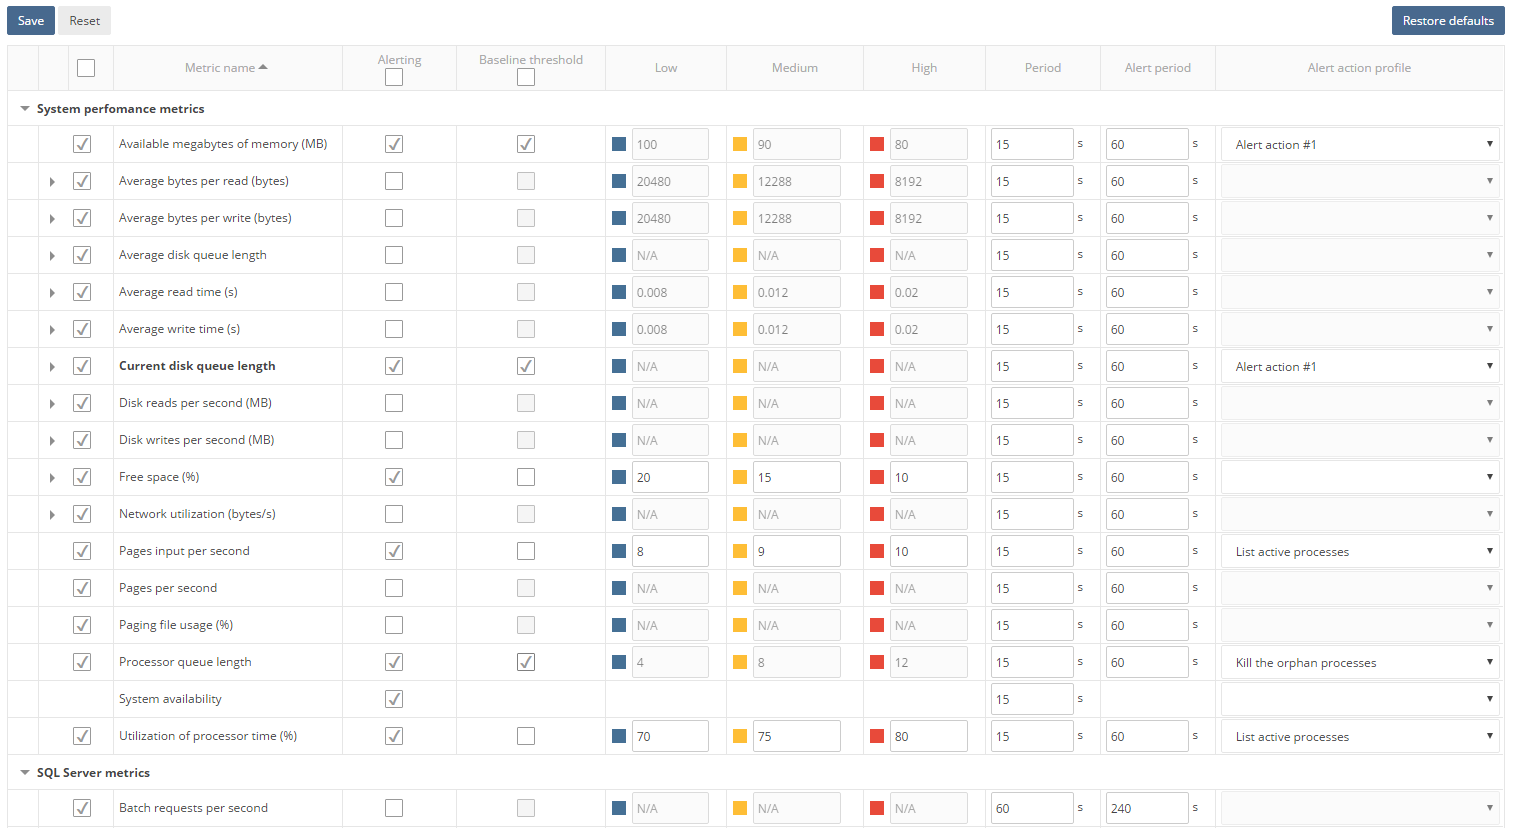
The metric configuration page is default configuration page. Here the user can select what metrics will be monitored (or not), turn on/off regular or baseline alerting, specify threshold values and alert period for multiple or specific metrics. The predefined or user created alert actions can be assigned to desired metrics here:
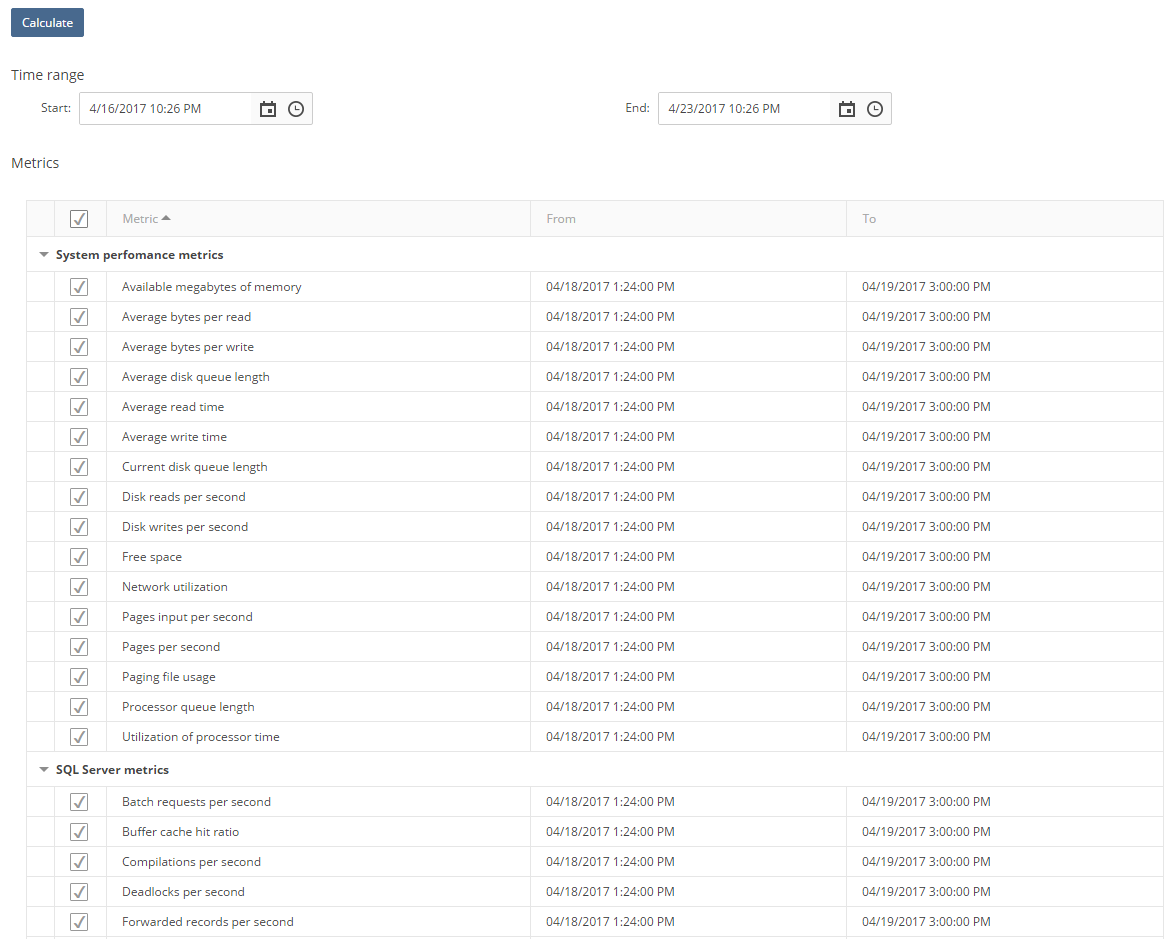
The user can calculate baselines just for selected or for all metrics at once in the baselines configuration page. After selecting the period that will be used for baseline calculation and pressing the “Calculate” button, the baseline will be calculated:
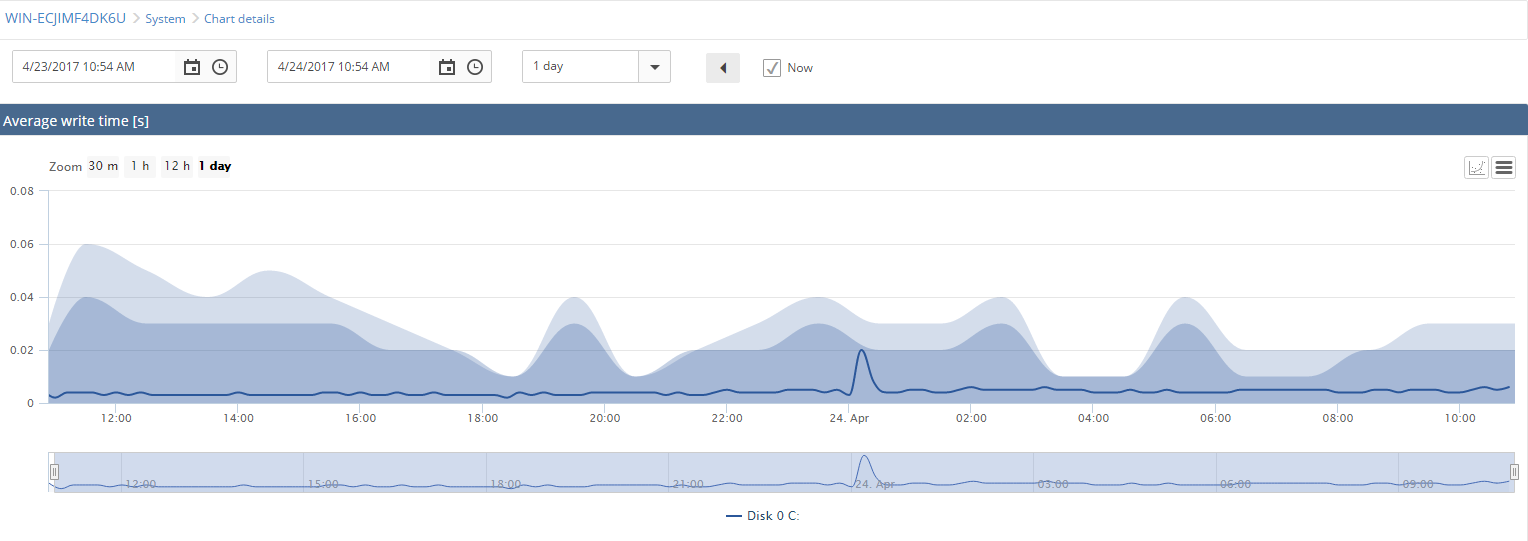
And this is how the baseline is represented in the chart:
The devices configuration page provides option to include or exclude specific devices from monitoring process:

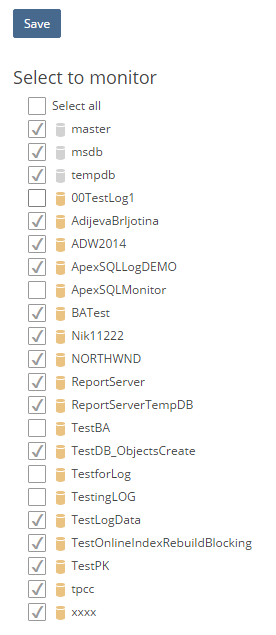
Selecting which databases will be monitored or not can be done in the databases configuration page:
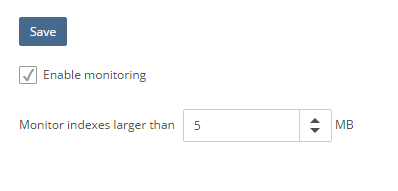
Index monitoring can be enabled or disabled from the index configuration page. Here the minimum index size that must be met for index to be monitored by ApexSQL Monitor can be defined by the user:
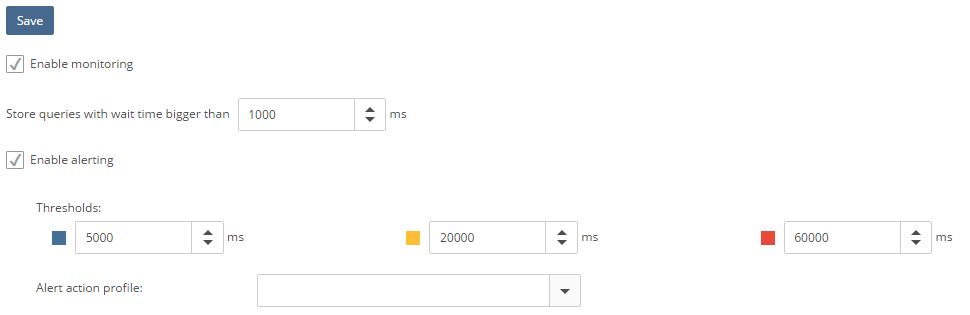
The Query configuration page provides the option to enable/disable query monitoring, minimum wait time that must be collected by the query to be collected and stored in repository. Enable/disable alerting and setting the alert thresholds and alert actions can also be performed in this page:
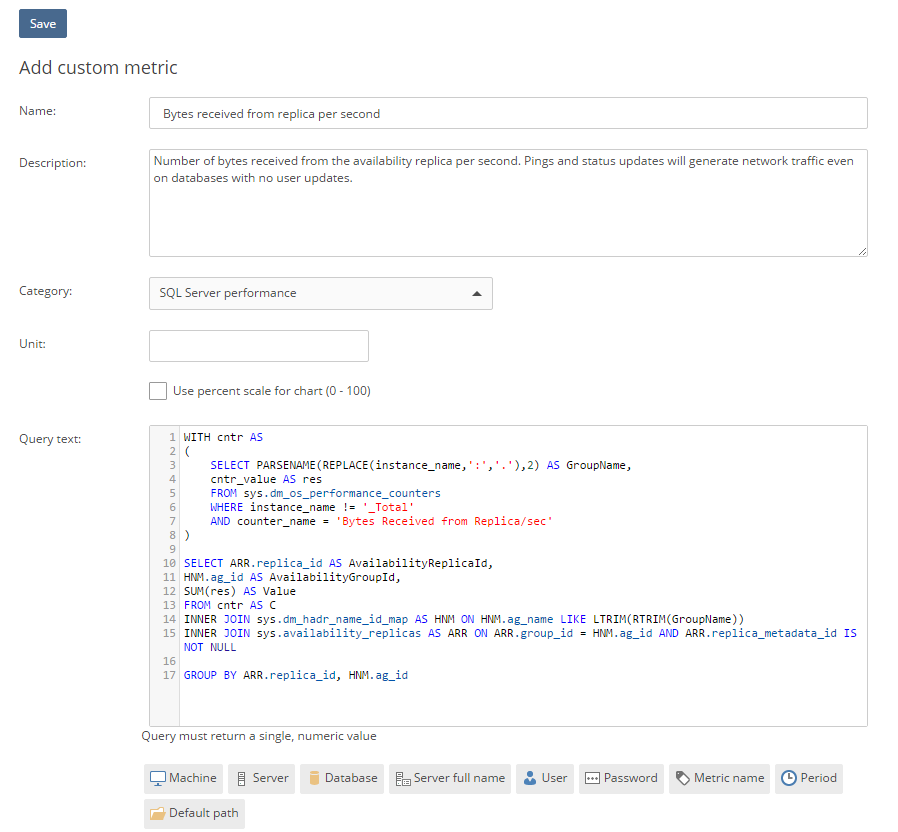
The custom metric configuration page allows creation of custom system, SQL Server and database metrics that, when created, can be used and configured as any built-in performance metric:
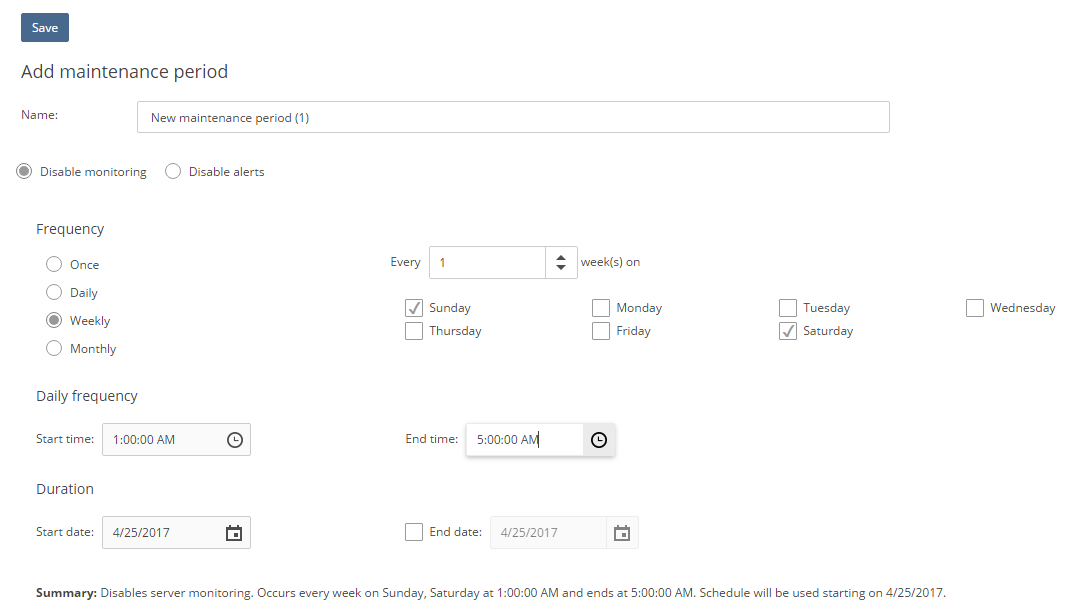
The maintenance period configuration page allows scheduling the maintenance windows during which performance monitoring or just alerting will be disabled:
The alert actions configuration page can be used to create various alert actions such as adding email profiles, creating SNMP traps, SQL Script and CLI/Power shell commands that will be executed when alert occurs:

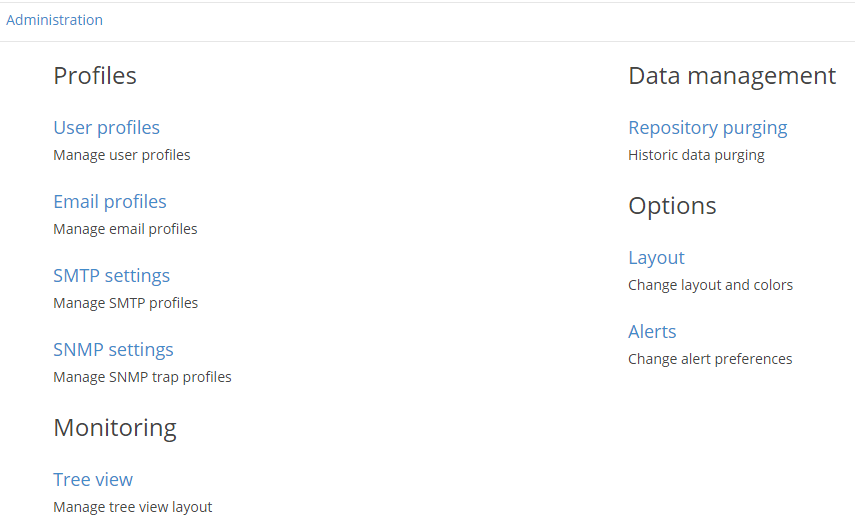
The Administration pages are accessible via the link in the main menu. From here it is possible to access the pages for administering various application related settings:
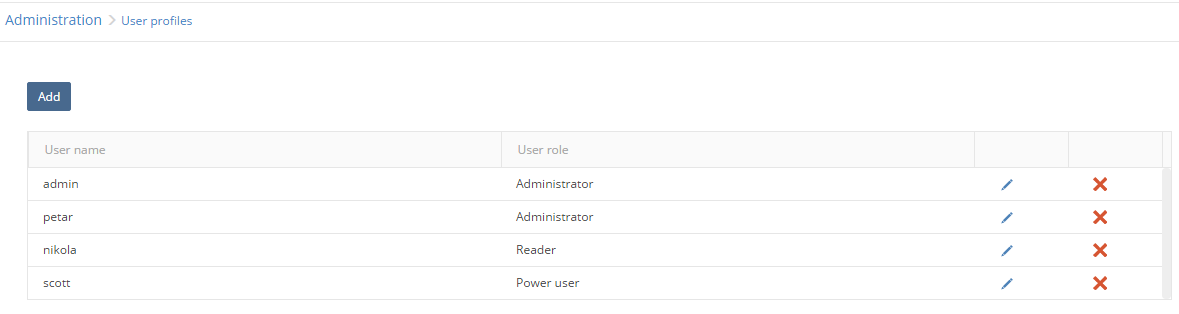
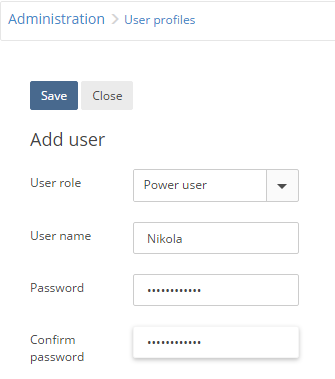
User administration page allows adding, removing and editing of application users, as well as to assign one of the available user security roles: Administrator, Power user and Reader:
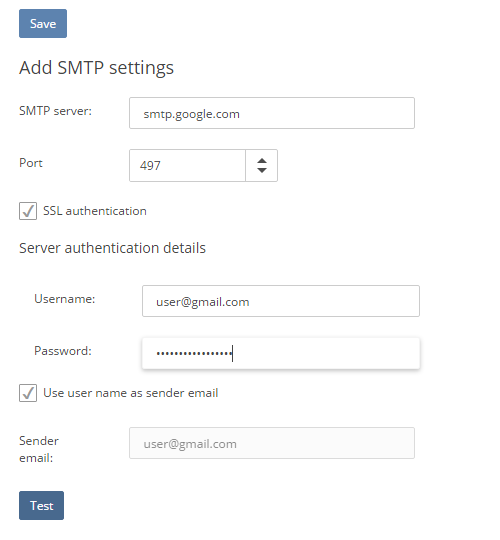
The SMTP configuration page allows creating, deleting and editing SMTP mail server profiles:

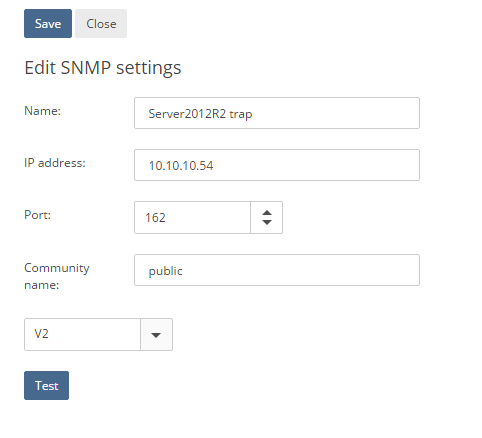
The SNMP settings allows creating new, editing and deleting SNMP trap settings:
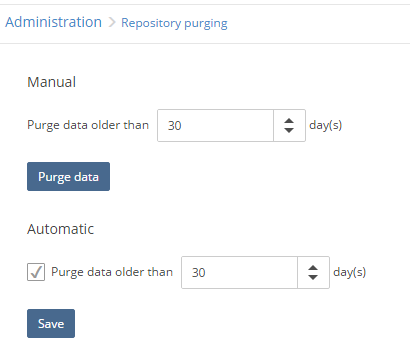
The repository purging settings allows user to define automatic data retention policy for data stored in the repository database, by instructing application to regularly delete data older than the specified number of days. Data purging can be also executed manually by the user:
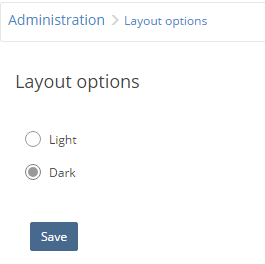
The Layout options settings allow switching between the light and dark application theme:
Alert options allows turning on/off option to force adding comments when resolving alert. Here the automatic report generation on specified report that is resolved can be turned on. Report can be generated and stored in .pdf, .doc or .mht file formats:
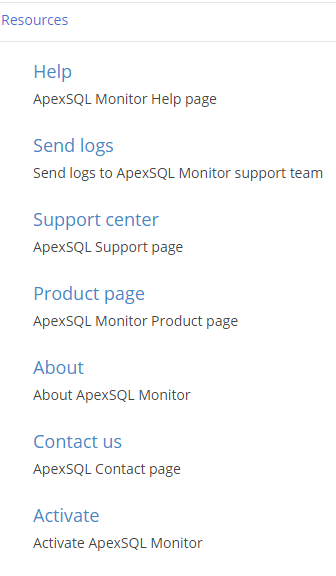
The resources page allows user to connect with ApexSQL teams, access application help and product page or handle application update and activation tasks:
April 25, 2017


