


Installation
Installation of ApexSQL Job is a simple and straightforward task.
Run the ApexSQL Job executable installer to enter the first step of installation wizard where you’re greeted with the welcome screen. Click the Next button to continue:

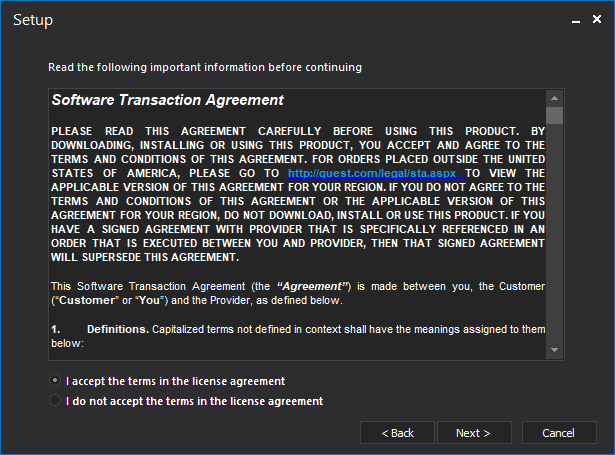
In the following window, Software Transaction Agreement is shown and, in order to continue with the installation, one must accept the terms in the license agreement and then click on the Next button:
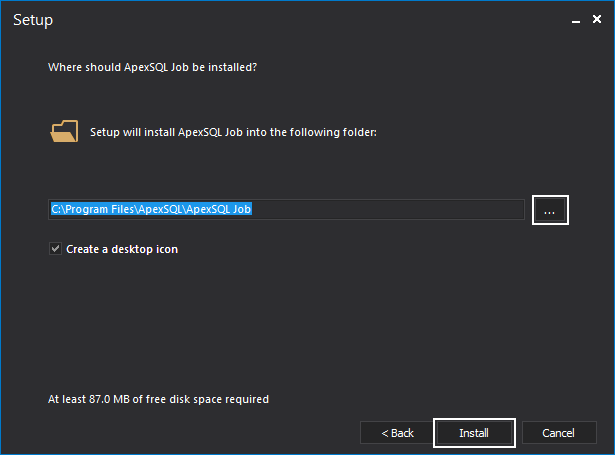
In the next step of setup, choose where to install ApexSQL Job. Leave the default destination folder or select a custom one by clicking on the browse button. Leave Create a desktop icon checkbox intact to create a desktop shortcut and click on the Install button to finish the setup:
The final step confirms ApexSQL Job is successfully installed. Leave Run ApexSQL Job checkbox intact to run the tool immediately upon clicking the Close button:

The main menu of ApexSQL Job consists of the following six tabs, all respectively in the following order:
- Home
- Jobs
- History
- Schedules
- Alerts
- Resources
Home tab
The Home tab includes the tasks that manage the SQL Server instances and their agents. All those tasks are grouped into the following categories:
- SQL Server
- Agent
- Tools
- View
Under the SQL Server category, one could Add a new SQL Server instance, Edit the connections of previously added SQL Servers and remove added SQL Servers by the single click on the Remove button:

In the same category, presented are options to Start, Stop or Restart a SQL Server:

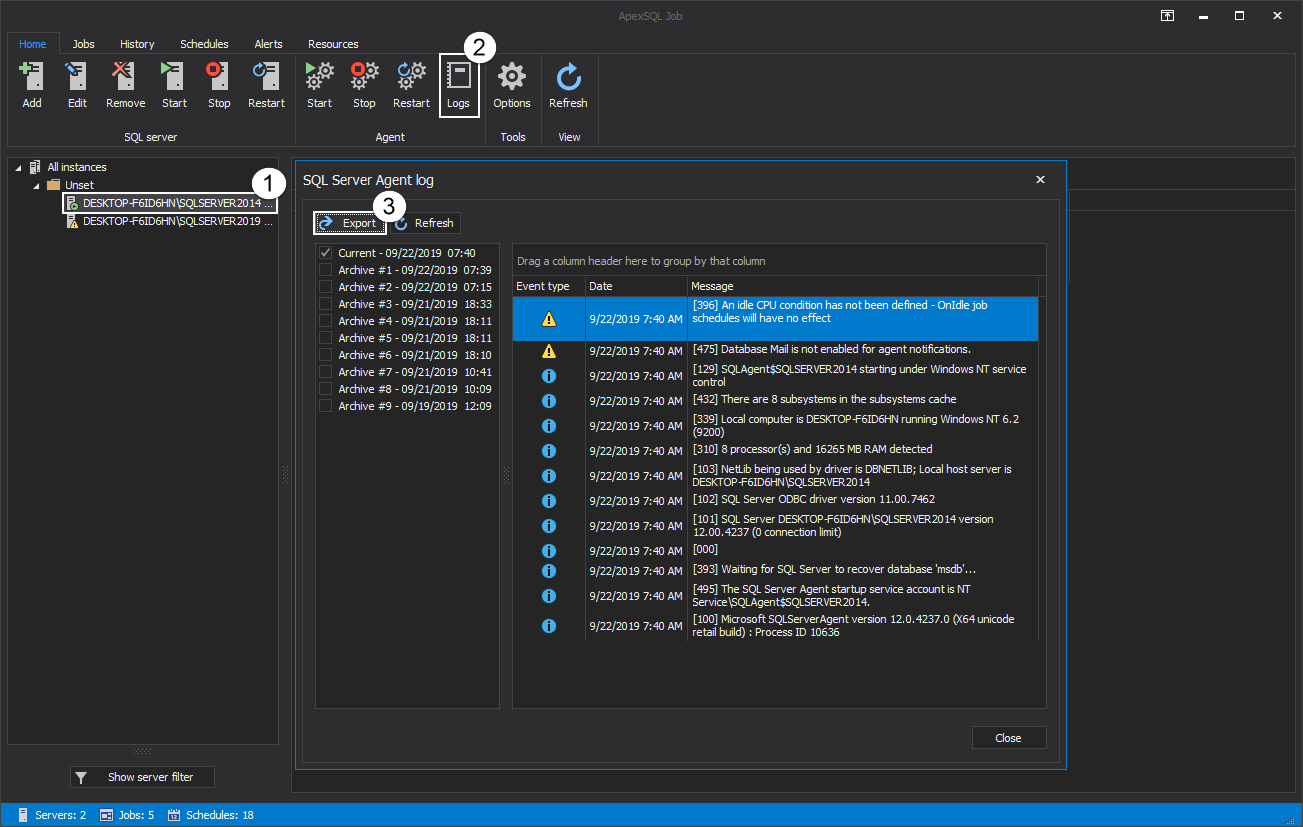
In the Agent group are presented the “SQL Server Agent” related options. Agent services for previously added SQL Servers can be started, stopped and restarted, by clicking on any of corresponding buttons in the respective order:

Additionally, under the same group SQL Server Agent logs can be seen and later exported to CSV file format:
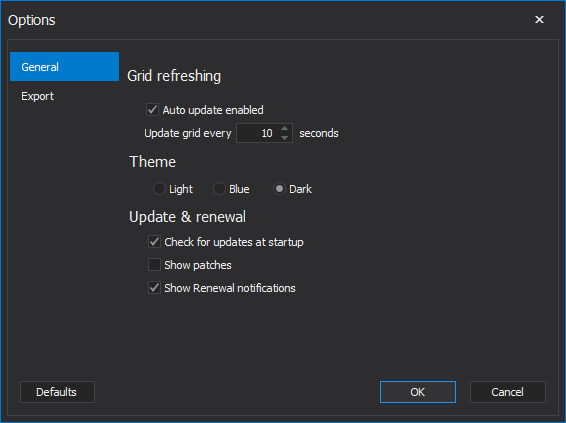
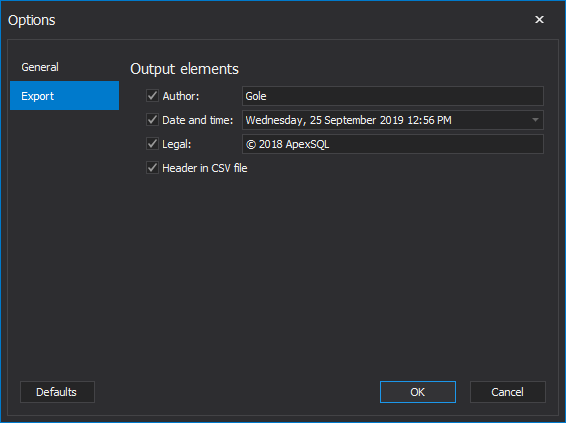
Options window under the Tools section offers some tool configuration options.
The General tab allows the user to choose the grid refreshing rate, preferable theme, and update and renewal options:
The Export tab allows the user to set custom output options, e.g. to enter a name, date/time desired format, company name and whether header will be included inside the exported CSV file:
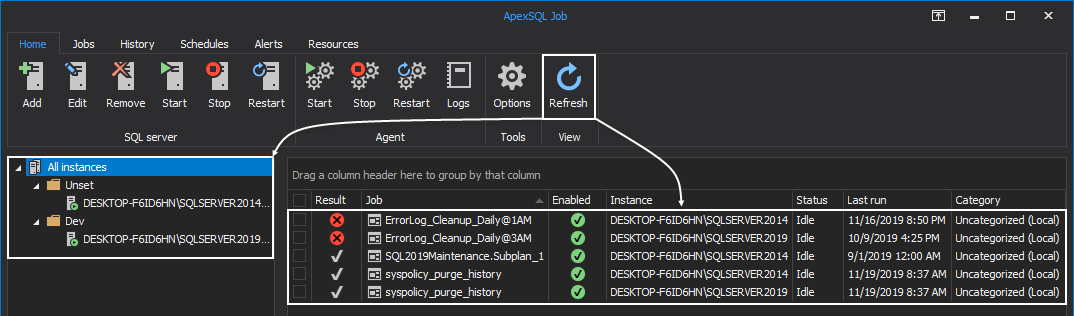
Last option left to be covered under the Home tab is the Refresh option, the one that manually refreshes “all visible information” displayed under this tab, both in SQL Server pane and in Job list grid:
Jobs tab

The Jobs tab in the light theme:
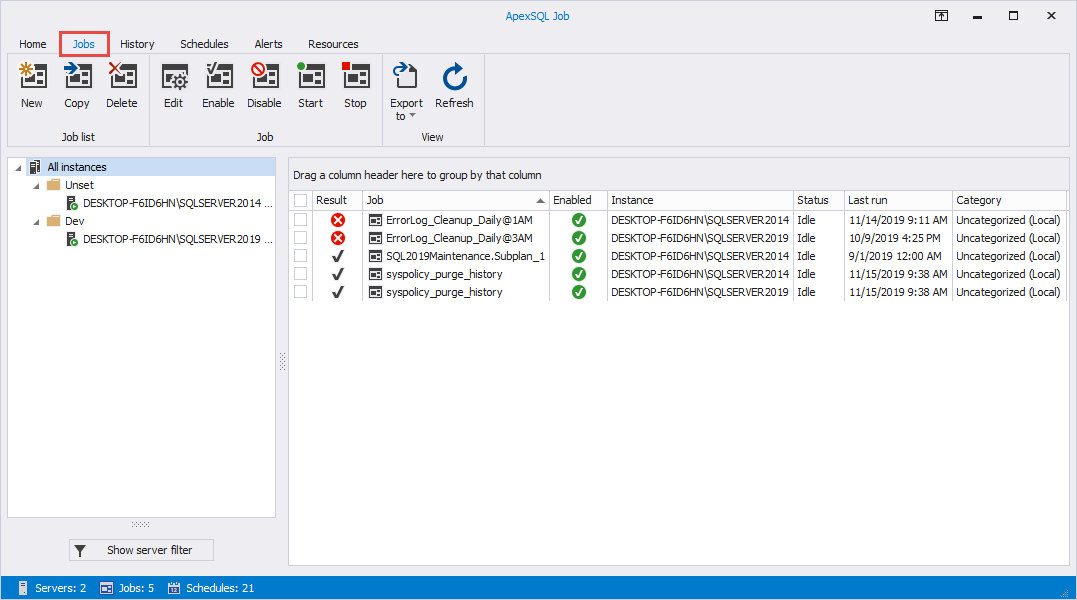
Jobs tab is the main tab of the application. It consists of three task categories:
- Job list
- Job
- View
The Job list category allows the user to create a new job, to copy a job from/to another SQL Server instance and to delete the desired job. All those actions can be triggered by clicking on the New, Copy, Delete buttons respectively:

Under the Job category, one could choose to edit, enable, disable, start or stop a running job by clicking on the corresponding button:

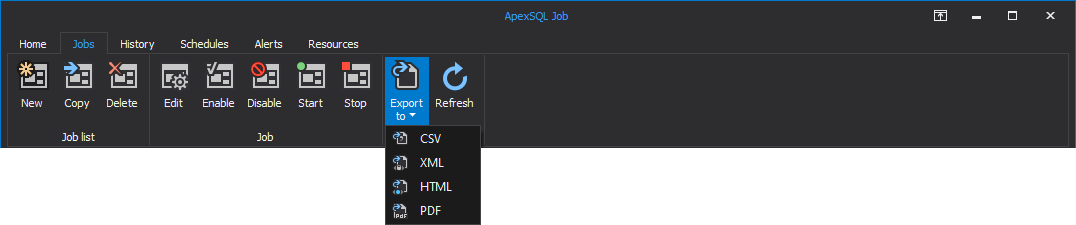
By clicking on the Export to button under the View category drop-down menu is called where the user is presented with the option to export any of the previously selected numbers of jobs to the desired file format: CSV, XML, HTML or PDF:
By clicking on the New button, the New job wizard is opened where the user is presented with five different tabs and each one provides various “job related” settings:
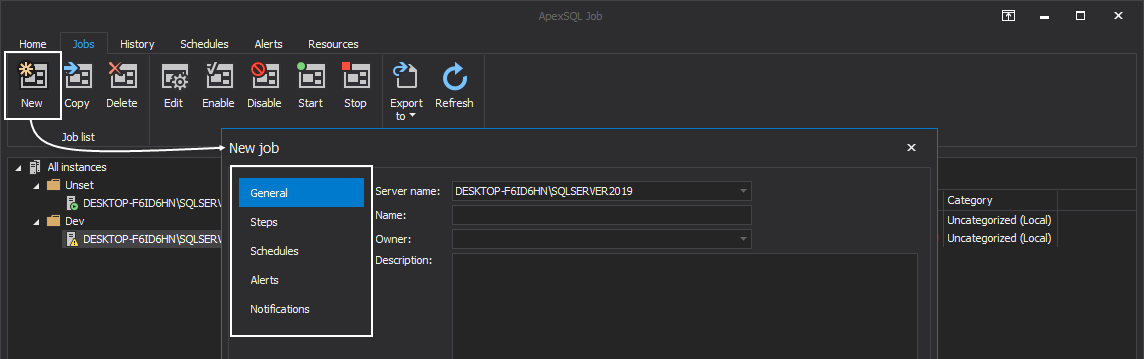
Under the General tab, from the Server name drop-down list, choose the preferable SQL Server to create a job for:

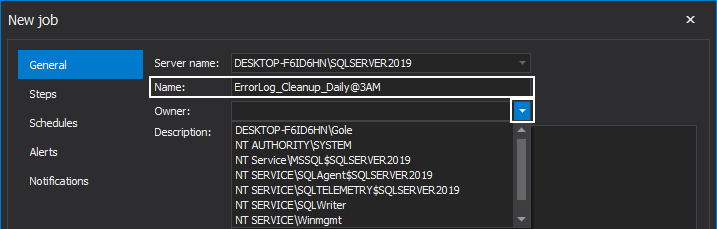
Provide a desired name for the job and select its owner from the corresponding drop-down list:
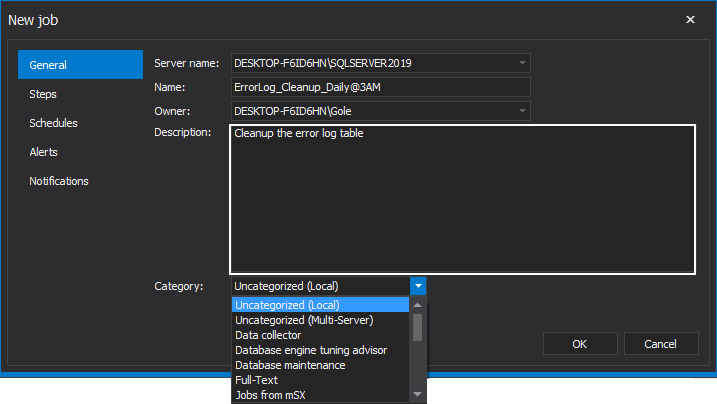
Optionally provide a meaningful description of its functionality and choose the category to which the job will be assigned to:
Once the desired settings under the General tab are set, it is time to move on to Steps tab where one or more steps for the new job need to be created.
A single click on the New button opens the New job step window:
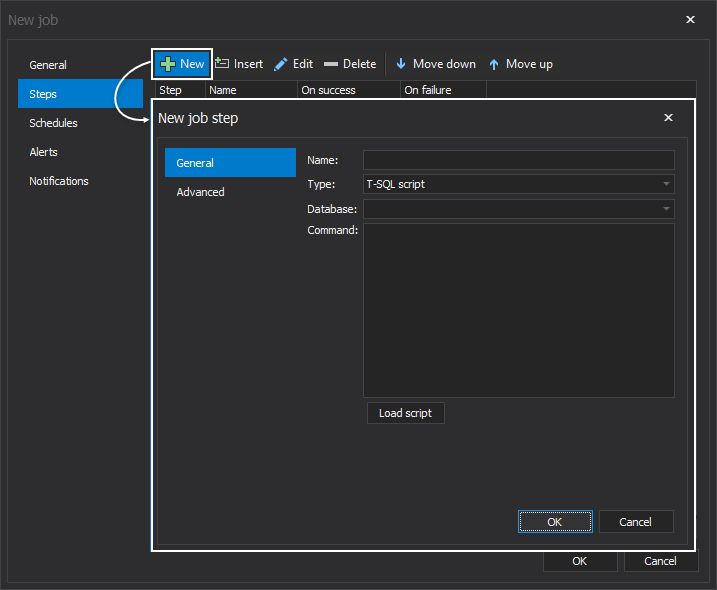
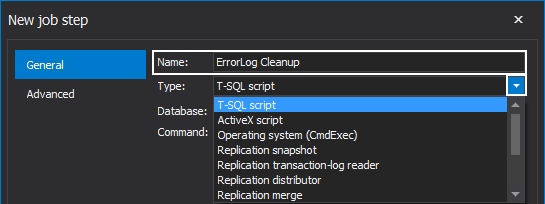
In the New job step window, specify an indicative name of the step, e.g. the one that closely describes its key functionality. Also, select a step type among the twelve different types of tasks offered in the drop-down list:
Choose the database to perform this job step against to and write the command directly in the Command box. Additionally, presented is the option to load a prepared script directly if that’s more convenient:

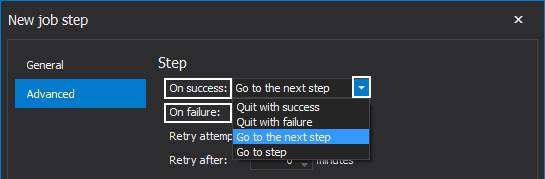
Once we specify what will be done in the created step, it’s time to jump to the Advanced tab and further tune job step settings.
Here, you can control the action that will be performed when the step is completed successfully or fails:
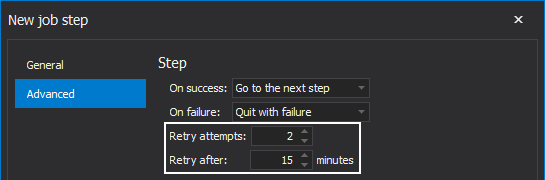
Choose to set the number of retries in the case of the step failure, and in the same case to retry the step execution after a specific time:
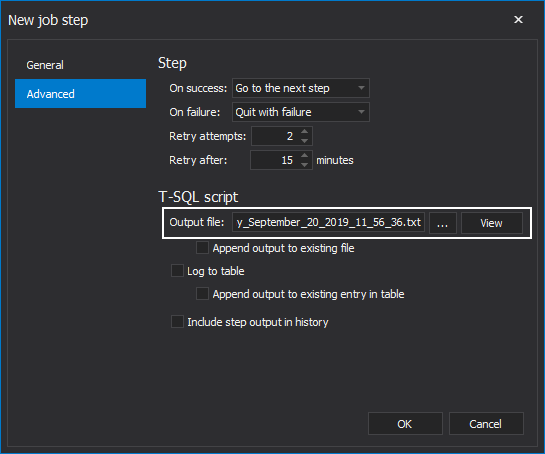
Additionally, choose to write the output of the step execution:
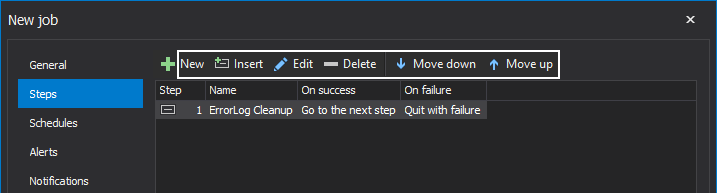
The step is created successfully as presented. To create more job steps, click on the New button again, and repeat the same steps.
Further, we could edit, delete or move up/down on the list the desired job step, should more job steps be created:
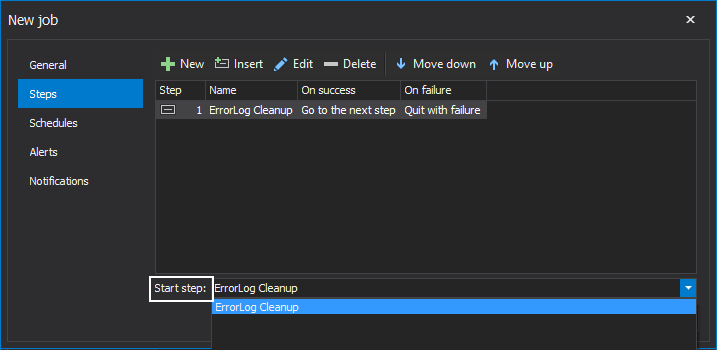
Additionally, if the aforementioned is the case, then there is an option to choose which step will start first during the job execution:
The next step here would be to set schedule time for the newly created job, e.g. to specify when and how frequent this job will be executed. To create a new schedule for a specific job, one should click on the Schedules tab on the left side of the New job wizard:
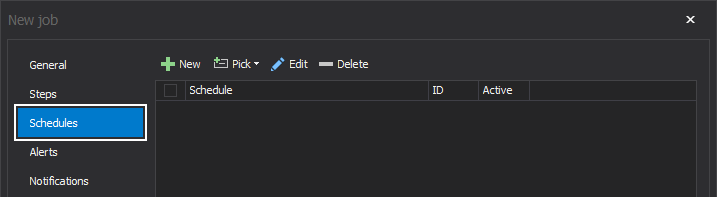
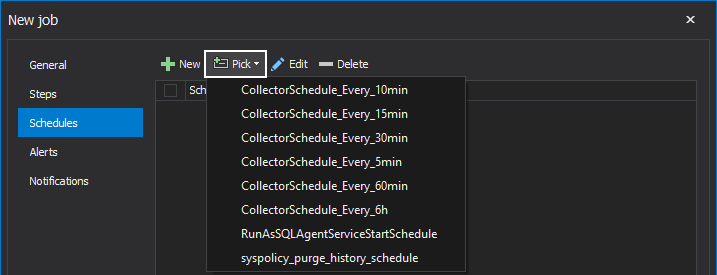
Here, the presented are a few options to choose from. We could create a new schedule or pick an already created one by clicking on the Pick drop-down button:
Let’s now go through the creation steps of the new schedule and doing so by initializing it with a single click on the New button. This single action opens the New job schedule window:

The New Job schedule window provides various options to specify when and how frequent the job will be executed with a clear summary of the selected options. After entering the desired name for the schedule, it’s worth mentioning that there are two types of schedules to choose from: Event and Time:
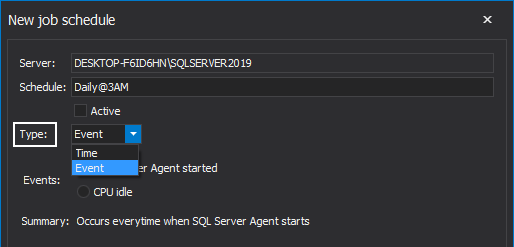
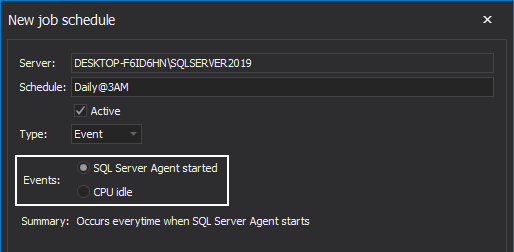
Should the default Event type be selected, it indicates that the job will be triggered to execute as a response to the specific event. Two types of event are specified here, the job will start directly when the SQL Server Agent starts or when the CPU is in idle state:
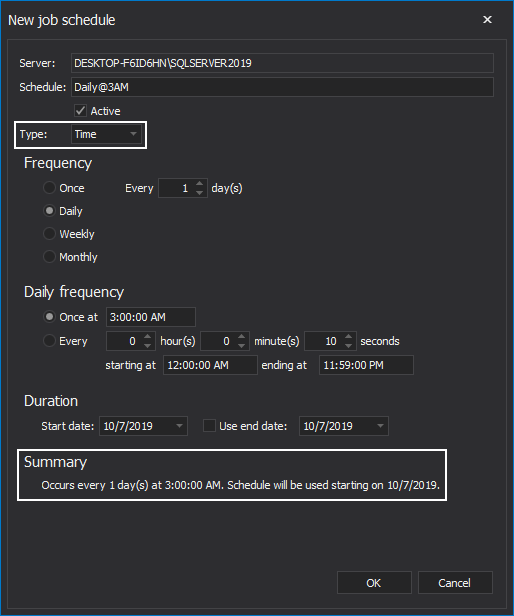
On the other side, if the Time event is selected, set the desired job frequency under the Frequency area. Choose the job to be executed: Once, Daily, Weekly or Monthly. Set daily frequency and job duration. Under the Summary section, the info about chosen schedule parameters is presented:
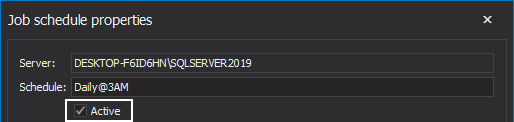
It’s worth mentioning that if either of the schedule types is selected, Active checkbox must be marked in order for that schedule to become active upon its creation:
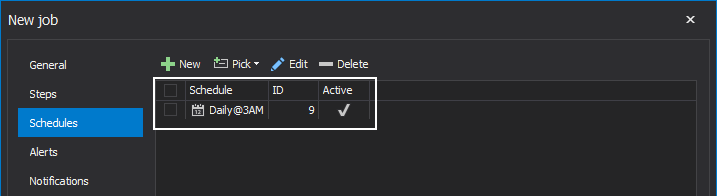
Once the new schedule for the job is created, it is shown under the schedules list as displayed. Here, it can be later edited or deleted by clicking on the Edit or Delete buttons respectively:
Once the job schedule is out of the way, the next focus of job creation procedure is the job alerts.
The mentioned settings can be accessed by a click on the Alerts tab in the New job wizard, as well as from the Alerts tab from the main application tab group but more on that later.
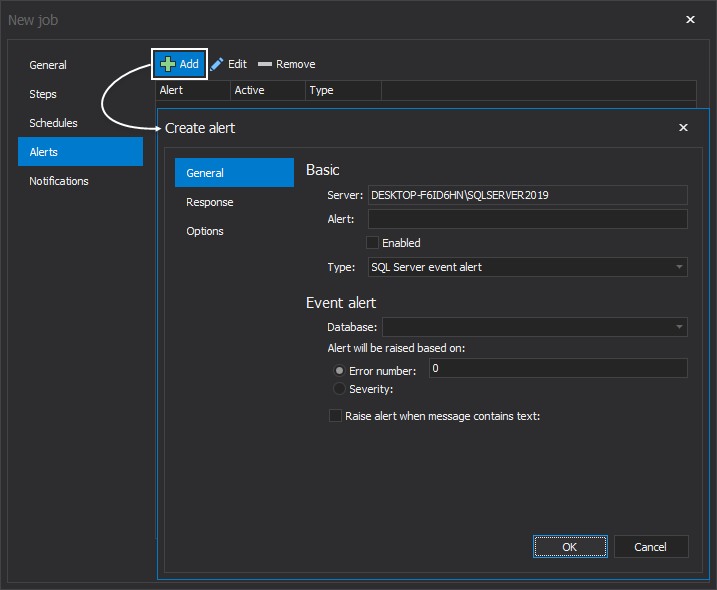
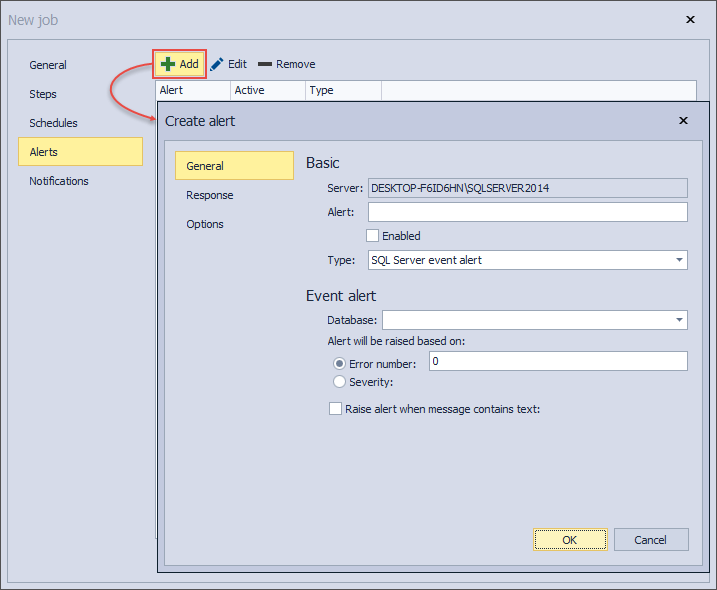
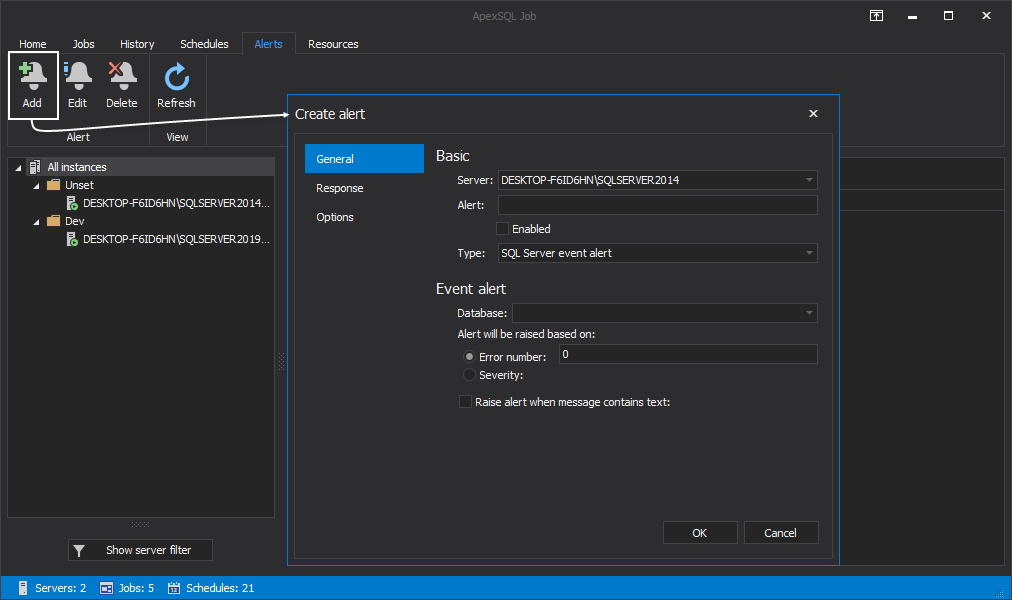
A click on the Add button summons the Create alert window:
Same window in blue theme:
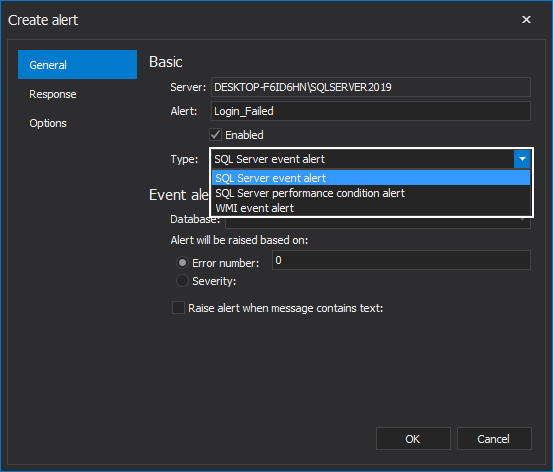
There are three types of alerts that can be created in the SQL Server Agents:
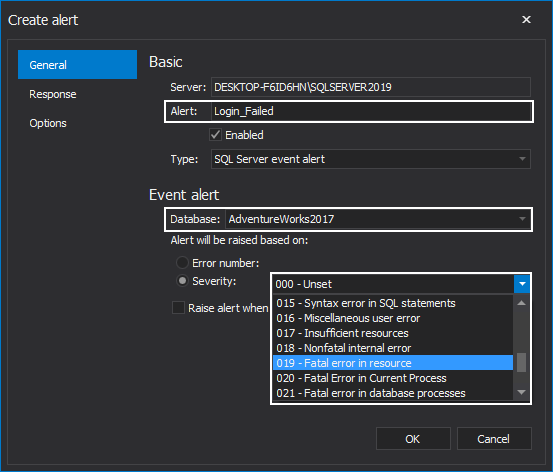
- SQL Server Event Alerts: This alert will be fired when an event with a specific error number or an error severity level occurs
- SQL Server Performance Event Alerts: This alert will be fired when a specific performance counter exceeds, equal to or falls below a predefined threshold value
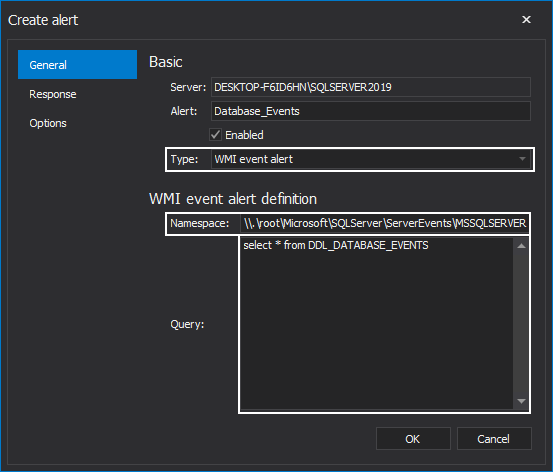
- WMI event alerts: This alert will be fired when a specific Windows Management Instrumentation (WMI) event occurs
ApexSQL Job allows the user to create all three mentioned SQL Server Agent Alerts types:
When SQL Server event alert is selected, you must specify the following settings: the alert name, the database to which the alert will apply and whether it should fire in response to a specific SQL Server error number or error severity level:
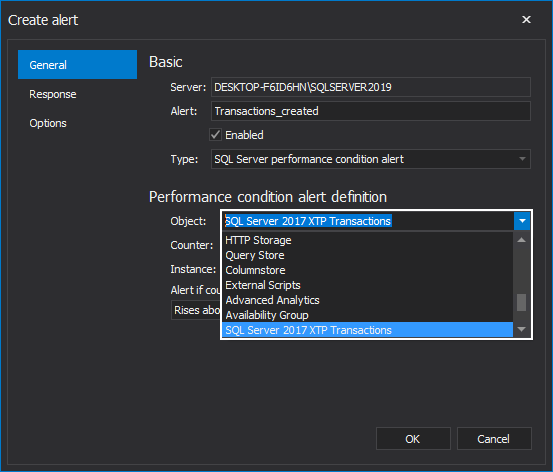
If SQL Server Performance Condition Alert is selected, the following settings must be defined:
Object as the area of performance to be monitored can be chosen from its drop-down list:
After specifying the performance area, select the performance counter from the counters list, that is planned to be monitored. In addition, specify the threshold, that number describes the selected counter for the alert and the behavior of the counter that fires the alert:
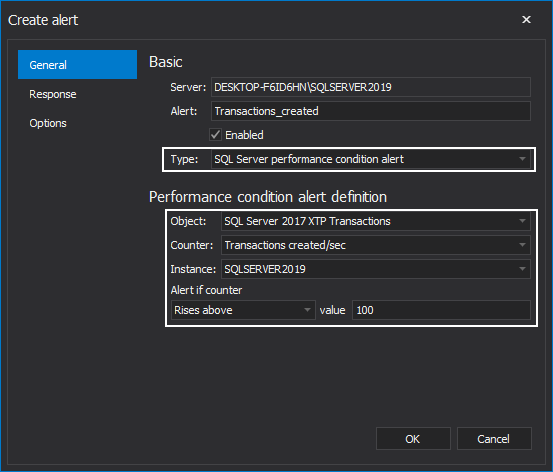
For instance, the alert can be fired if the current counter value Rises above, Becomes equal to or Falls below the defined counter threshold:

And lastly, should the WMI Event Alert ends up being selected, the following settings must be applied:
Alert name, WMI namespace where the SQL Server Agent will register itself as a WMI client and a query for the event:
After choosing the desired alert type for the job and applying its settings, the following thing left do be done is specifying what action should be performed as a response for the occurred event.
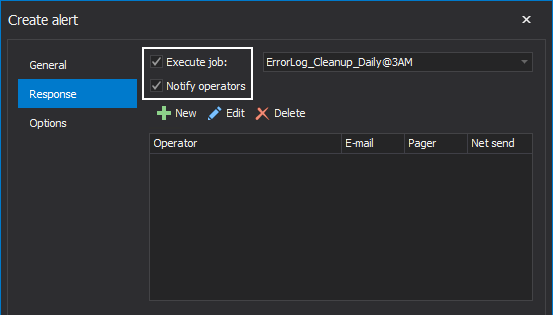
In the Create Alert window, click on the Response tab on the left, to configure the response type.
From here, we can see that there are two types of responses for the event occurrence:
- Execute job: Select which SQL Server Agent job will be executed in response to the event occurrence
- Notify operators: Provide a predefined operator or create a new operator to notify when the alert event occurred
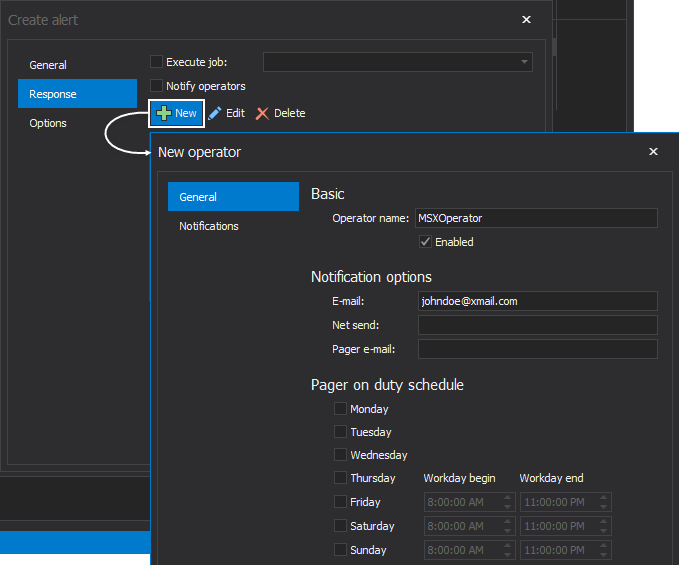
To create a new operator, click on the New button.
In the New operator window, provide operator name, notification option and optionally Pager on duty schedule if the Pager e-mail notification option is selected:
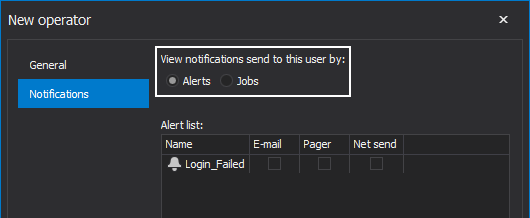
Under the Notifications tab choose to view notifications sent to the user by alerts or by jobs:
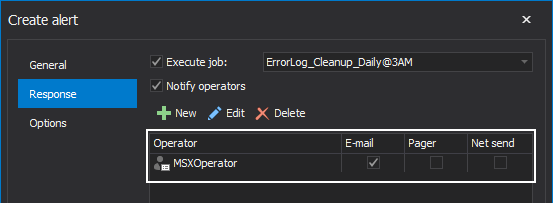
Once the New operator is created, it can be seen under the Operator list:
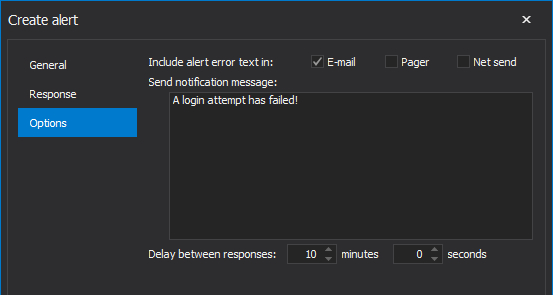
In the Options page of the Create Alert window, you can optionally specify what will be included in the notification message, and how much time the two consequent responses will be delayed, as shown below:
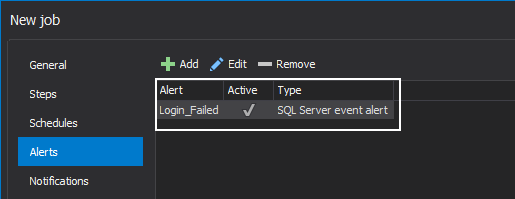
Once created, the alert can be configured, monitored or removed from the alerts list:
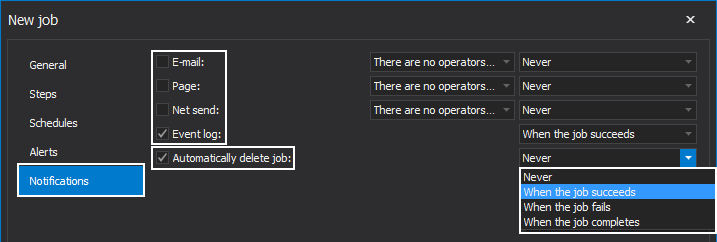
And lastly, under the Notification tab of the New job wizard, we can specify notifications we’d like to receive for the job results. Choose to be notified when the job succeeds, fails or completes. We can elect to be notified by a specific operator, via e-mail, page or net send, or we can elect to simply have a record written in the event logs.
There is even an option to automatically delete the job upon its completion:
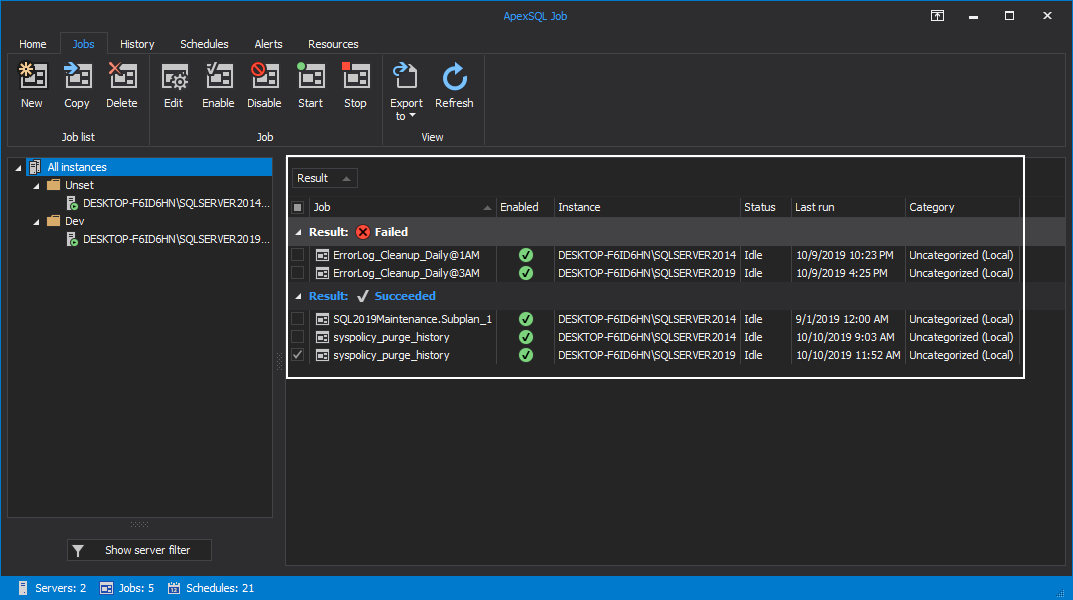
When the job is successfully created, it is displayed in the main grid. Grid columns present the job details, including result and time of its last execution, job name, SQL instance it belongs to, its status and category.
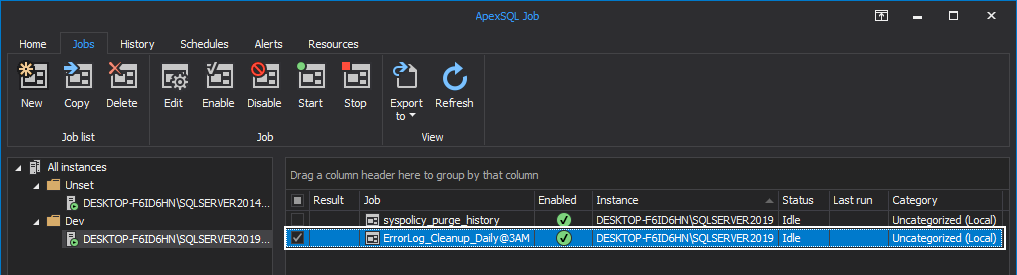
From this grid, you can delete, enable, disable start or stop the currently running job by clicking the appropriate button:

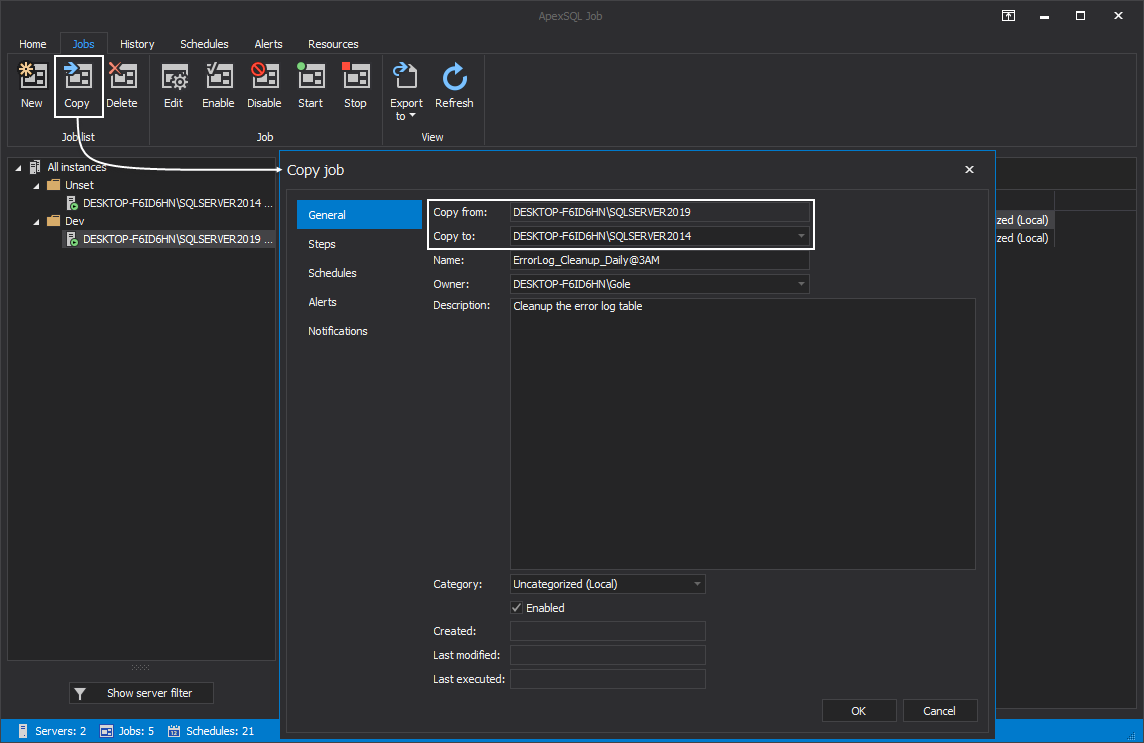
To copy job from one SQL Server instance to the other, select it from the grid and click on the Copy button from the Job list category.
This action summons the Copy job wizard where under the General tab user needs to specify a SQL Server instance to copy the job to along with its configuration settings. Additionally, new job steps, schedules, and alerts can be added to previously created one in the already described manner:
Job data can be filtered by any SQL Server instance and then grouped by the grid columns. Select a SQL Server instance from the server panel on the left to see only its jobs or click on All instances to include all the jobs of all the SQL Server instances. Once that selection has been made, choose the desired grid column to group the data by:
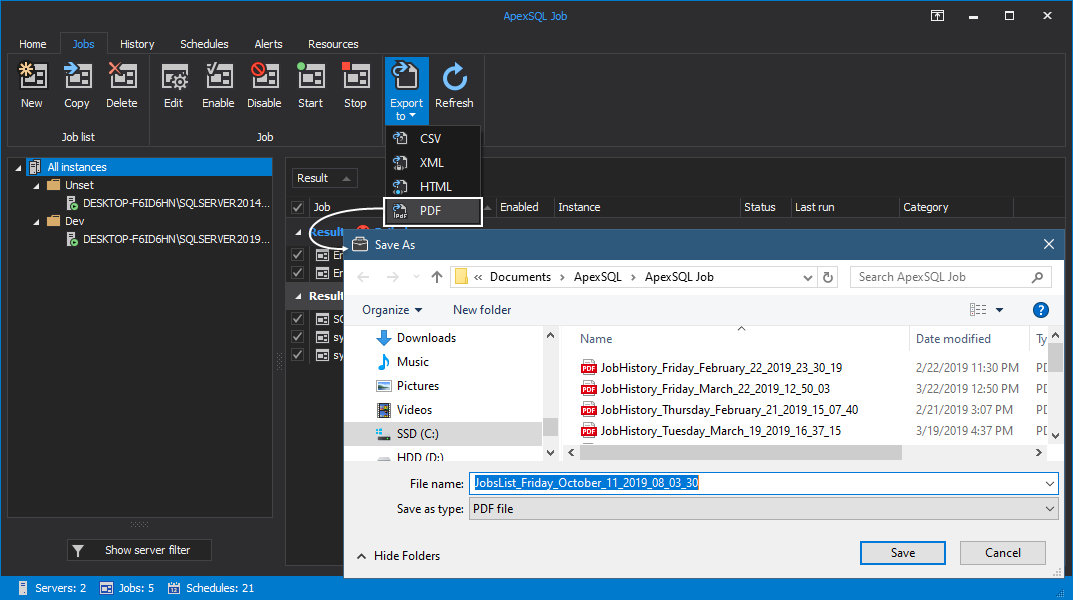
All this data can be exported to CSV, XML, HTML or PDF file formats. To export reports to PDF format, make any selection of jobs from the grid, click on the Export to button and select PDF:
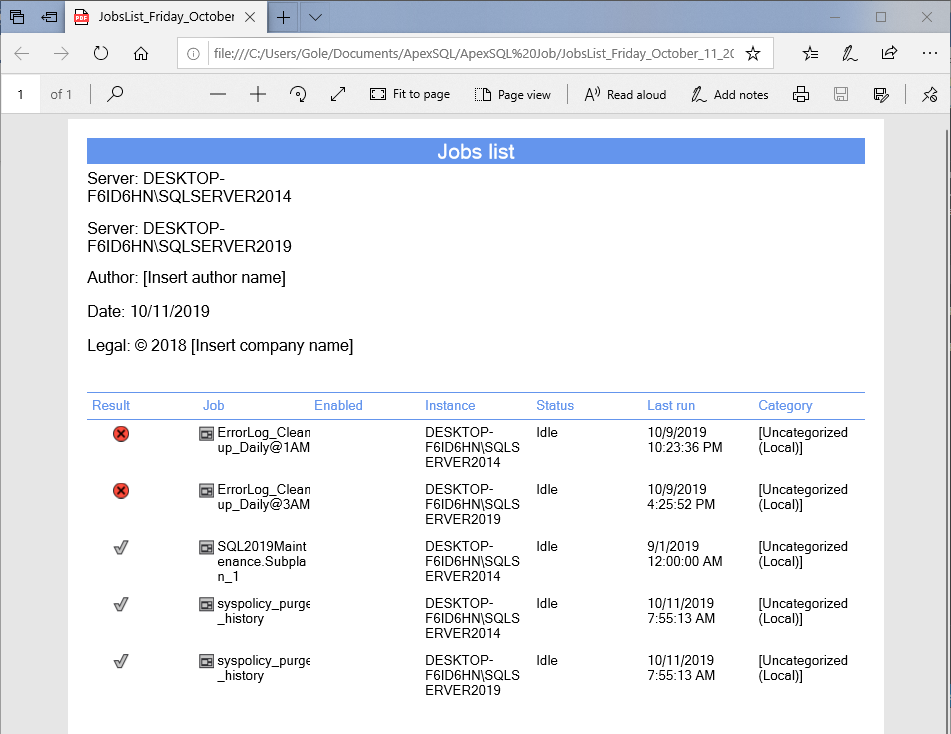
Immediately upon saving the file, you will be asked to open it. The result will look like this:
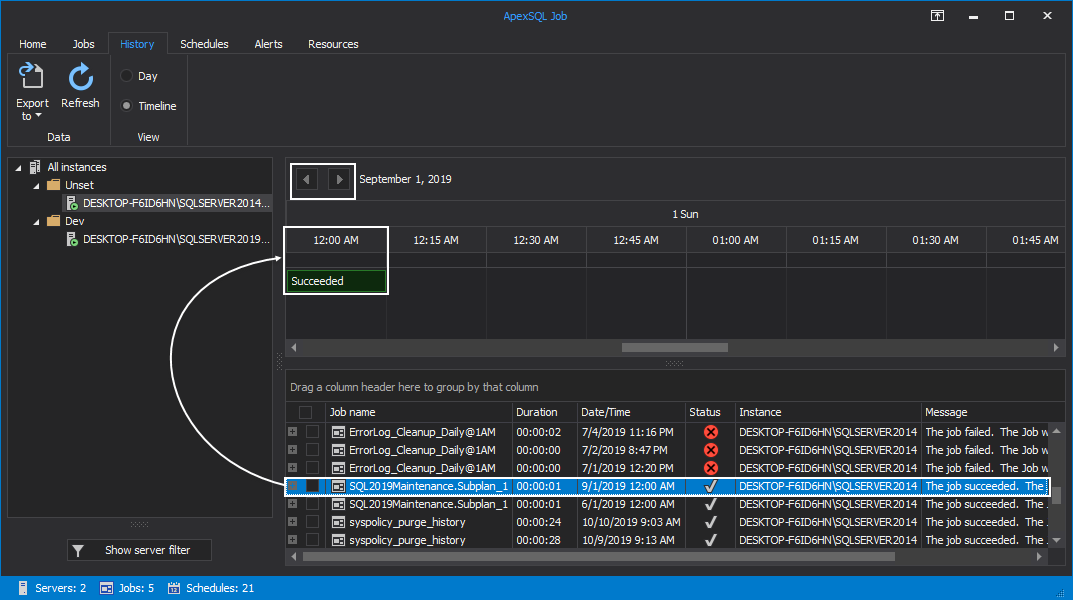
History tab
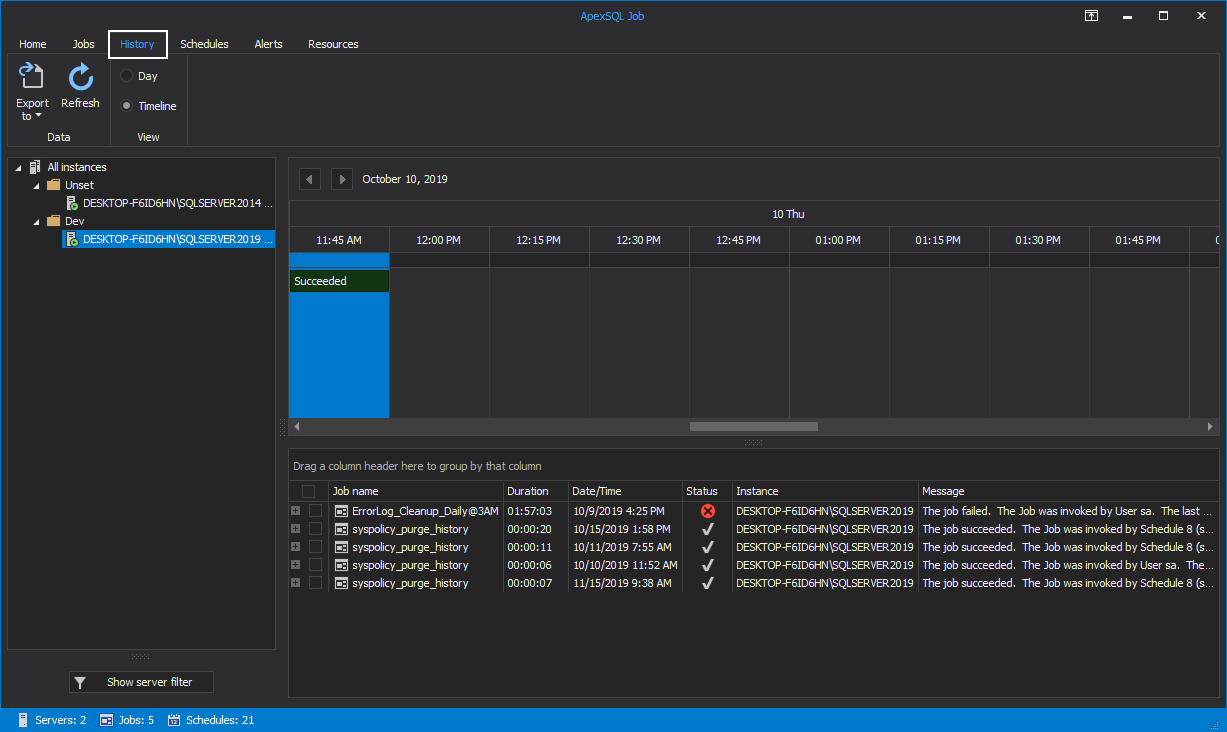
History tab in blue theme:
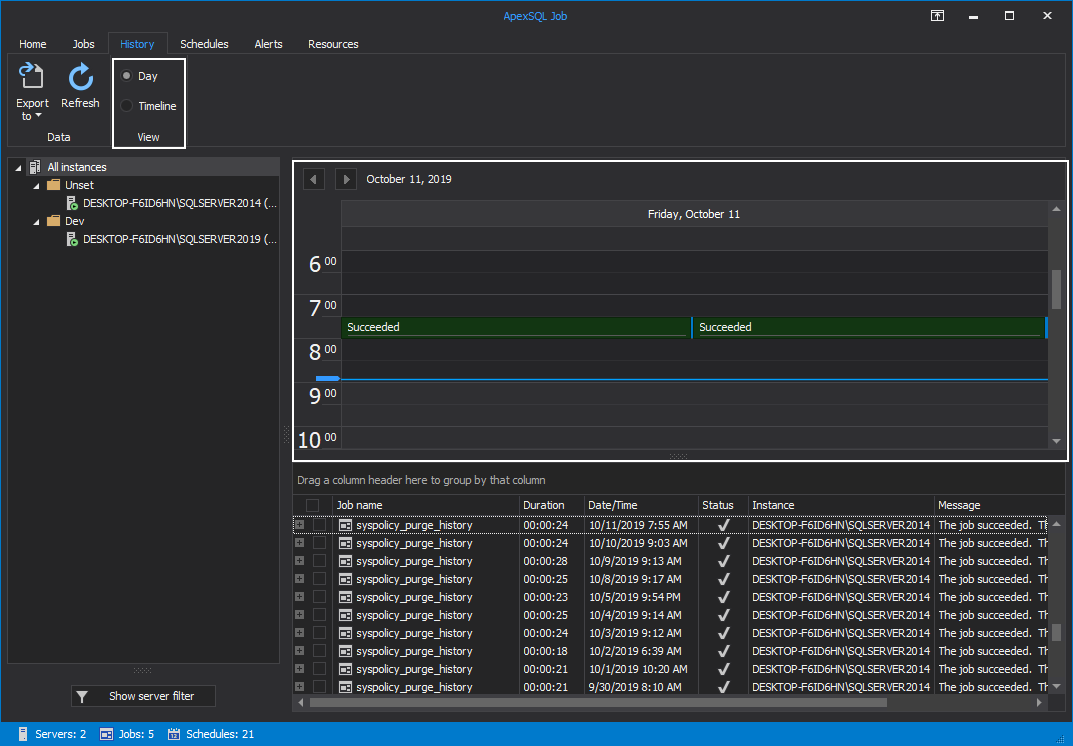
Under the History tab, you can view a detailed execution history of the scheduled SQL Agent jobs for all the SQL Server instances.
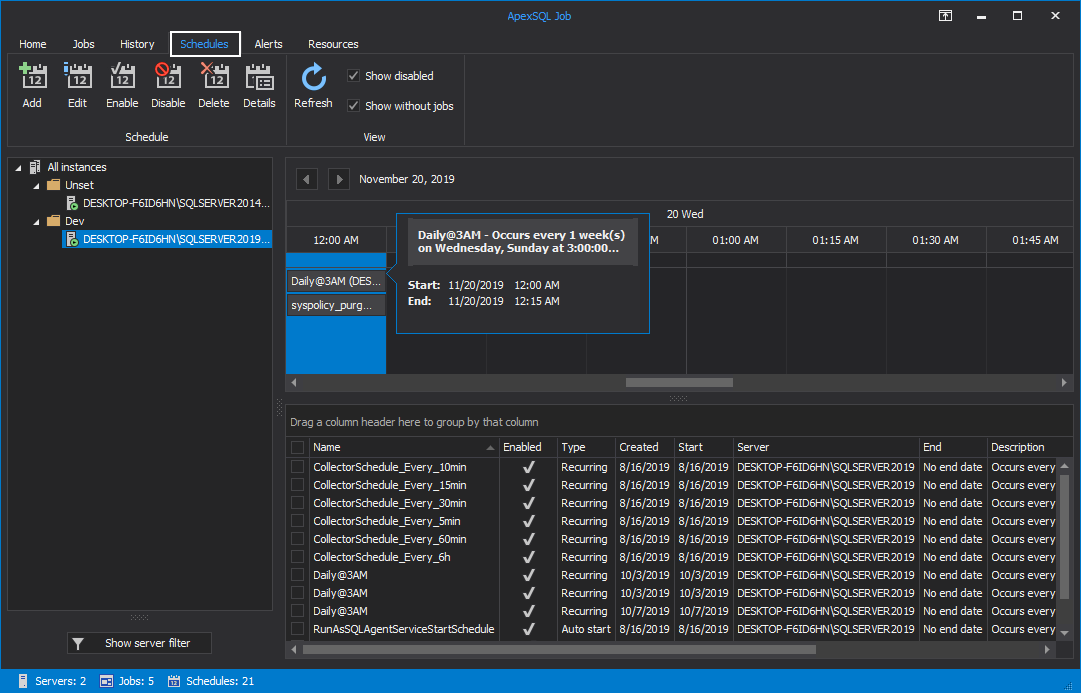
The results summary of the scheduled SQL Agent jobs is displayed in horizontal time intervals for the day, with the ability to move between days by using the top arrows:
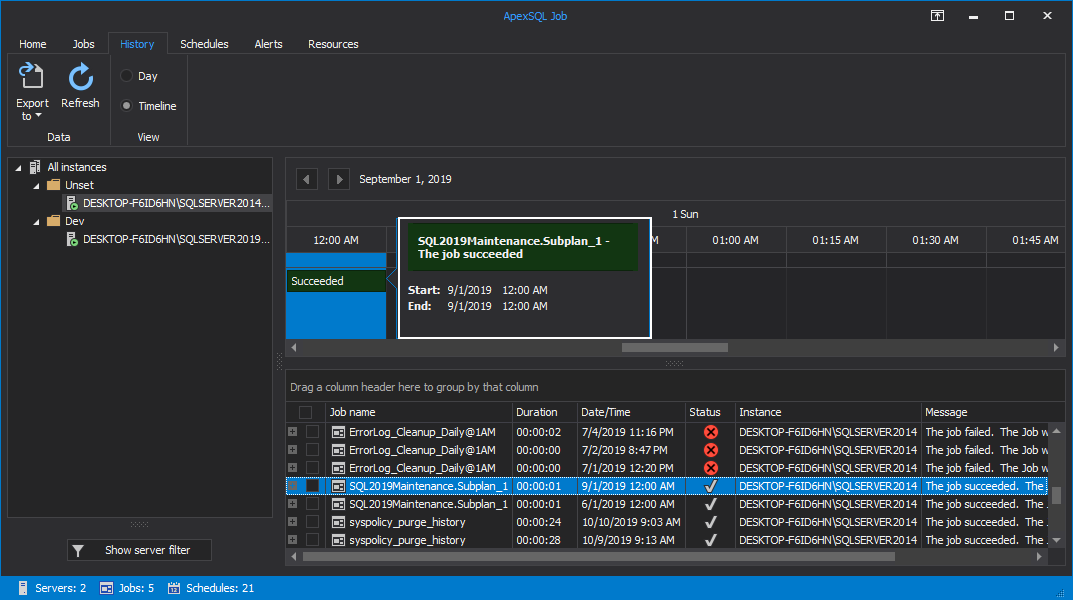
You can hover the mouse over the timeline to get the start and end time of any job from the grid:
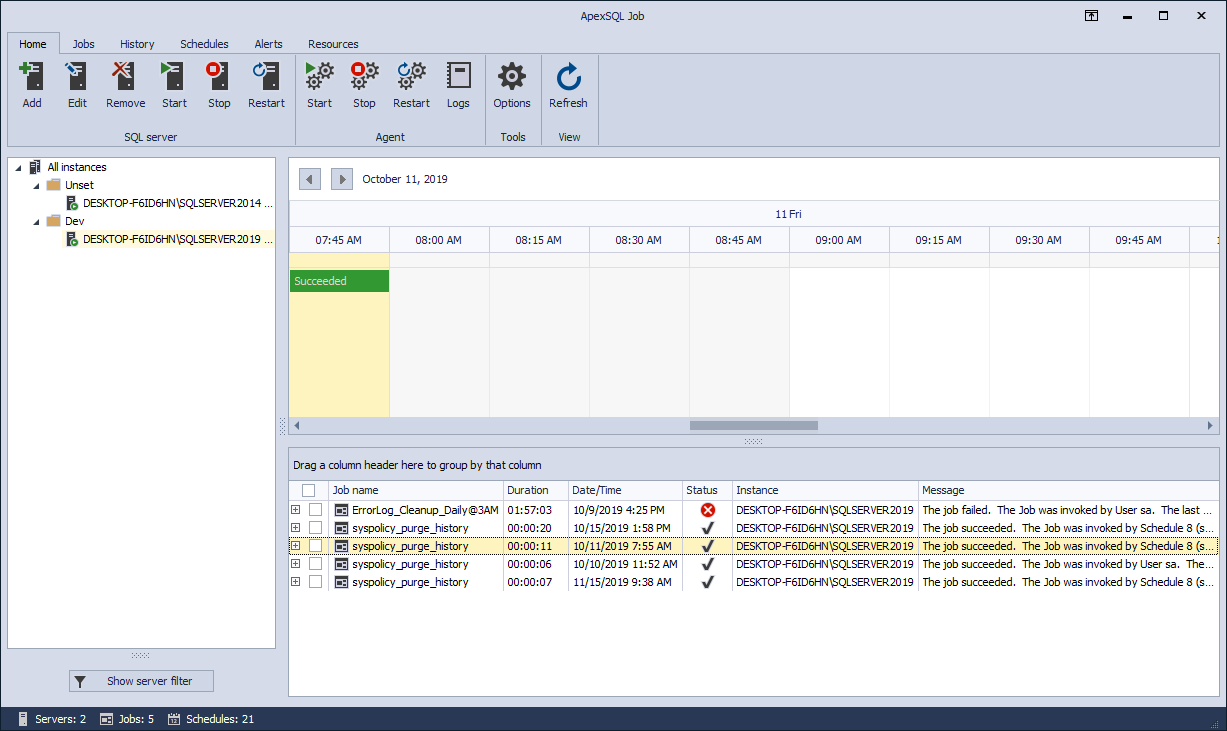
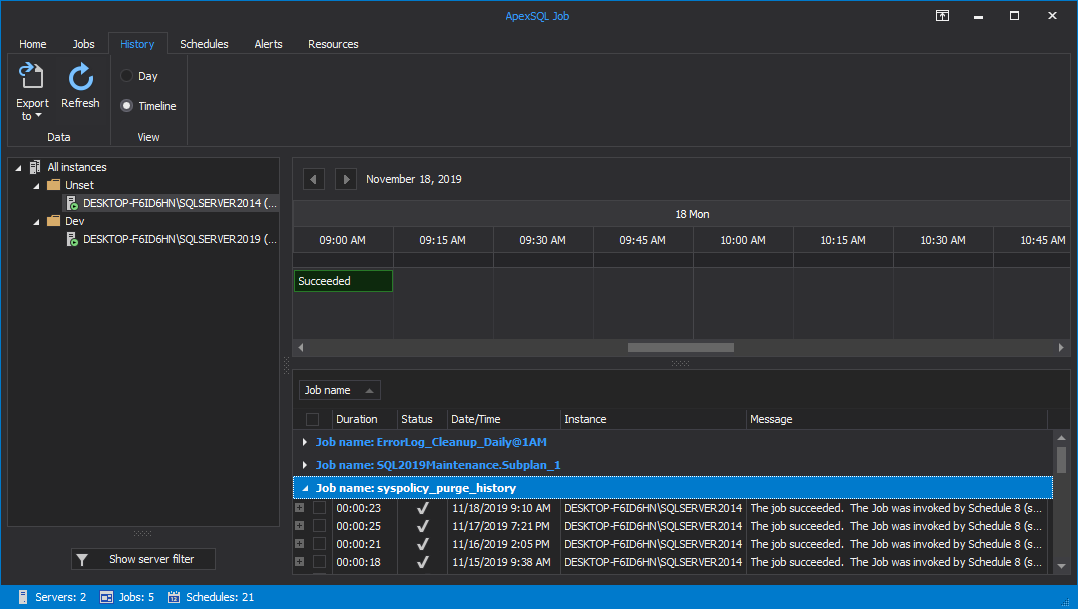
Changing the View from Timeline to Day changes the summary view of the scheduled SQL Agent jobs to vertical time intervals for the day:
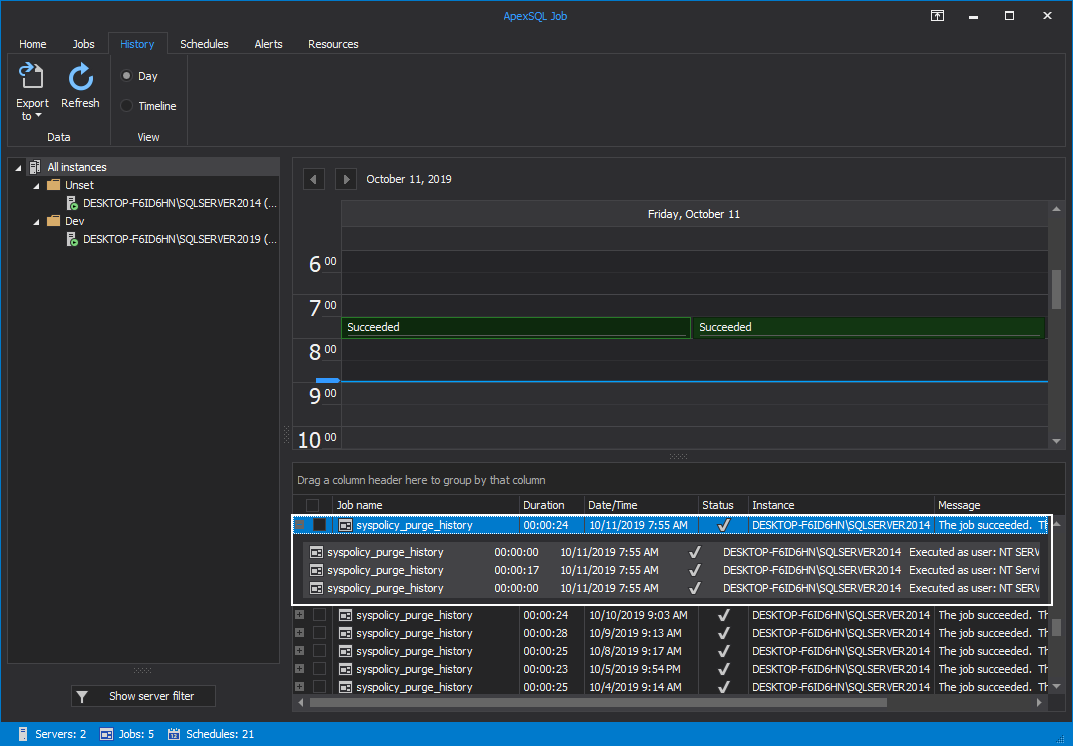
In addition to the detailed information about the job execution, ApexSQL Job provides you with the ability to display the execution result for all the steps executed within the selected job:
For a more convenient job execution results overview, you can group the data by the Date/Time grid column. To do so, drag and drop the Date/Time column into the group area:
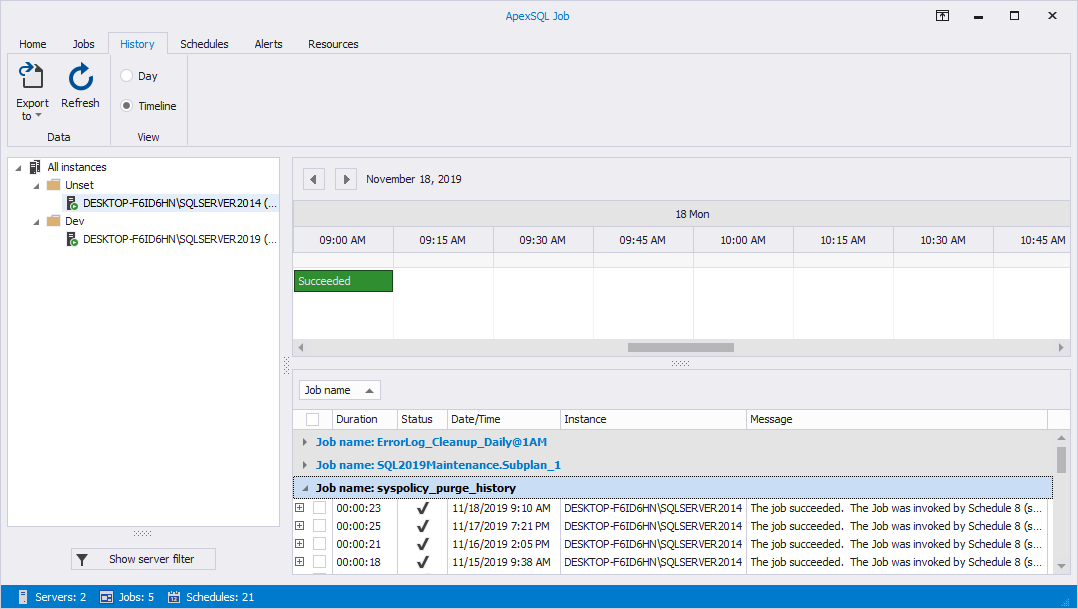
For those who prefer the light theme:
To export jobs execution results, after its selection from the grid, click on the Export to button and choose preferred the file format:

Schedules tab
Here, the user can manage job execution schedules.
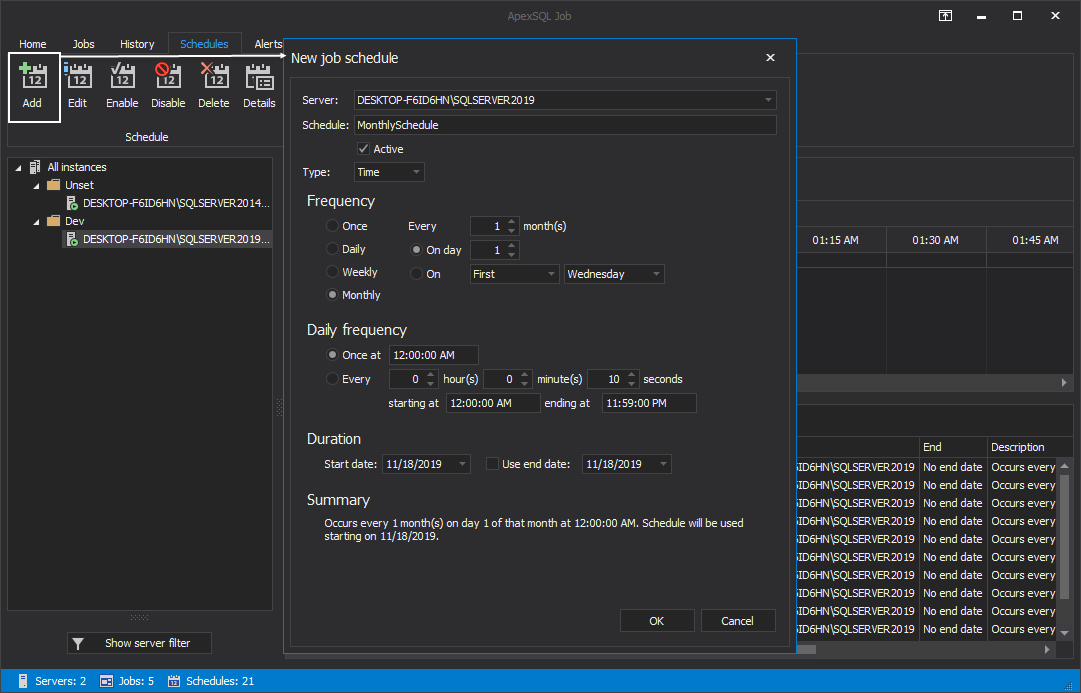
To add a new job schedule, click on the Add button under the Schedule category. This will open the New job schedule window and its configuration settings we previously covered within the New Job wizard:
Job schedules from the grid can be further edited, enabled, disabled or deleted with a single click on the matching button:

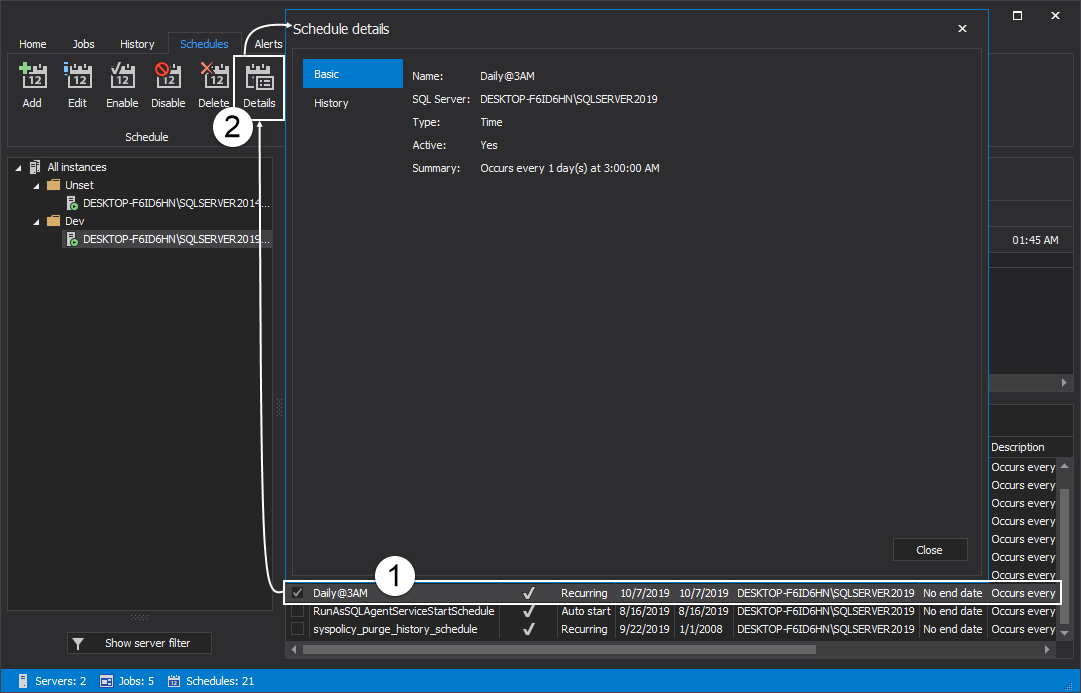
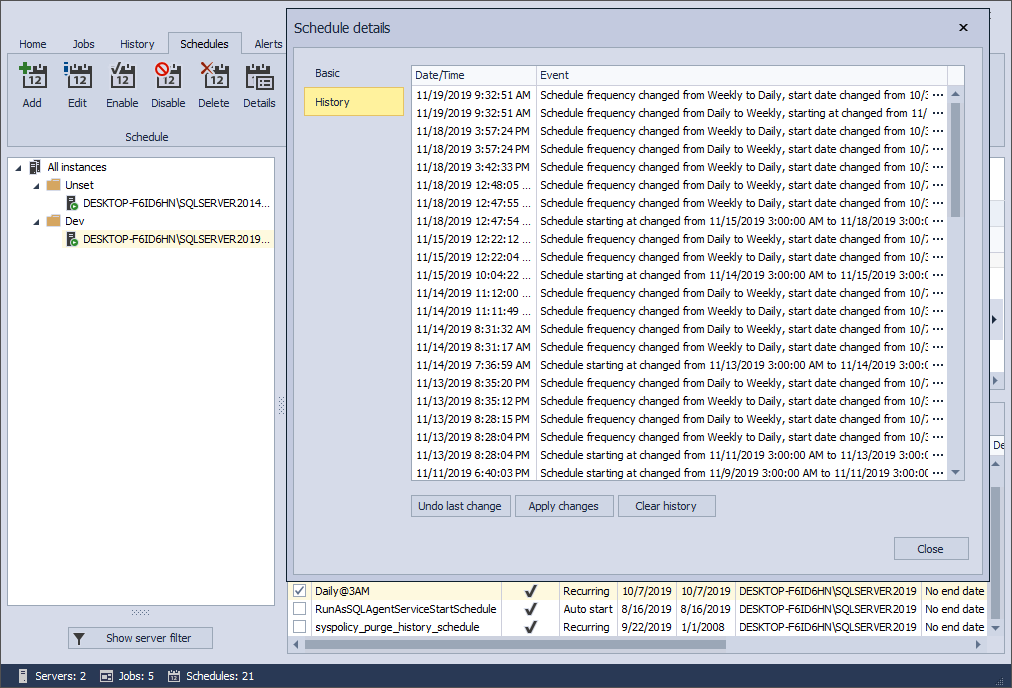
Select a job schedule from the grid and click on the Details button to view its basic and history details:
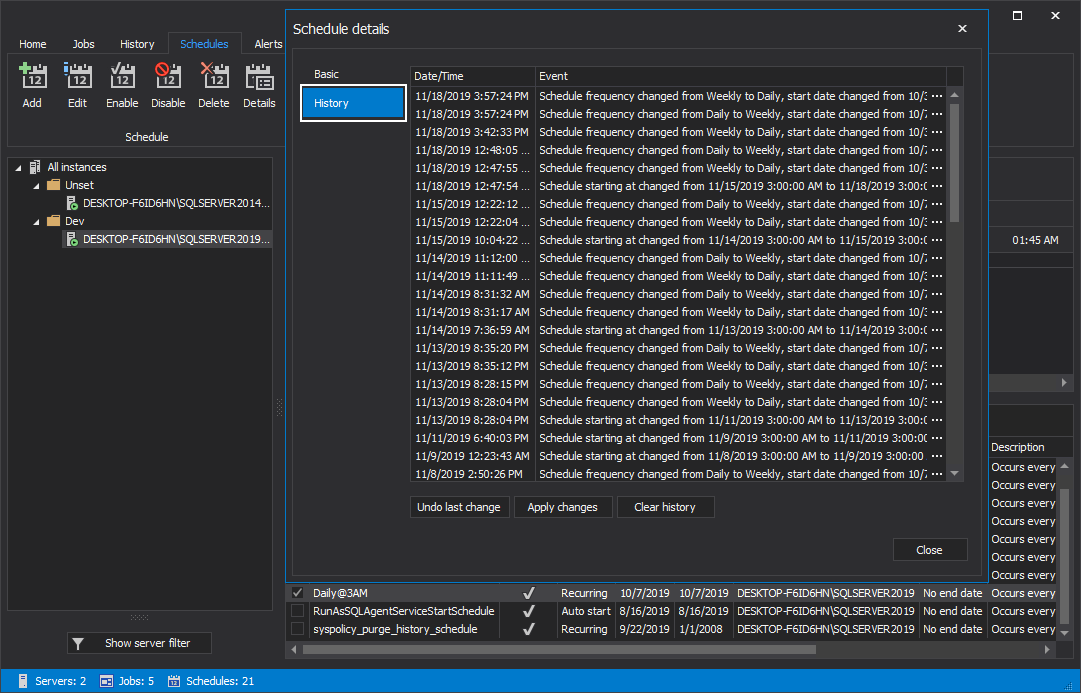
To view history for the selected job schedule from the grid, click on the History tab on the left side of the Schedule details window:
Same form in blue theme:
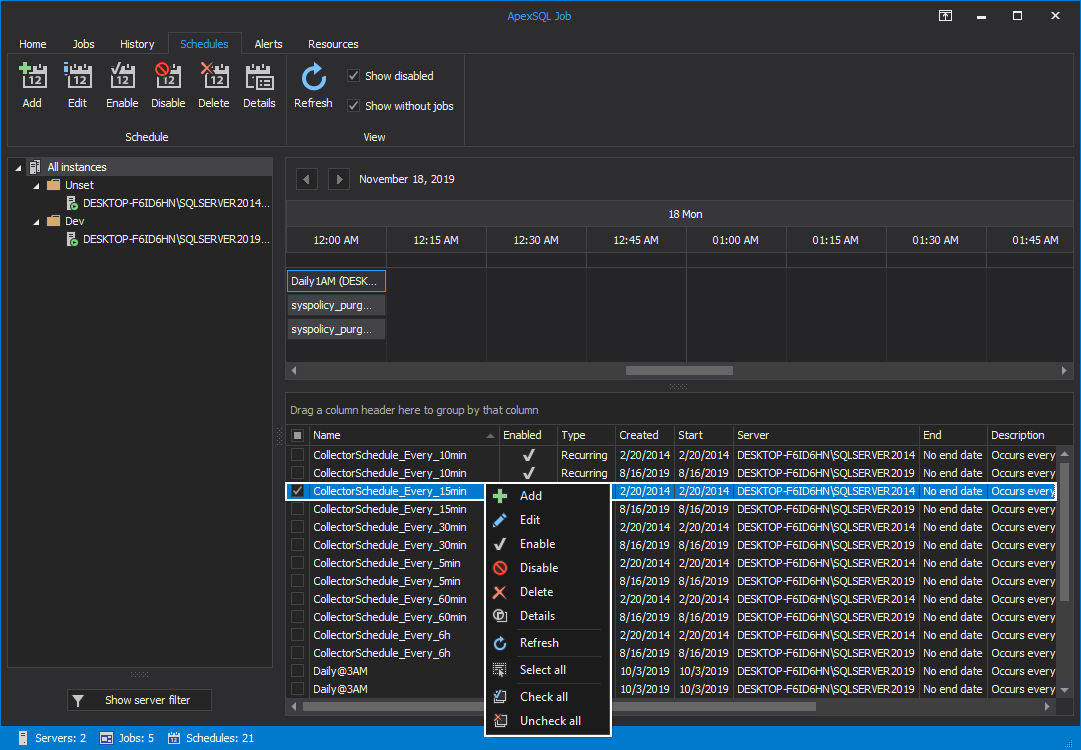
The View category controls the schedules view to show or exclude the disabled schedules or the schedules that are not linked with an agent job, as shown below:

All the existing options we mentioned under the Schedules tab can be easily found with a single right-click over the selected job schedule:
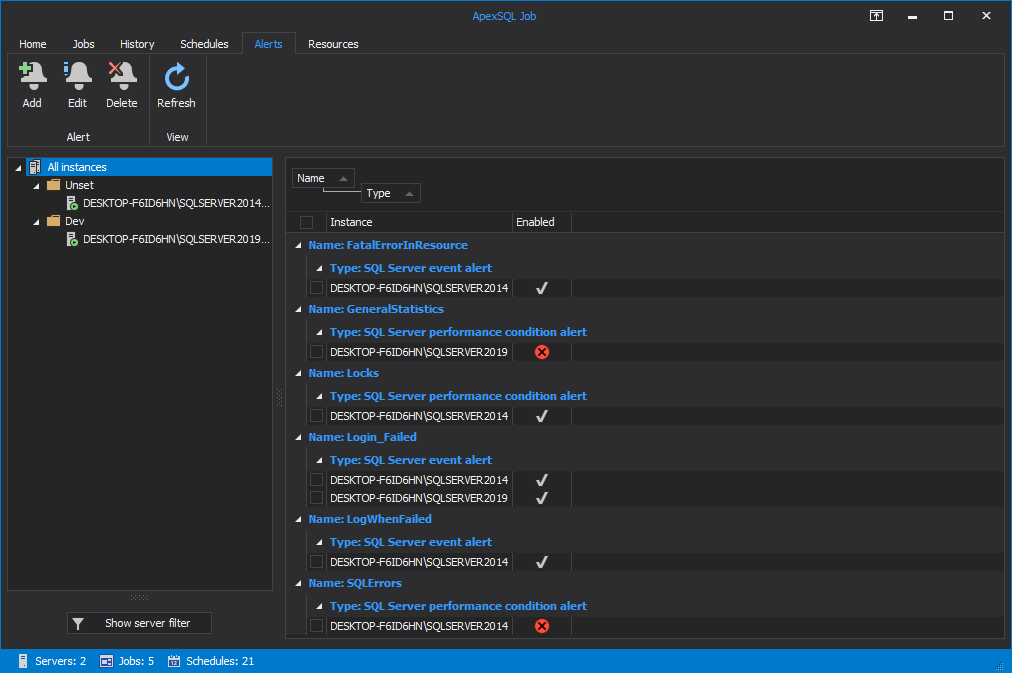
Alerts tab
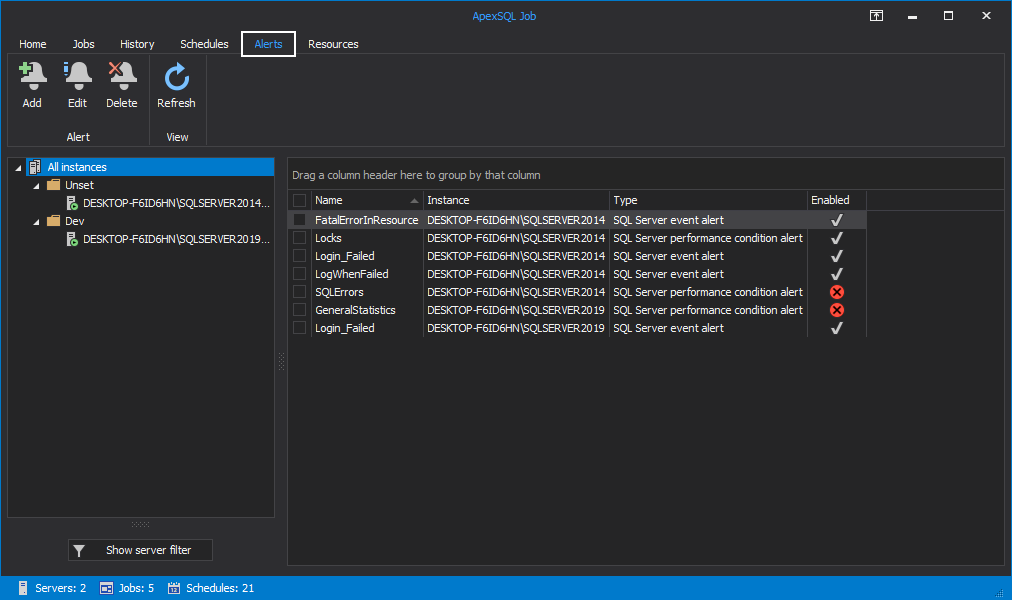
Under the Alerts tab, the user can manage SQL Server Agent job alerts for all SQL Server instances he previously connected to.
To create a new alert and assign it to a SQL Server instance click on the Add button:
Alerts from the grid can be further edited or deleted:

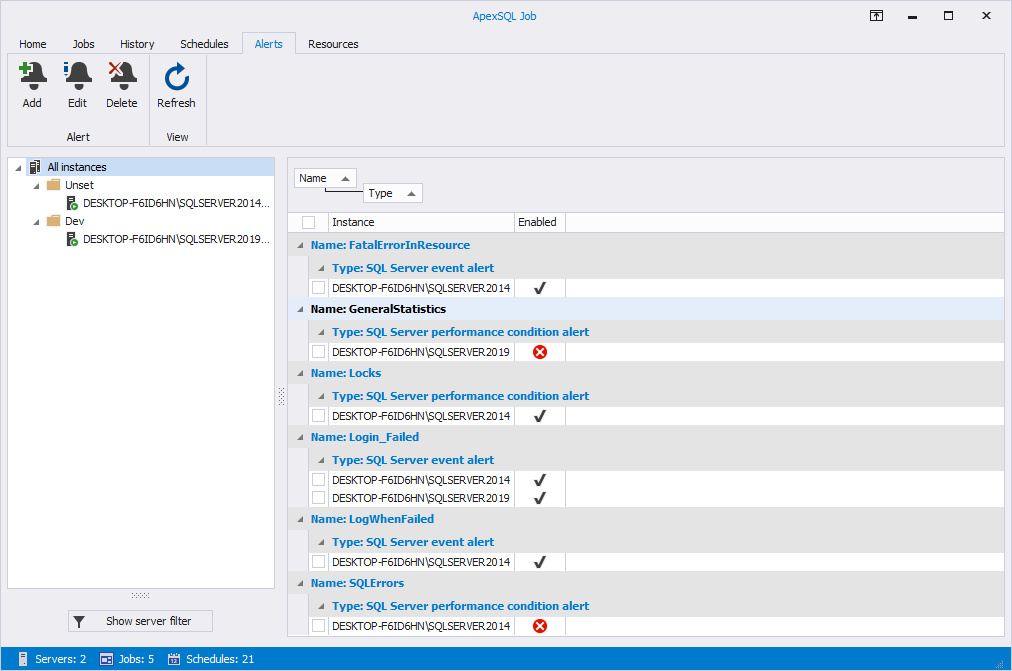
To group alerts by Name and Type columns drag them into the Drag a column header area:
Light-themed grid presentation may be more appealing to some:
November 27, 2019


