


In the new version of ApexSQL Backup, 2016 R2 we added lots of new features and improvements
Microsoft SQL Server 2016 support
ApexSQL Backup 2016 R2 is now fully compatible with Microsoft SQL Server 2016. All ApexSQL Backup features support SQL Server 2016. Any SQL Server 2016 instance can be used to store ApexSQL Backup central repository database.
Improved wizards
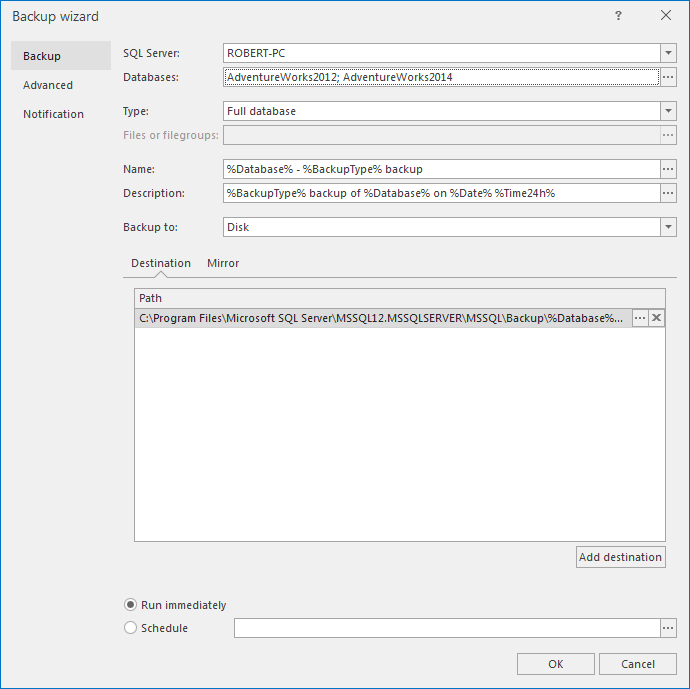
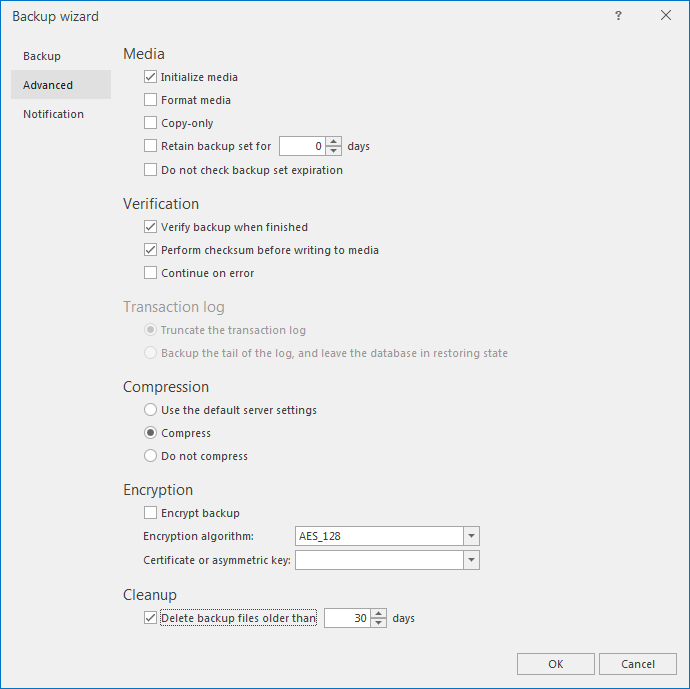
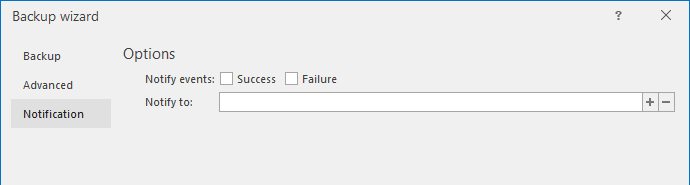
Wizards for all jobs have been optimized to enable easier and faster job configuration. There is no need to go back and forward through the numerous wizard steps. All options necessary for the job are available on a single form.
-
Basic settings for the job such as: affected databases, job type, naming options, file paths and schedules are configured in the main tab.
-
Additional settings like: media settings, verification, encryption and compression are optionally configured in Advanced tab.
-
If needed, configure the Email notifications for the job in Notification tab.
Application themes
The color theme can be easily changed in Configuration tab.

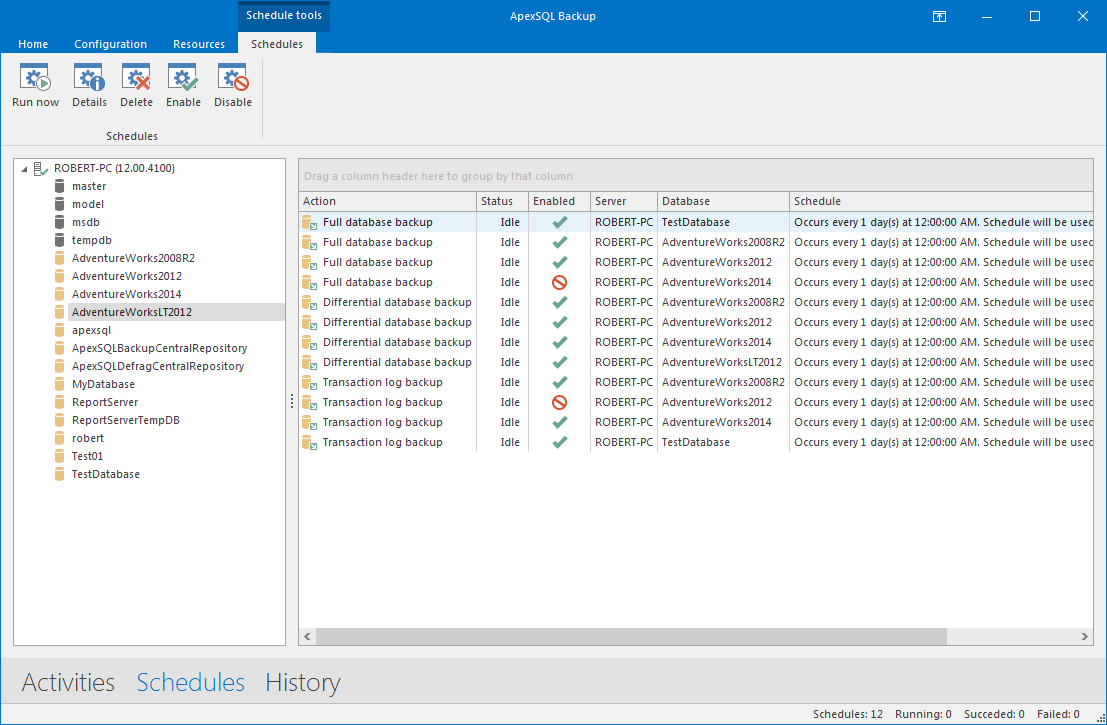
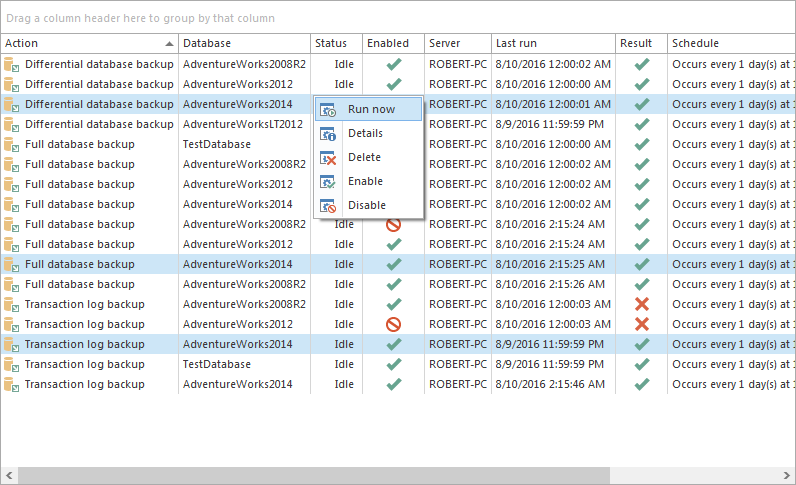
More complex filters and grouping are now supported by Activities, Schedules and History grids
Results in Activities, Schedules and History grids can now be sorted or grouped by any column of the grid. This is especially useful when manipulating large number of entries in the grids.
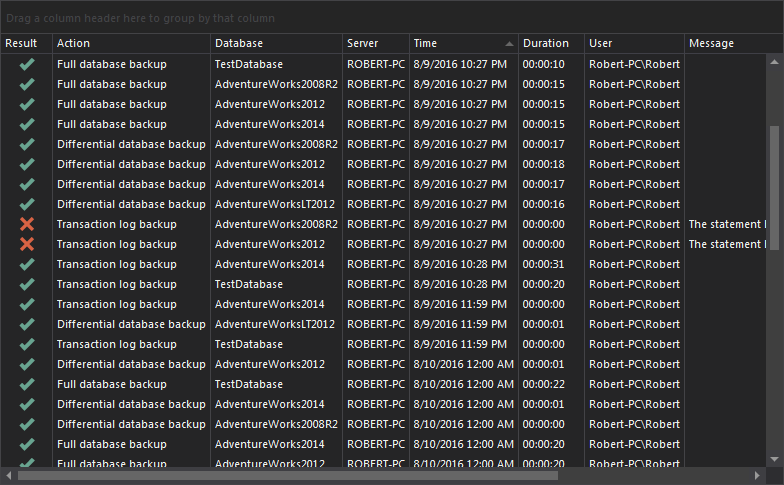
To group items by the column, simply drag that column to an area above the grid. In this case, results are grouped by the Database column.

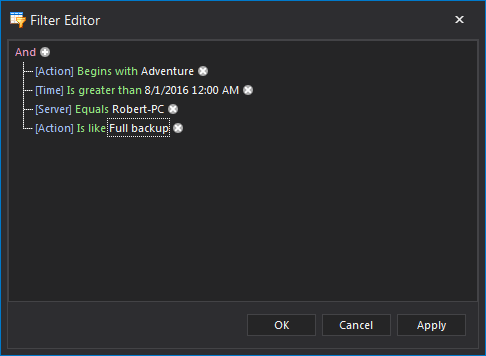
To further narrow the results, use the Filter editor, or Auto filter for any column of the grid. The filters can be enabled or disabled from the context menu.
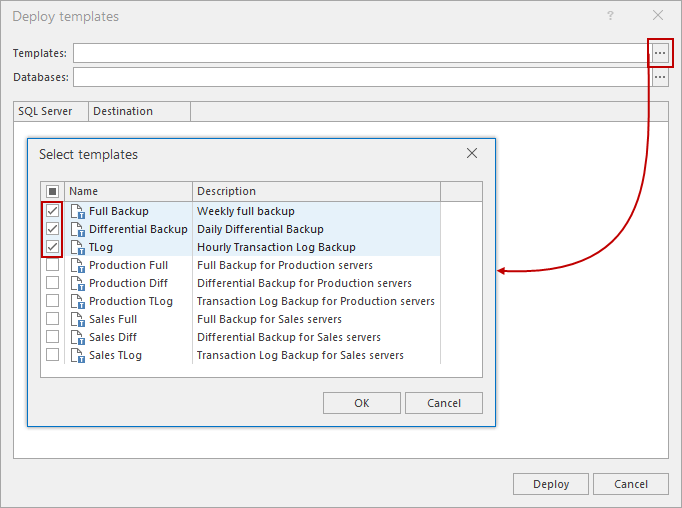
Single deployment of multiple backup templates
There is no need to create and execute one job at the time. Instead, create several backup templates with most common options, and deploy them on preferred databases. This way, multiple pre-defined backup jobs can be deployed on a single database or on the multiple databases.
-
Click on Deploy button from Backup templates group in the Home tab

-
In the Templates box, click on Browse button to open the list of all available templates. Mark the checkboxes in front of the templates that need to be deployed, and click OK when done.
-
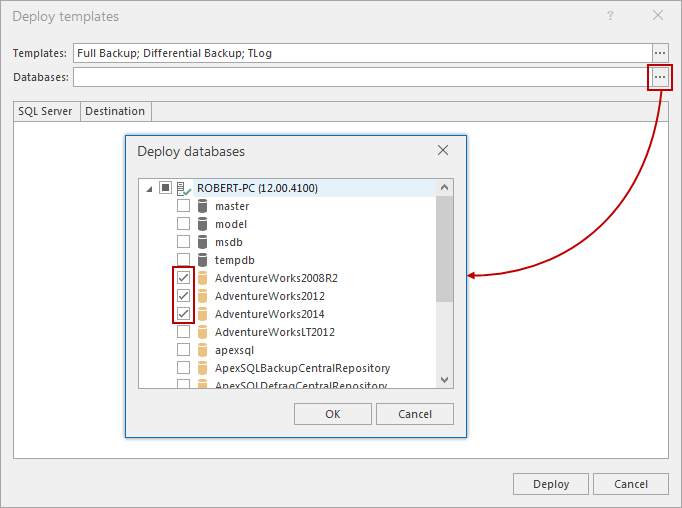
Click on the Browse button in Databases box. Select the databases for the job defined in the template.
-
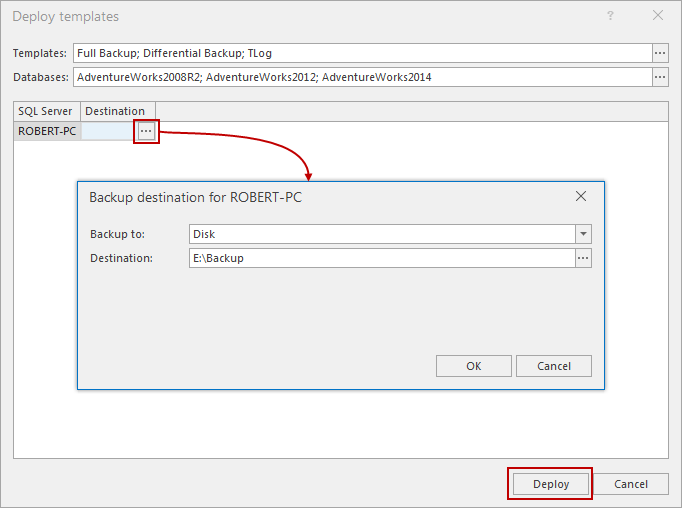
Click on the Browse in Destination column, set the backup destination and click on Deploy.
-
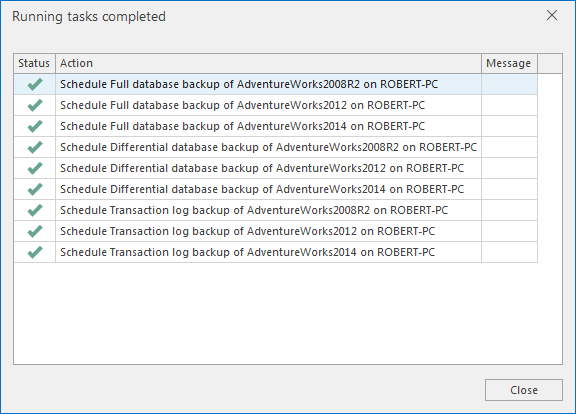
All selected templates are now applied to the specified databases.
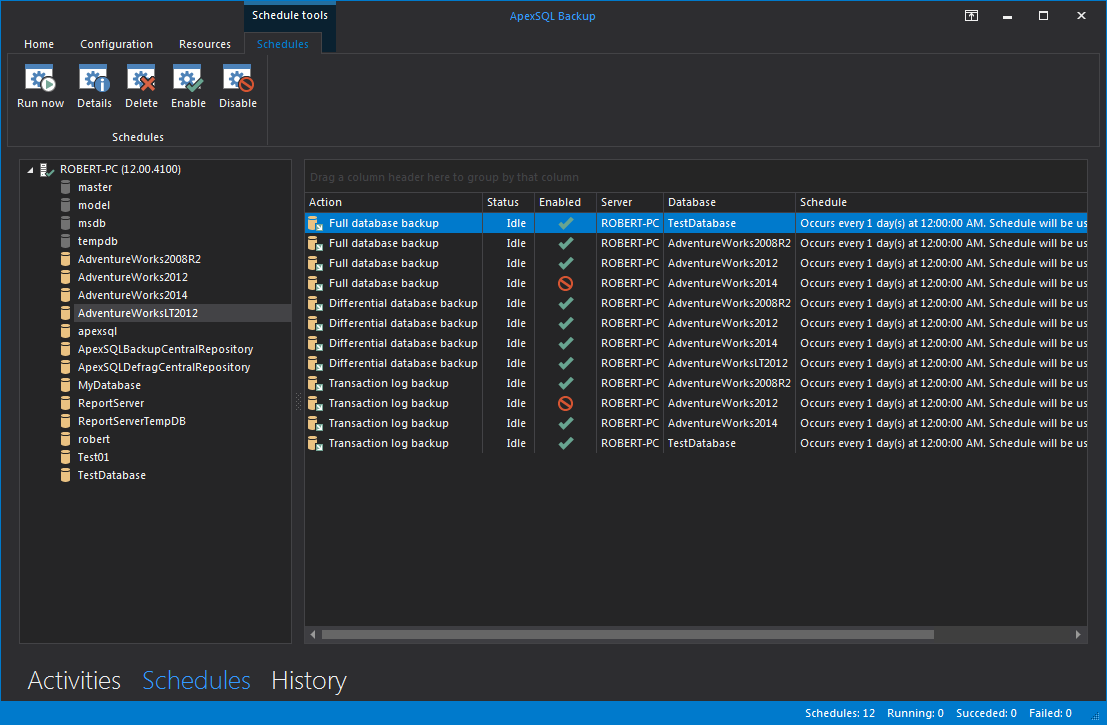
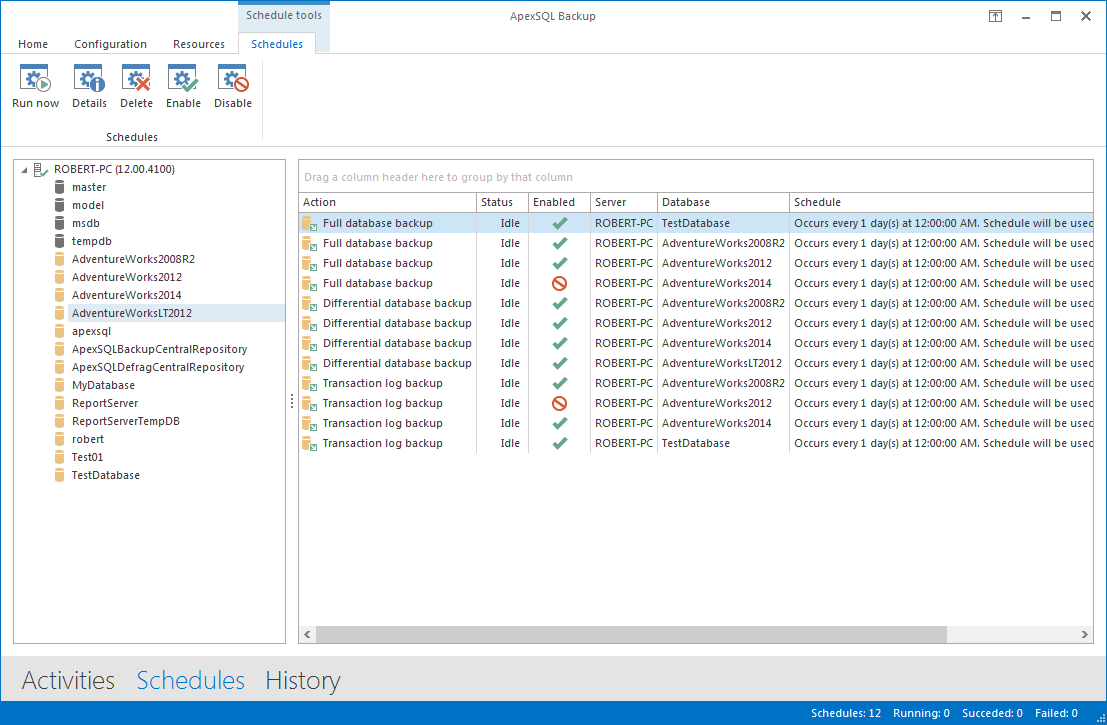
Multiple schedule management
All created schedules are now listed in the Schedules view. It is now possible to perform multiple actions on these schedules. The scheduled job can be executed right away by selecting it, and clicking on the Run now button in the context menu. Multiple schedules may be selected by holding down the Ctrl button while clicking on the schedules. In the same way, multiple schedules can be enabled, disabled or deleted.
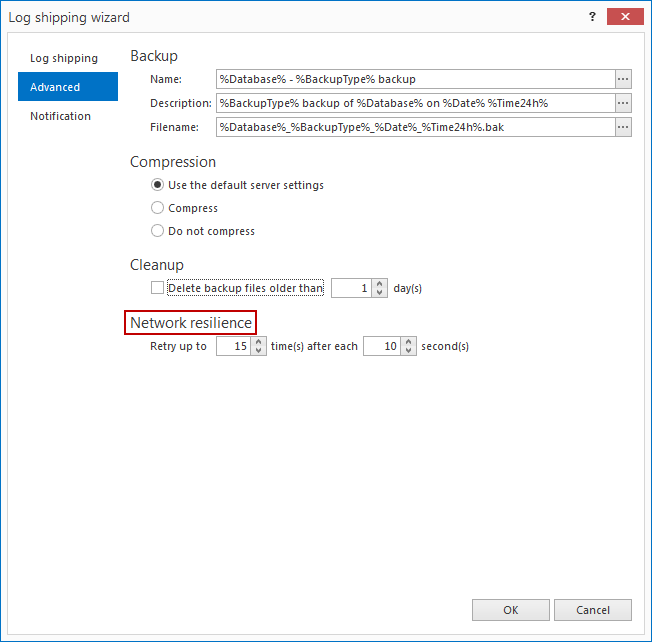
Log shipping network resilience
The option to set network resilience is added in Advanced tab of Log shipping wizard. This feature may be useful when log shipping jobs tend to fail for unspecific reasons (bad network connection for example). It is possible to set number of retries for log shipping job in the case of failure, as well as the time interval between these retries.
Azure backup
Backup to Azure option is now fully supported. The process of backing up the database to Azure is simple and straight forward, and can be completed from a single wizard step:
-
Start the Backup wizard, and select databases that need to be backed up.
-
Specify the backup type for the databases.
-
In Backup to text box, select Azure from drop down menu.
-
Provide Azure Credentials, and specify the Storage container in respective text boxes
-
Click OK to perform to execute the job

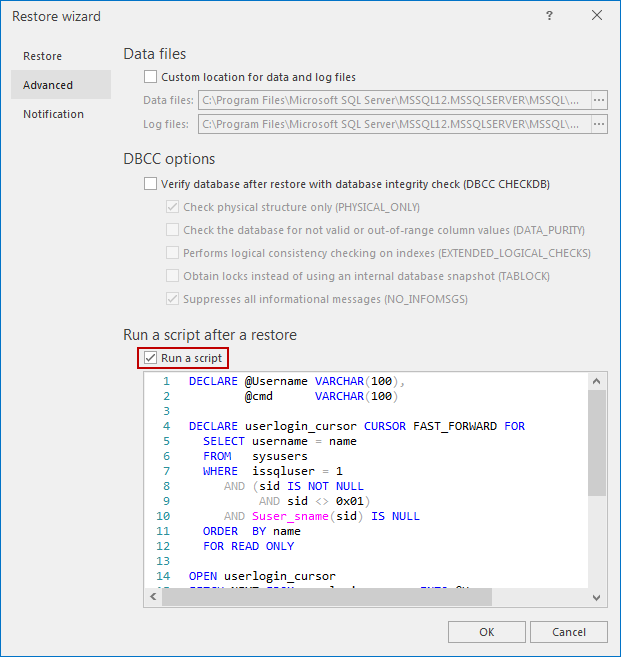
Post-restore scripts
Although ApexSQL Backup already supports the option to verify any database after a restore with database integrity check, this feature allows the user to run any custom maintenance script after the database restoration. Run a script after a restore feature is located in the Advanced tab of Restore wizard. Just tick Run a script checkbox, and paste the maintenance script in the box bellow. The script will be executed as soon as restore job is completed.
August 10, 2016


