


In the new version of ApexSQL Data Diff 2016 R2, many new features and enhancements have been added.
SQL Server 2016 support
ApexSQL Data Diff 2016 R2 fully supports the latest release of SQL Server 2016, for which databases and backups can be compared and synchronized. Currently, SQL Server Management Studio 2016 add-in integration is not supported, but it will be implemented in the next release of ApexSQL Data Diff. The support schedule for ApexSQL Data Diff’s add-in integration, along with the other ApexSQL tools, can be seen here.
Schema mapping
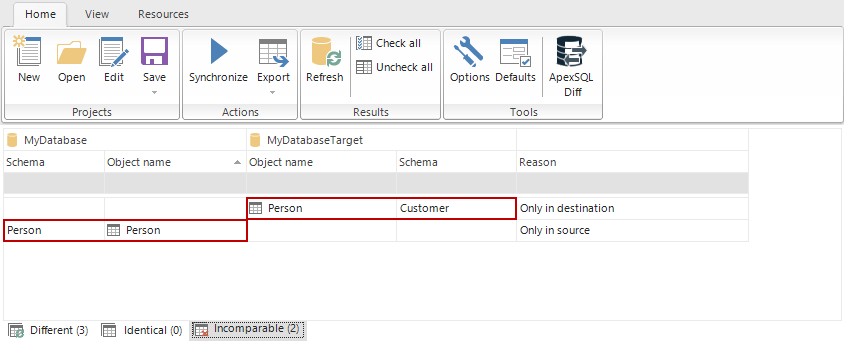
The Schema mapping feature allows comparison of tables from the source and destination databases, which have the same structure, but the table’s schema name is different. For example, if two databases are compared and there is a table with the same structure in both databases, but the schema name is different:
Source database: Person.Person table
Destination database: Customer.Person table
By comparing these databases, the two mentioned tables will be shown under the Incomparable tab, in the Results grid:
In order to avoid renaming of schema in any of these two databases or if there is a need to preserve schema names as is, use the Schema mapping feature in the following way:
-
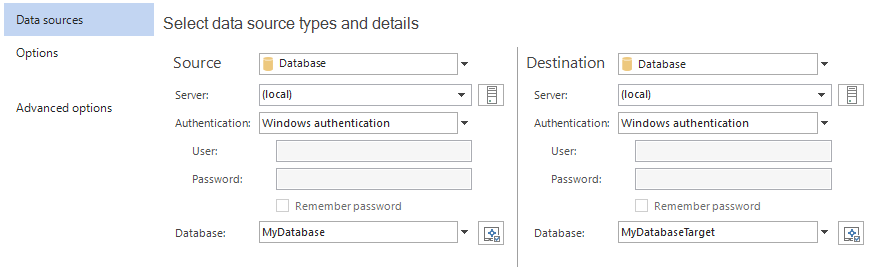
Go to the New project window and set the source and destination database:
-
Expand the Advanced options and select the Schema mapping tab:
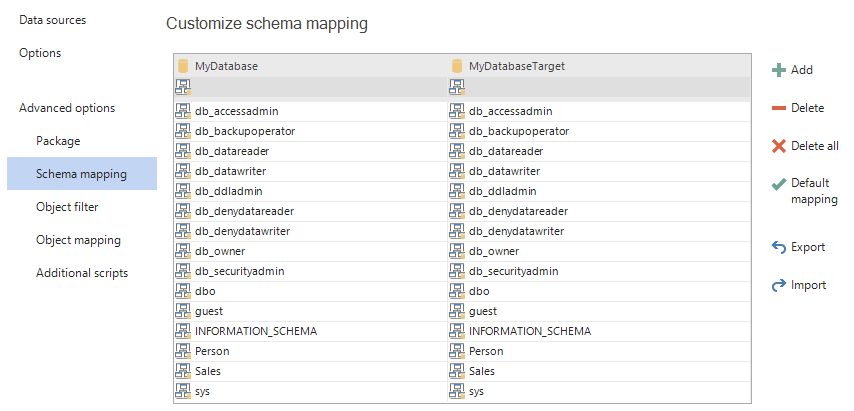
By default, schemas of the same name will be automatically mapped to each other.
-
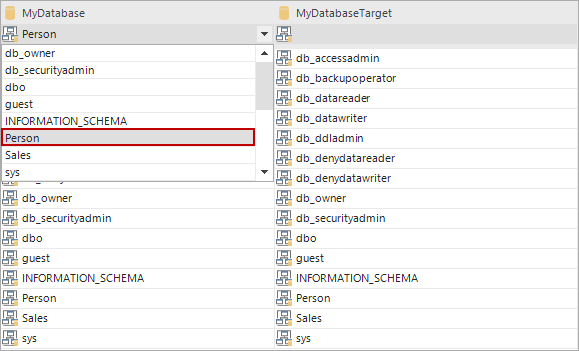
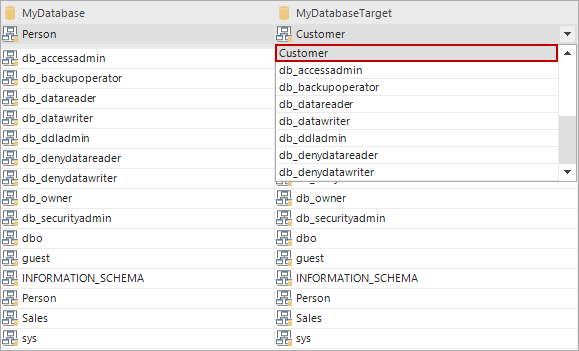
To add a new schema mapping, click on the first row (empty one) on the left (source) side and select the source schema from the drop-down list, in this case the Person schema:
-
Select the destination schema from the right side drop-down list, in this case the Customer schema:
-
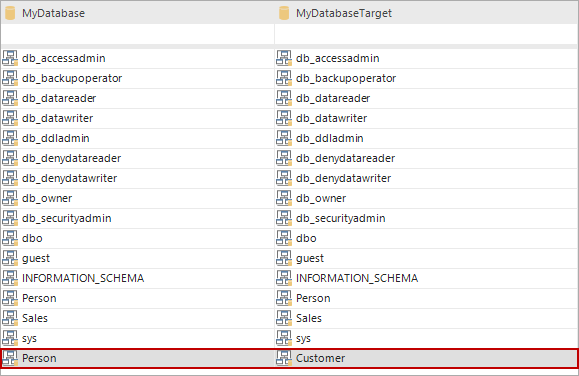
Since both schemas are set, click the Add button on the right side and the new schema mapping will be shown at the bottom of the Schema mapping list:
-
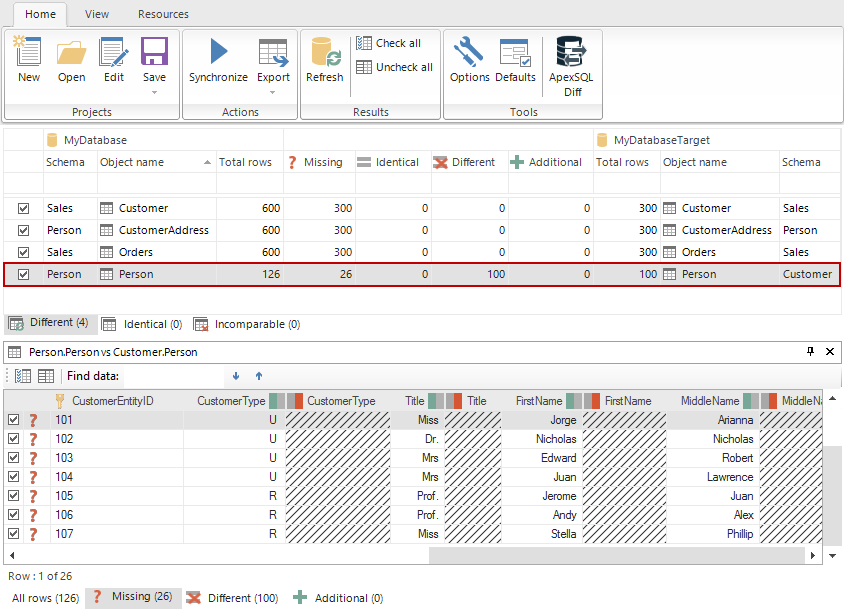
After mapping desired schemas, click the Compare button in the bottom-right corner and the newly mapped objects will be shown with their differences in the Results grid:
Save project as batch file
The Save project as batch file feature is added under the Synchronization wizard, to allow easy creating of batch files with all options set until the very end. This feature is particularly useful when performing the same synchronization process multiple times, so instead of going through the whole GUI process, a batch file can be created and when needed it just need to be double-clicked.
To save project as batch file, the following need/can be done:
-
Set the source and destination data sources
-
Check/uncheck desired comparison and synchronization options
-
Compare data sources
-
Check/uncheck objects/rows in the Results grid
- Click the Synchronize button from the Home tab
-
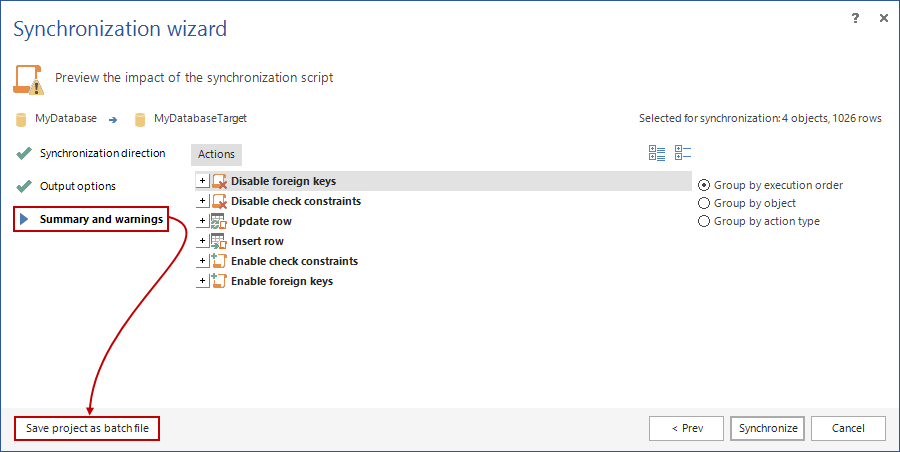
Go through the Synchronization wizard, select an Output action, and when the Summary and warnings are shown, click the Save project as batch file button in the bottom-left corner:
-
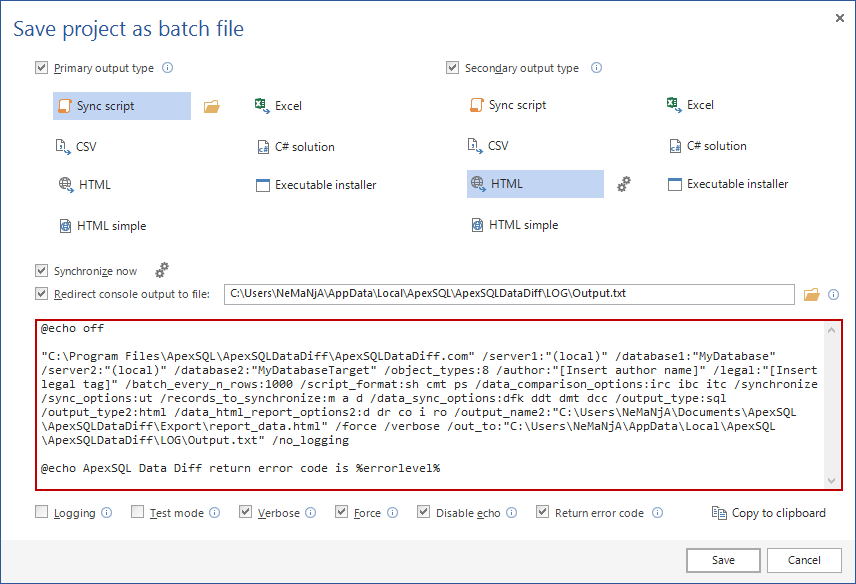
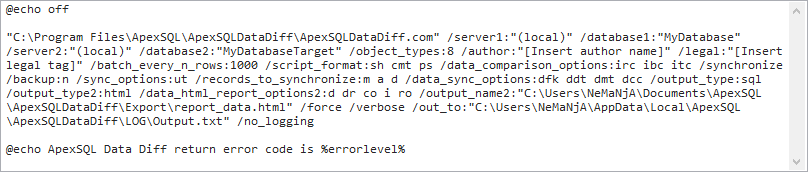
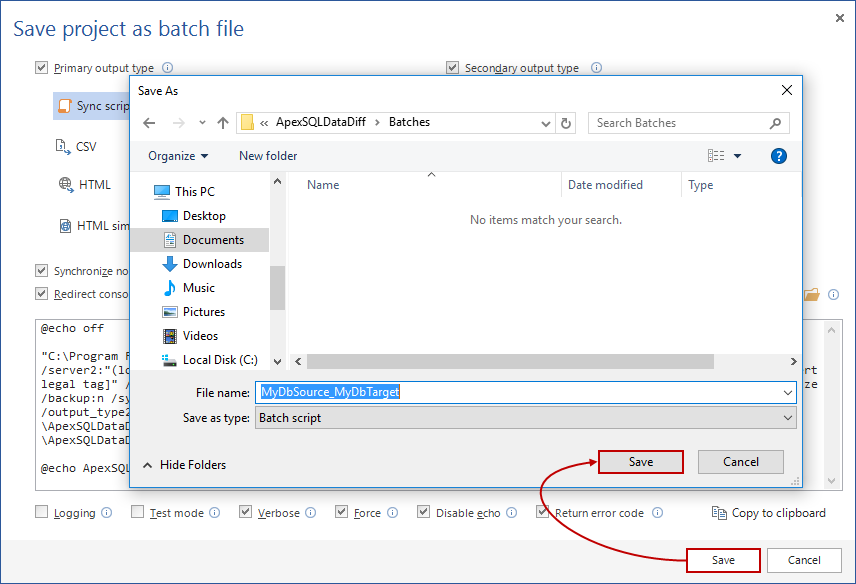
The Save project as batch file window is shown and the script with all CLI switches is provided:
-
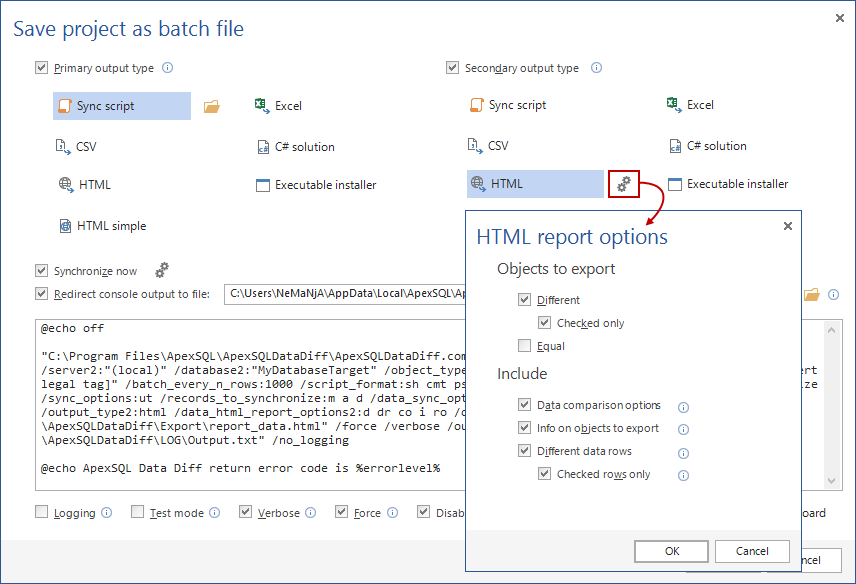
As in the CLI, the primary and secondary output types can be set from this window. Each of the output types has the Settings or Browse button next to it, which can set specific options for that output type or to set an output file path:
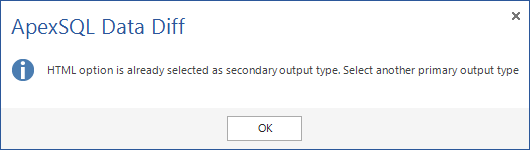
If the same output types are set for primary and secondary output type, an information message will be shown that this output type is already set for the other output type:
-
Additional options that can be set in this window are:
-
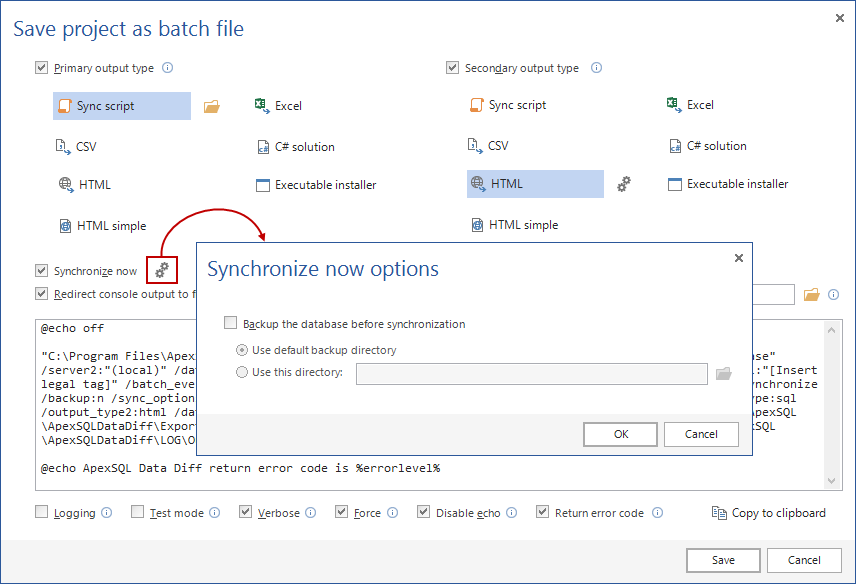
Application specific options – the Synchronize now option – by clicking the Settings button next to it, backup options can be set:
-
Common additional options. Learn more about them from here.
-
-
Once all options are set, all of them will be shown in the batch script preview pane as CLI switches:
-
At the end, click the Save button in the bottom-right corner of the Save project as batch file window, specify the location where to save it, and click the Save button:
A batch file is created and saved, and ready for use whenever it’s needed.
Help to HTML switch
The Help to HTML is a new CLI switch [ /help_to_html ], which creates the CLI help file in the HTML format. This switch can be found under the Additional options in the CLI help, when the following command is entered:
ApexSQLDataDiff.com /?
To export the CLI help into the HTML format, a full path to the CLI help file, along with a .html extension, needs to be provided:
ApexSQLDataDiff.com /help_to_html:Help.html
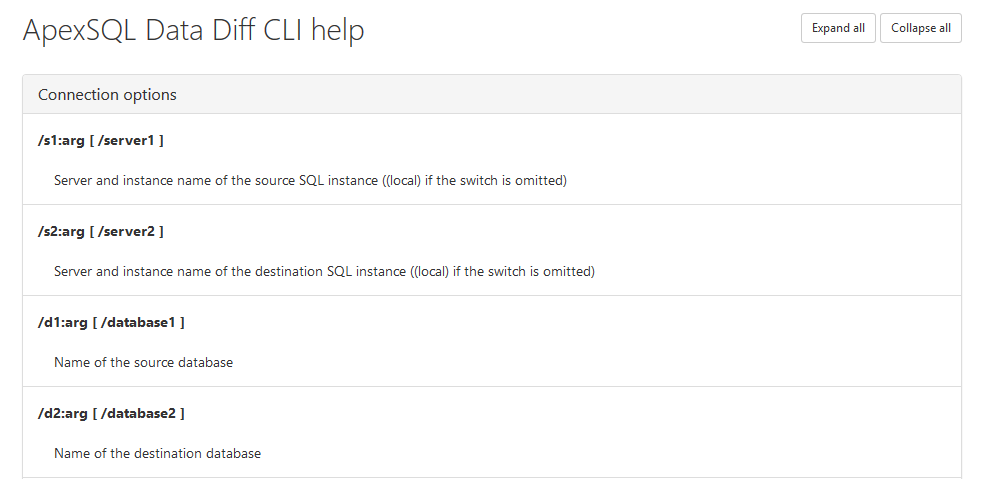
After executing the above command, the CLI help file will be created in the HTML format and opened in default browser:
The Expand/Collapse all buttons in the top-right corner can be used to expand/collapse option groups in the CLI help. For example, if the Collapse all button is clicked, only the group’s names will be shown:
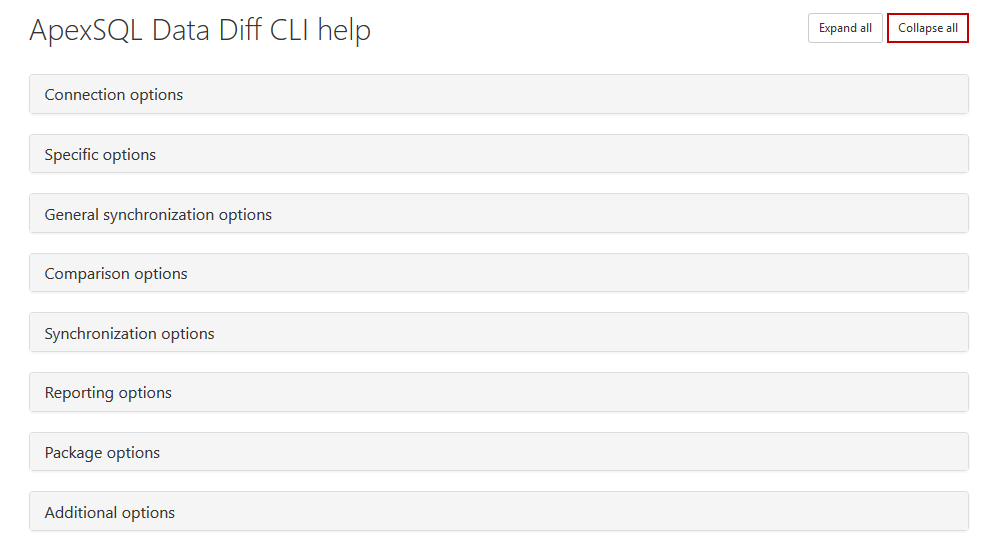
With a click on each group name, switches for that group will be shown:

In this way, the CLI help is much easier for previewing, finding the desired switch and reading its description.
Return error codes switch
This is a newly added switch [ /return_codes ] that outputs all return codes to console, while executing the application through the CLI. If this switch is specified along with data sources in the CLI, the following will be shown before the comparison process:
ApexSQLDataDiff.com /rc /database1:MyDatabaseS /database2:MyDatabaseT /v
Return codes:
0 – success
1 – general error code
2 – invalid switch
3 – duplicated switch
4 – incompatible switches
5 – missing argument
6 – missing a dependent switch
7 – invalid value
8 – value out of range
9 – invalid file path
10 – invalid project file
11 – unsupported edition
13 – trial has expired
14 – connection timeout
15 – connection failed
16 – IO error
17 – operation canceled
18 – application error
19 – execution error
20 – execution timeout
101 – insufficient permissions
102 – output file creating failed
Connecting:
Connecting to [(local)].[MyDatabaseS]
Connection successful
Connecting to [(local)].[MyDatabaseT]
Connection successful
17 new CLI return error codes
As shown above, ApexSQL Data Diff now has 22 return error codes and 17 are newly added ones in this release.
The return error code will be provided upon the finished application action in the CLI. Learn how to obtain the return error code from here.
Below is the list of all return codes in ApexSQL Data Diff with their descriptions:
|
|
|
|
|
0 |
Success |
The <operation> has finished successfully |
|
1 |
General error code |
An error has occurred: <error> |
|
2 |
Invalid switch |
Switch “<switch>” does not exist Type ApexSQL Data Diff.com /? for help |
|
3 |
Duplicated switch |
Switches <switch1>, <switch2> cannot be used more than once Type ApexSQL Data Diff.com /? for help |
|
4 |
Incompatible switches |
Switches <switch1> and <switch2> cannot be used together Type ApexSQL Data Diff.com /? for help |
|
5 |
Missing argument |
Missing required argument(s) for switch <switch> Type ApexSQL Data Diff.com /? for help |
|
6 |
Missing a dependent switch |
Switch <switch1> is missing its dependent switch <switch2> Type ApexSQL Data Diff.com /? for help |
|
7 |
Invalid value |
The value <value> for switch <switch> is invalid |
|
8 |
Value out of range |
The numeric value provided for switch <switch> is out of the range. Allowed values are <range start> – <range end> |
|
9 |
Invalid file path |
Specified file path: <path> is invalid or the file does not exist |
|
10 |
Invalid project file |
Specified project file: <path to project file> is not a valid project file for ApexSQL <application name> |
|
11 |
Unsupported edition |
The Command Line Interface is not supported in the <edition> edition. To purchase the Professional edition, please contact sales@apexsql.com |
|
12 |
Invalid activation key |
The entered activation key is invalid. Please check that the correct activation key is entered or contact sales@apexsql.com for help |
|
13 |
Trial has expired |
Trial has expired. To extend your trial or purchase the Professional edition, please contact sales@apexsql.com |
|
14 |
Connection timeout |
Connection to server <server> has timed out. Make sure that SQL Server is accessible and try again |
|
15 |
Connection failed |
Connection to server <server> has failed: <error description> |
|
16 |
IO error |
The application attempted to write to a file that already exists and the /force switch has not been set |
|
17 |
Operation canceled |
The operation was canceled because the Ctrl+C or the Ctrl+Break was used |
|
18 |
Application error |
The following error has occurred: <error> |
|
19 |
Execution error |
The execution of <script> has failed with following error: <error> |
|
20 |
Execution timeout |
The execution of <script> has timed out with the following error: <error> |
|
101 |
Insufficient permissions |
The operation cannot be completed because the user does not have the required permissions |
|
102 |
Output file creating failed |
An issue was encountered while creating the output file and caused the failure |
Package option switches
From this release, all package options can be set from the CLI using switches. To see the newly added CLI switches, check out the knowledgebase article on this link, under the Package switches section.
Warnings handling switch
In the Synchronization wizard, when a warning is shown, the synchronization process can be continued or stopped. In this release, the /warnings_handling is added to allow:
-
Ignore warnings – warnings will be ignored during the application execution
-
Abort on medium or high warnings – application execution will be aborted on medium or high warnings
-
Abort on high warnings – application execution will be aborted only on high warnings
This new switch can also be seen in the article on this link.
In addition, the Warnings output is provided as a part of the CLI output messages.
Ignore new objects switch
When a project file is saved with a specific data sources, objects and options selection, newly created objects will be automatically added to a saved project file. In order to avoid adding new objects to a previously saved project file, a new switch has been added – [ /ignore_new_objects ]
Silent switch
The /silent switch is an another newly added switch that can be used when there is a need to disable all output to console, so that nothing is shown in the CLI.
Improved CLI output messages
ApexSQL Data Diff 2016 R2 brings improved CLI output messages that can be seen only when the /verbose switch is specified
In the following example, two local databases are compared and synchronized and HTML report will be generated on specified location:
ApexSQLDataDiff.com /rc /database1:MyDatabaseS /database2:MyDatabaseT /synchronize /output_type:html /on:Report.html /verbose /force
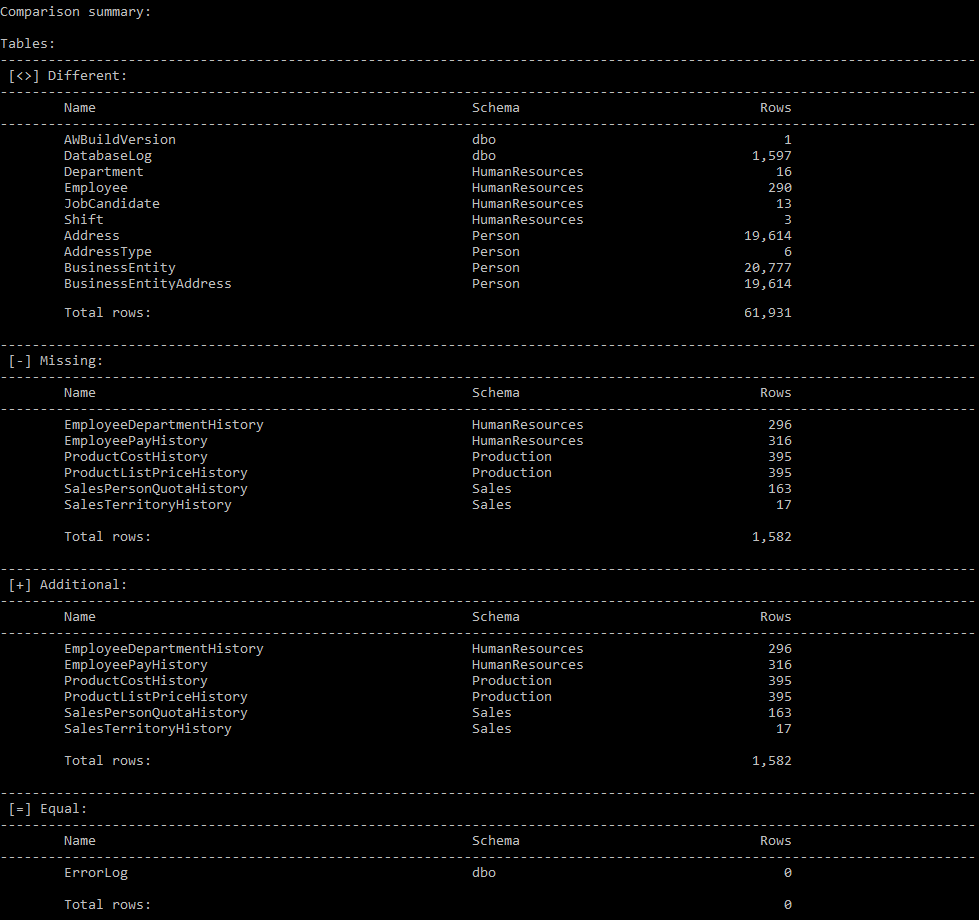
-
Comparison summary – contains information about the number of rows in each table that are different, missing, additional, or equal:
-
Warnings output – contains information about all warnings which are encountered before executing the synchronization script:

Depending on which option is set for the /warning_handling switch, the appropriate message will be shown. In this case, the default option is used, so the message is:
Warnings will be ignored during the application execution, due to the Ignore warnings option, which is set by default
-
Synchronization summary – contains information about which database was synchronized, the number of warnings, and the number of rows that are updated, added, deleted, and the total number of synchronized rows:

Warnings and Changes log files can be viewed in provided location next to the See part, as shown in the above screenshot.
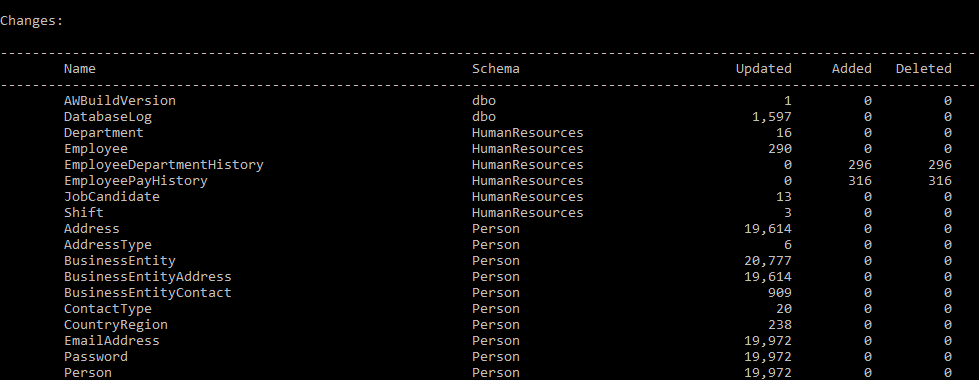
-
Changes output – contains the number of updated, added, and deleted rows for each table in destination database:
Improved HTML reports
The last, but not the least, are improved HTML reports. The outdated look of HTML reports is replaced with new cleaner and more eye appealing one:

May 25, 2016


