


We are excited to announce that ApexSQL Model 2019 has just been published. In the latest version of the SQL data modeling tool, we have added eight new features that will enhance our users’ experience.
New features in the latest release:
- Constraint customization
- Create a model from a snapshot
- Export (partial diagram selection)
- Generate SQL script from model
- Import only selected objects from database to model
- Index customization
- Profiles for table customization
- Show/hide tables on diagrams
Let’s start with the introduction of those features.
Profiles for table customization
In the Options window under Table style tab selecting a profile selects predefined options for displaying tables on a diagram:
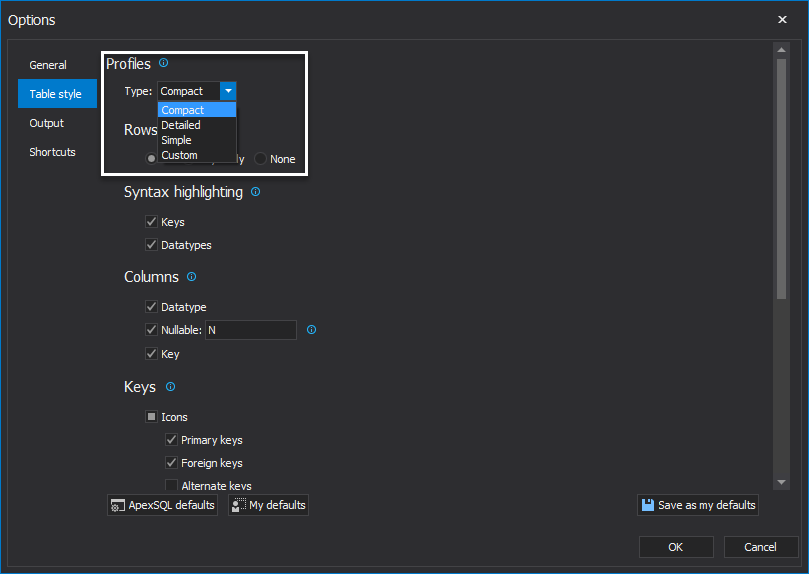
By selecting one of the profiles (Simple, Detailed or Compact), predefined options for the selected profiles will be selected. If any of the below options are additionally checked or unchecked, the type of profile will be changed to the custom profile.
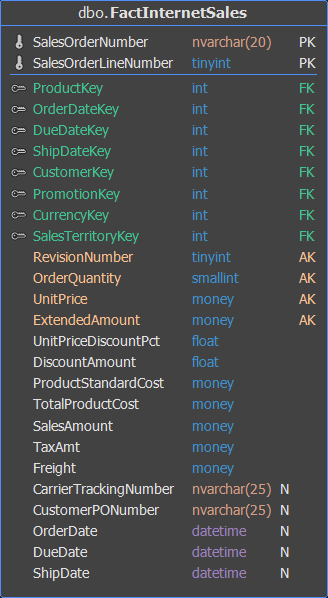
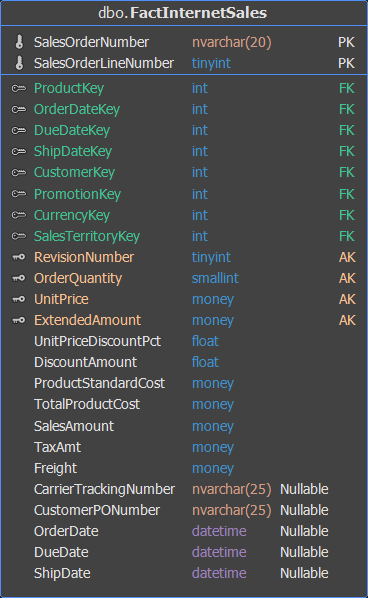
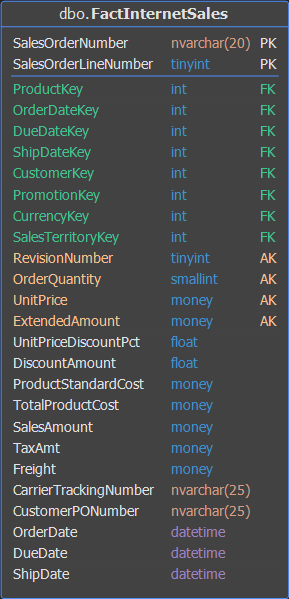
Depending on which profile is chosen, a table will look like this:
Simple:
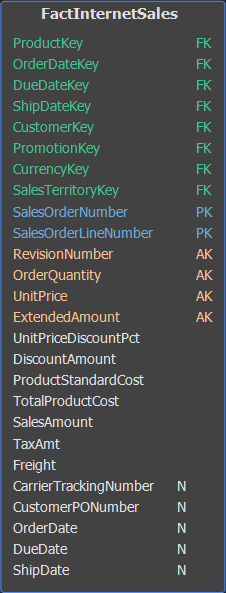
Compact:
Detailed:
Custom:
Export part of a diagram
All export options are grouped under one Export button.
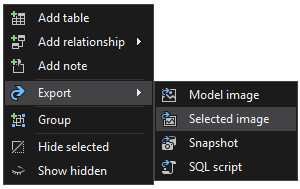
This feature enables the export of selected tables as an image. It can be done by choosing tables from the right-click context menu choosing Export then clicking on the Selected image option:
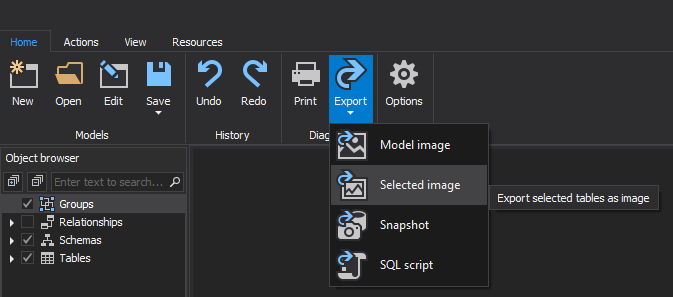
This option can also be chosen from the Home ribbon tab by selecting Export, then Selected image option:
Standalone script generator
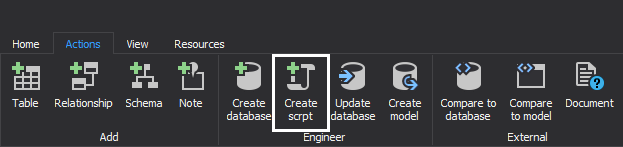
This is the option for generating script from tables on diagram using the SQL data modeling tool. It can be done by clicking on Create script option from the Action ribbon tab:
Dialog for selecting which tables will be included in the script will appear:
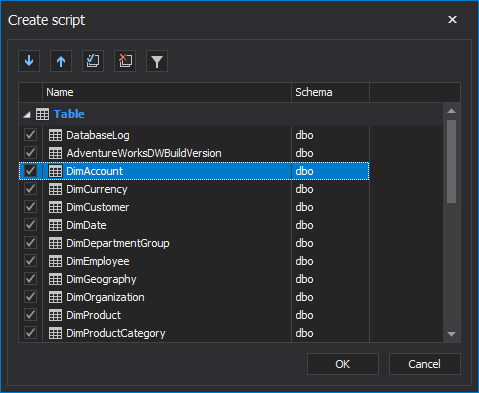
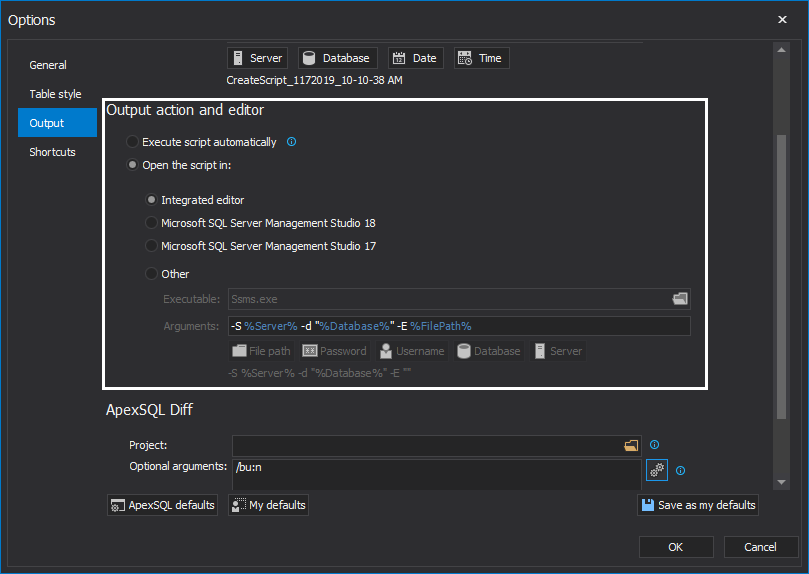
Selected tables will be included in script generation and by clicking on the OK button, the generated script will be opened in the selected editor from Model project options (integrated editor, SQL Server Management Studio or some other):
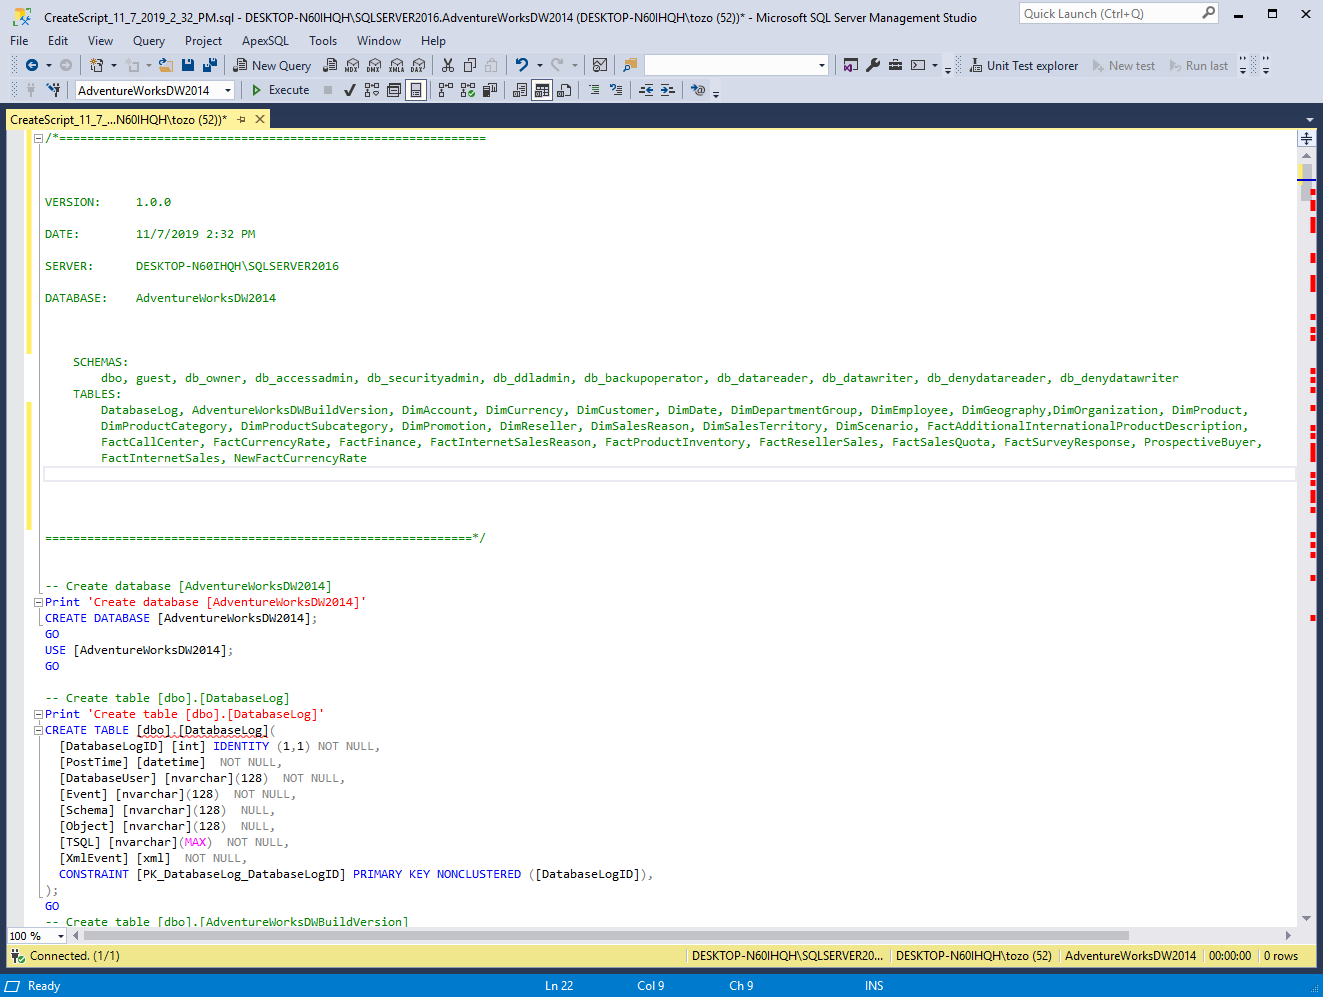
Integrated editor

SQL Server Management Studio
Show/hide tables on diagrams
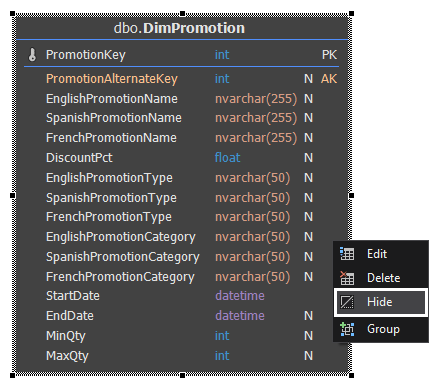
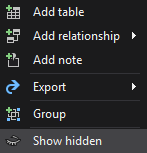
This option is for showing or hiding tables on the diagram. By pressing the right mouse click on the table and selecting the Hide option from the context menu, the currently selected table will hide. Selecting a few tables and pressing right mouse click then selecting the Hide selected option from the context menu it will hide all selected tables at once:

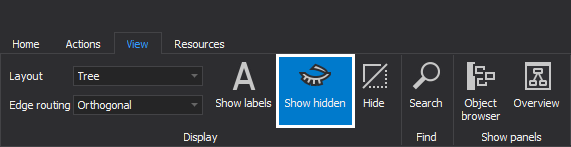
Tables can be shown again by pressing the right mouse click and selecting Show hidden option from the context menu or by selecting the Show hidden option from the View ribbon tab:
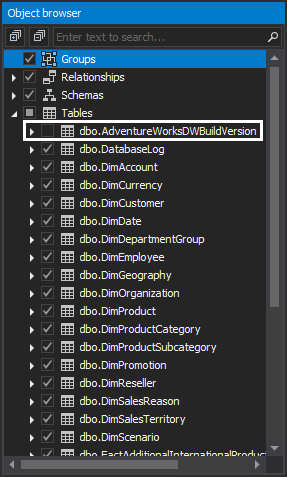
With the SQL data modeling tool, tables can also be shown or hidden by selecting or deselecting them in an object browser.
Hidden tables will not be included in forward engineering (Create database, Create script and Update database):
Import only selected objects from database to model
Using the SQL data modeling tool now can import only selected objects.
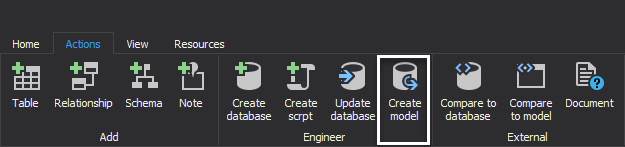
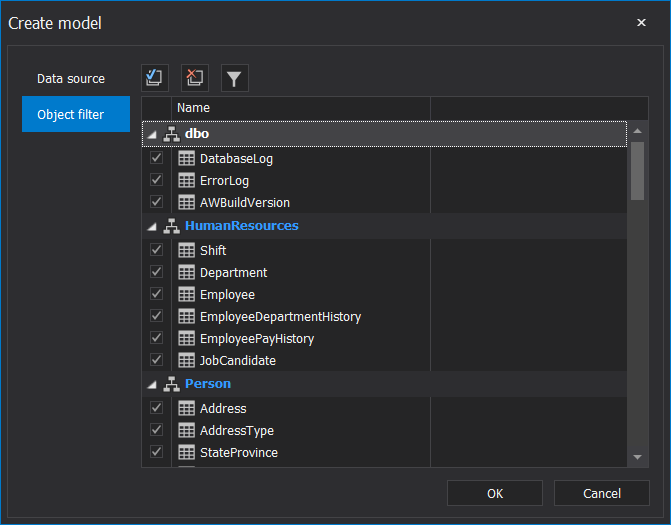
Selecting Create model option from Actions ribbon tab then by selecting the desired database and server and switching to the object filter tab in Create model dialog will show objects from the database:
Only selected objects will be imported into the diagram when OK button is clicked:
Index customization
Indexes can be added when tables are created or later by using the Edit option.
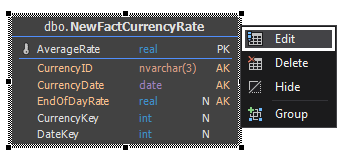
Indexes can be customized in the Edit table form, which can be done when adding a new table or editing an existing one. To add a new table, press the right mouse click on empty space in the diagram and select Add option from the context menu or edit existing one by pressing right mouse click on table and selecting the Edit option from the context menu:
Select Index tab for customizing indexes.
Edit table form will open, for customizing indexes select Indexes tab:
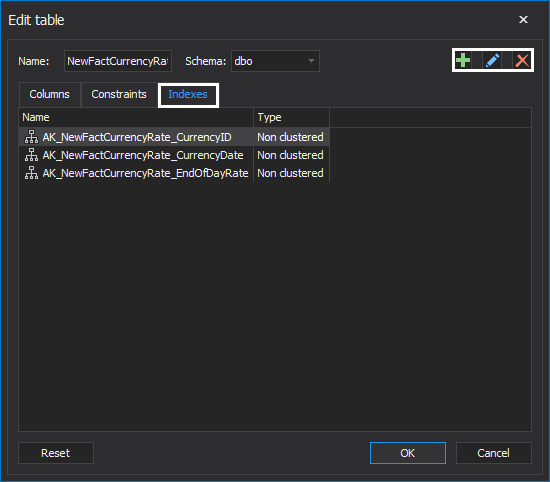
When the Indexes tab is selected all existing indexes will be listed, and they can be edited, deleted or created by clicking appropriate buttons.
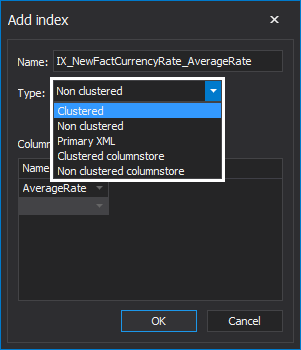
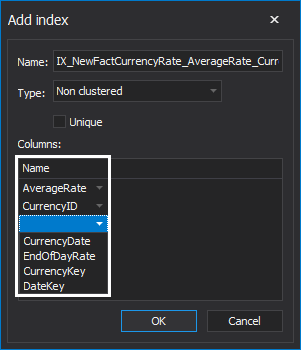
The new index can be added by clicking on the  button. The Add index dialog will appear:
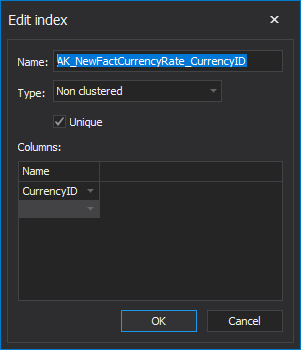
The index can be edited by clicking on the  button. The Edit index dialog will appear:
There are five types of indexes that can be added (Clustered, Non clustered, Primary XML, Clustered columnstore, Non clustered columnstore). Only for Clustered and Non clustered index type Unique option can be checked. If the unique option is checked for those two types, all columns in the column grid will be unique also in the Columns tab, the Unique option for those columns will be checked. One exception is the Clustered columnstore index type, which doesn’t have any columns.
Constraints customization
Similarly, as for adding or editing Indexes, Constraints can be customized in the Edit table form, which can be done when adding a new table or editing an existing one. To add a new table, press right mouse click on empty space in the diagram and select Add option from the context menu or editing existing one by pressing right mouse click on the table and selecting the Edit option from the context menu:

Select Constraints tab for customizing constraints.
Edit table form will open, for customizing constraints select the Constraints tab:
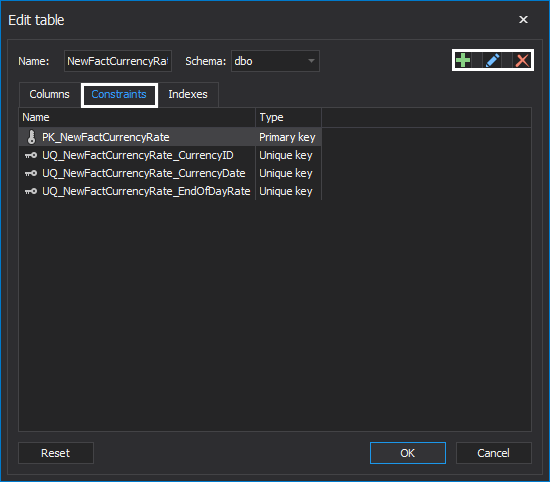
When Constraints tab is selected, all existing constraints will be listed, and they can be edited, deleted or created by clicking appropriate buttons.
Add new constraint by clicking  button. The Add constraint dialog will appear:
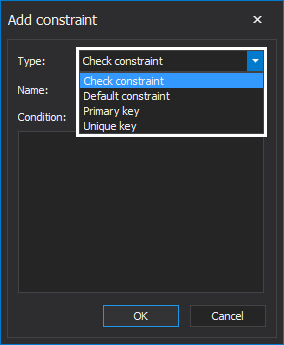
There are four possible constraint types to add:
Check constraint
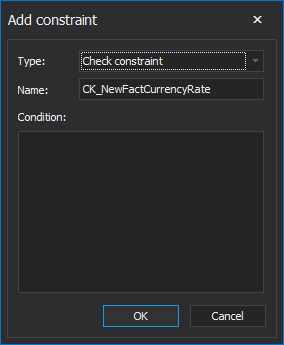
Name and Condition can be edited in the Add constraint window:
Default constraint
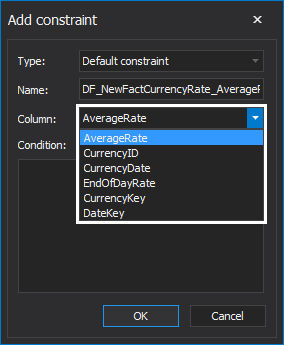
Name and Condition can be edited in the Add constraint window, the selected column will be the column on which default constraint will be defined.
Primary key

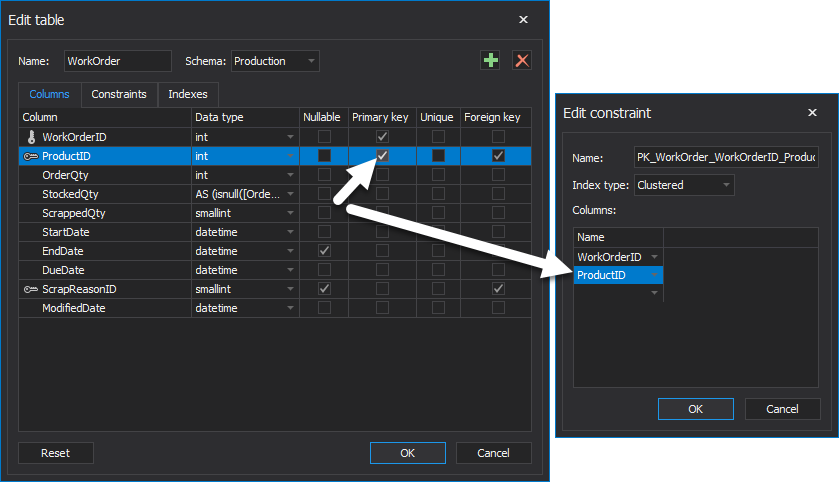
A table can have only one Primary key constraint, and if the Primary key constraint already exists, it can be only edited by changing Index type, or by adding or removing columns for Primary constraint. When Primary constraint is created, the Primary key option in the column tab will be checked for all columns which are selected for Primary key constraint:
Unique key
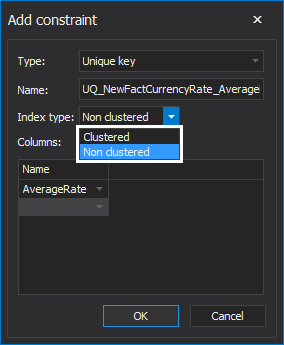
All options are the same as for Primary key constraints, but the difference is that there can exist more than one Unique key. For all columns which are selected for a unique key, the Unique option will be checked in columns tab when the Unique key is created.
Column customization
Clicking on Primary key option for selected column, Non clustered primary key constraint is automatically added. If the Primary key already exists, then the selected column will be added to that primary key:
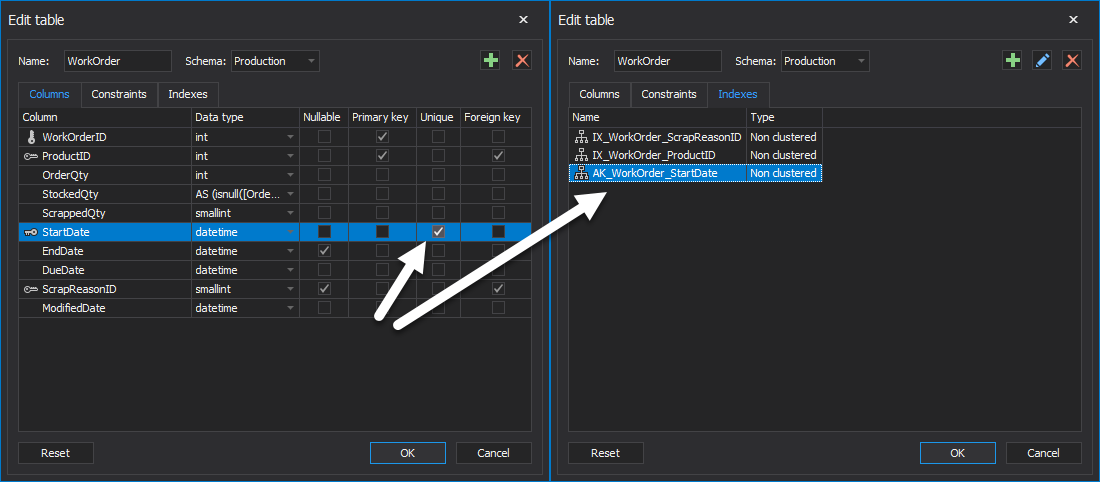
Clicking on Unique option for selected column, Non clustered unique constraint and Non clustered unique index is automatically added. If the Primary key already exists, then the selected column will be added to that primary key:
Clicking on the Reset button, the table will be reverted to starting state when the window has been opened.
December 6, 2019


