There are 2 main menu tabs in ApexSQL Recover.
Home tab contains ApexSQL Recover general commands to start different recovery wizards, or an extraction job:

The “Resources” tab allows users to contact ApexSQL support, access application help and product page or handle activation and update related tasks:

When a recovery wizard is initiated from the main ribbon, the first step is always the same. User needs to select a SQL Server instance and database for recovery, and to choose authentication method and provide valid credentials when SQL Server authentication is selected:

Connection options dialog allows users to set connection timeout, execution timeout and to mark connection encryption:

When recovering deleted data, or dropped tables, ApexSQL Recover can help users decide on the data sources that will and should be used for recovery. Users can opt to not use additional transaction log files, to add specific transaction log files, or to get help with their decision if they are not sure which resources will hold the crucial information for the recovery:

When users opt to get help with the decision on specifying recovery resources, simple questions are asked to help determine the next step and provide an advise on how to proceed with the process:


Finally, proper instruction is generated based on the user’s responses to previously described questions, to ensure that the best possible resources are selected for the recovery:

Adding multiple transaction log backup files is achieved by browsing the storage after clicking on the ‘Add file’ button. Users can opt to add only parts of transaction log backup files that contain multiple backups:

Users can specify exact time period when the disaster has occurred to ensure the best recovery precision, and to rollback only those changes that have occurred during the specific time:

To focus recovery only to specific tables, ApexSQL Recover allows users to choose which database tables will be included in the recovery process:

The final step of the recovery wizard allows users to decide the output of the recovery job. Users can choose to create a recovery script that can be edited in ApexSQL Recover internal editor, SQL Server Management studio or any other similar tool, or to create a new database and store recovery information inside that database:

Once the recovery process is completed, ApexSQL Recover shows the results of the job, and allows users to access created recovery files and open them directly in the default editor:

When recovering dropped tables, users can choose to recover only dropped data, only structure, or to recover both at once:

When recovering deleted blob files or extracting blobs from a database backup, users can define the location where the recovered blobs will be saved as files:

Application options dialog allows users to select a script editor that will be used to open created recovery script, as well as to choose an application theme:

Users can see application version and check license agreement through “About” form:

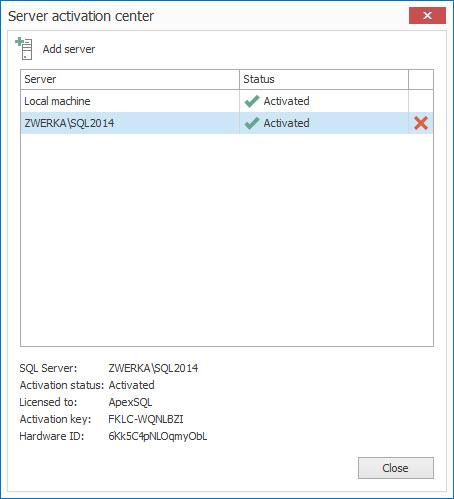
To activate individual SQL Server instances or to check activation of those already activated, Server activation center fill offer full information:

April 10, 2017


