


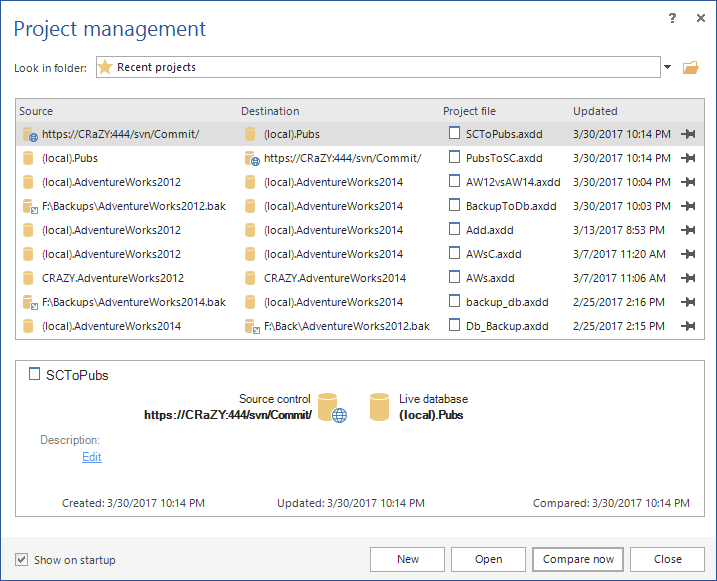
On the application startup, the Project management window shown:
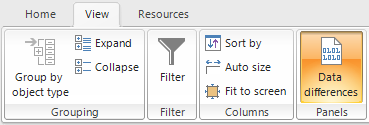
ApexSQL Data Diff has three main menu tabs:

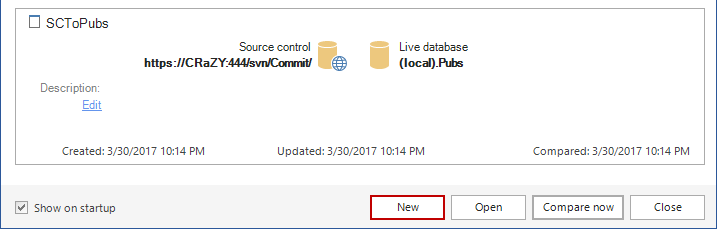
To initiate new comparison, click the New button in the Project management window:
Or it can be initiated from the Home tab with a click on the New button:

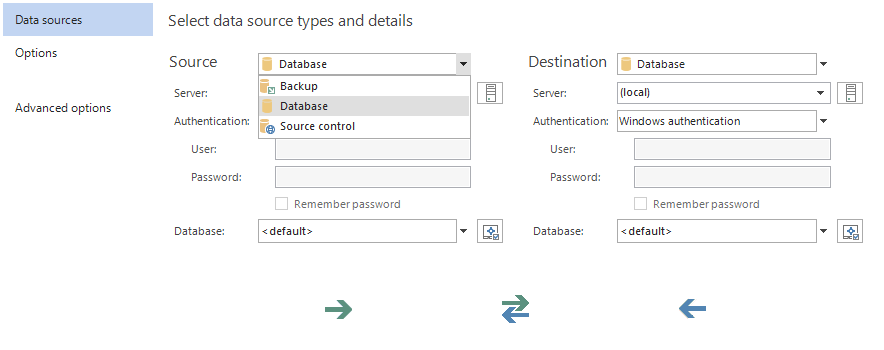
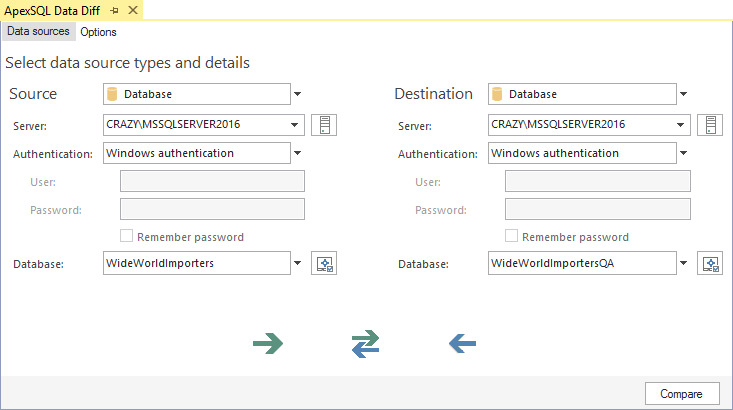
Once the New project window is shown, by default the Data sources tab is the first step and three different data sources can be chosen:
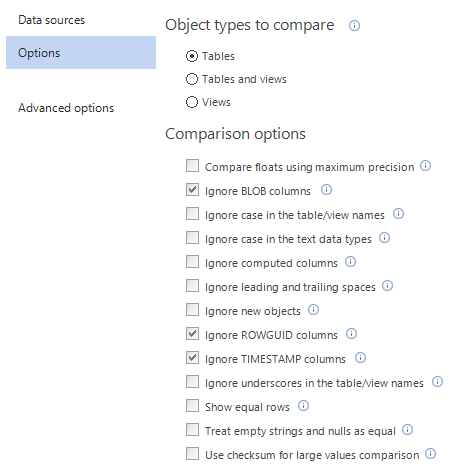
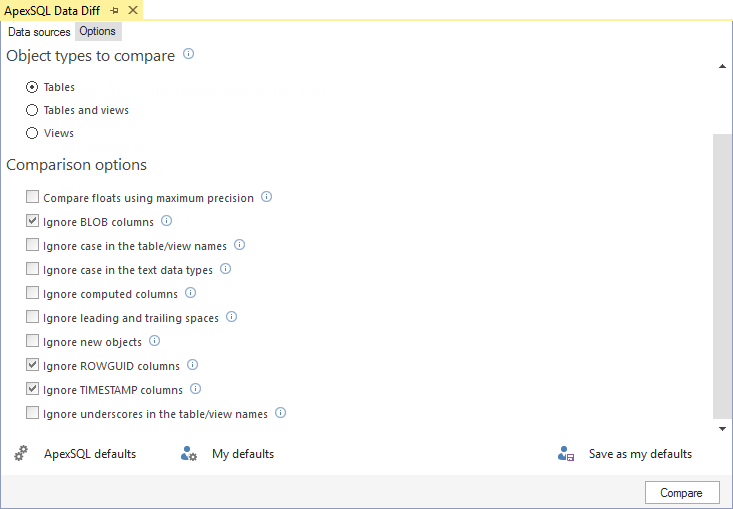
In the Options window, choose between Object types to compare, set specific Comparison and Synchronization options, Batching, and Output elements options:
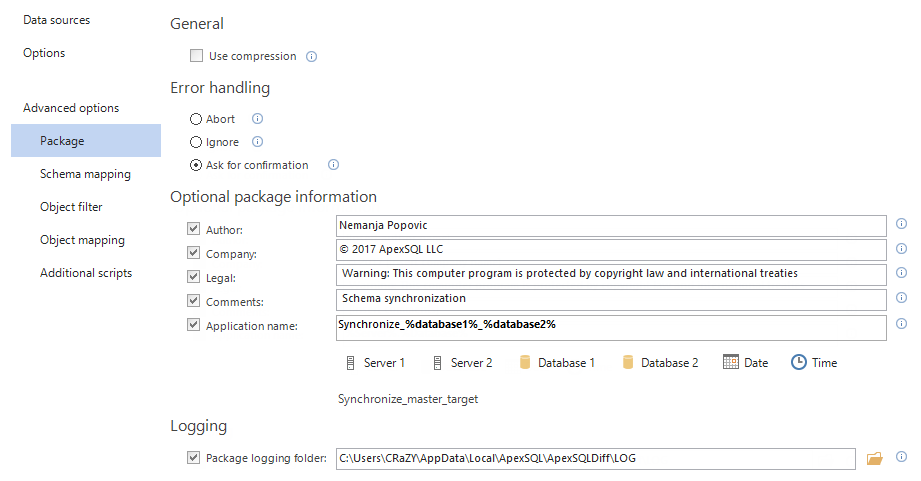
If Advanced options are expanded, additional options can be set. Under the Package tab, installer package options can be set, such as: compression of the installer package, error handling, optional package information, and logging:
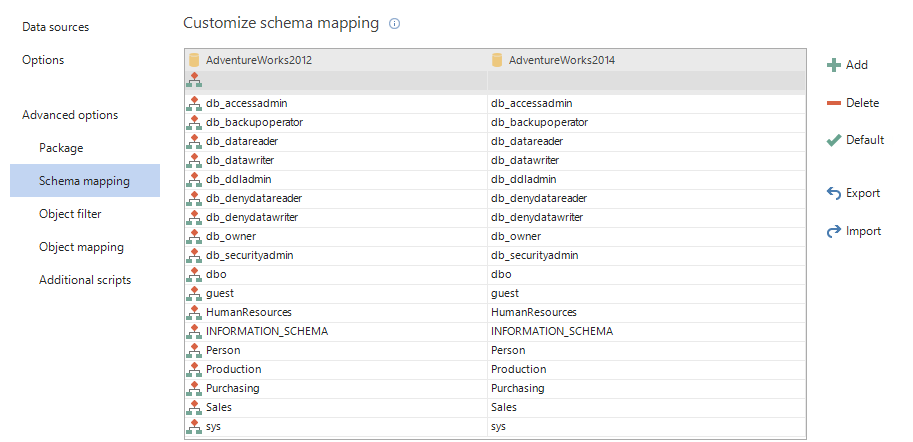
When opened, Schema mapping tab loads and automatically maps schemas of the same name, but it allows custom schema mapping:
Object filter tab offers variety of filter options, such us Custom comparison key, Row filter, etc. and these options can be used to narrow down a data comparison to affected rows only:

Object mapping tab automatically maps all tables and views with the same names and schemas, but it can be used to perform custom object mapping:

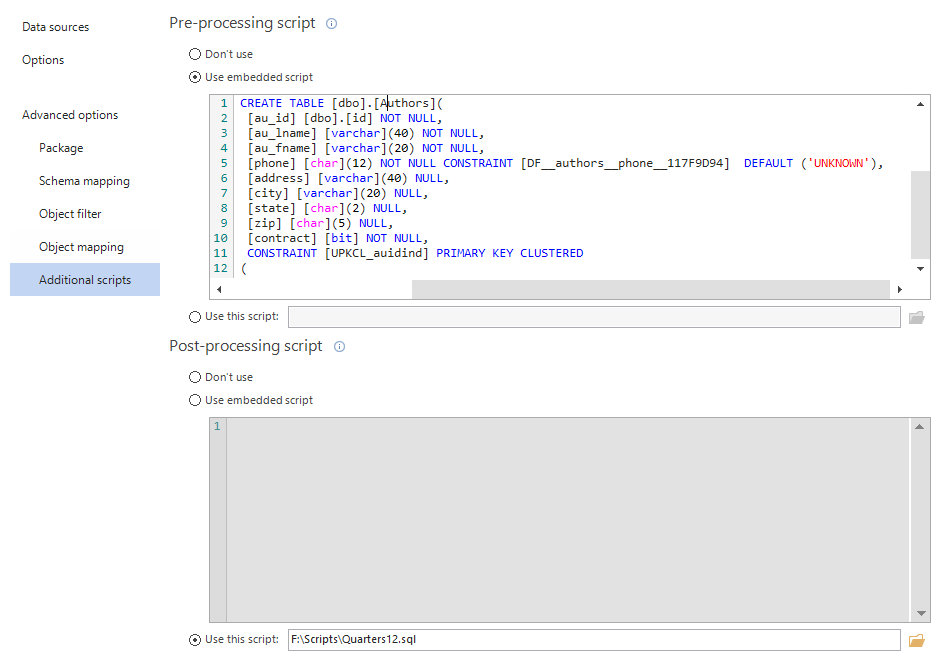
In the Additional scripts tab, pre or post processing scripts can be created or loaded and executed before or after the synchronization:
After all options are set and data sources are compared, data comparison results will be shown in the Results grid:
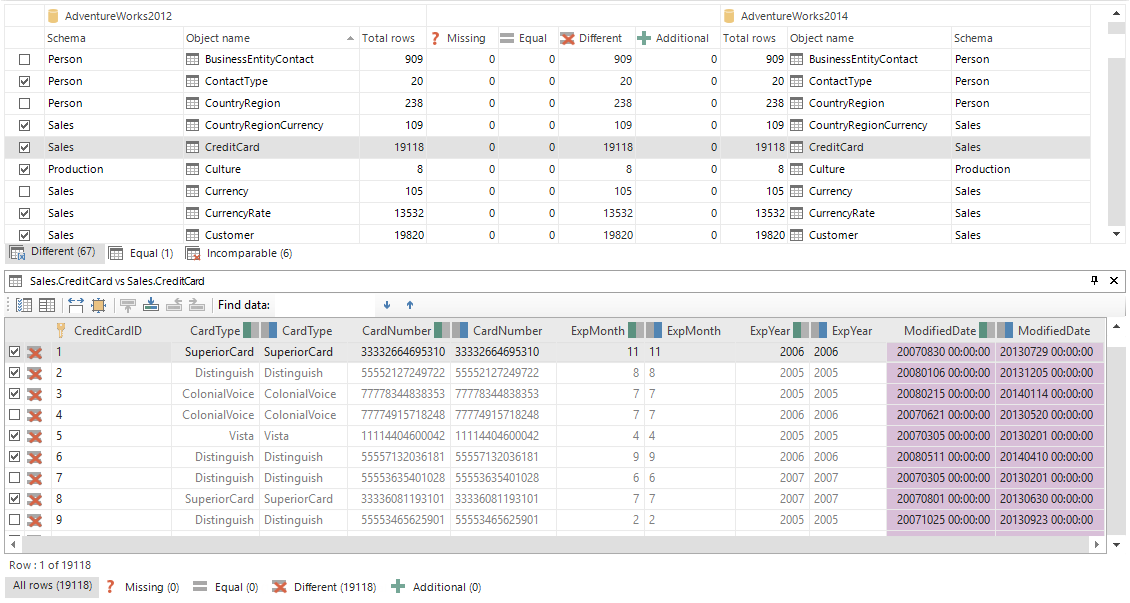
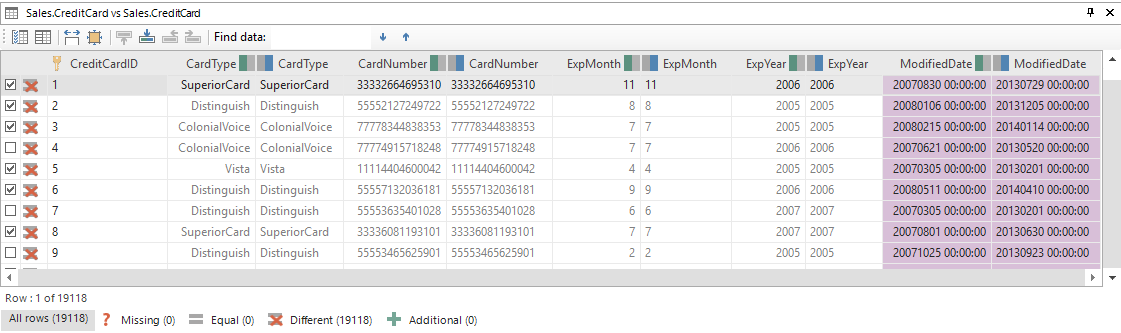
Data difference view panel shows exact data differences for each compared column of the selected table and data differences can be reviewed in separate tabs for all rows, missing, equal, different, or additional. Also, individual rows can be included/excluded from the synchronization process:
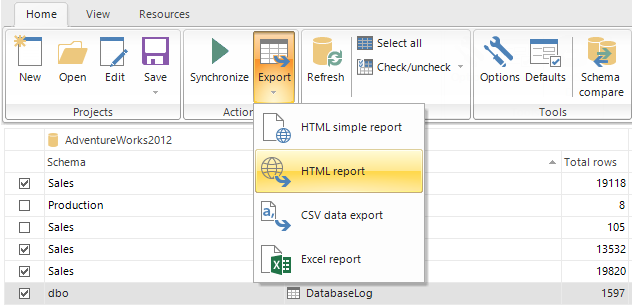
Once comparison results are reviewed, ApexSQL Data Diff provides an option to export these results with a click on the Export button from the Home tab, and choose one of the export files: HTML report, HTML simple report, CSV data export, and Excel report.
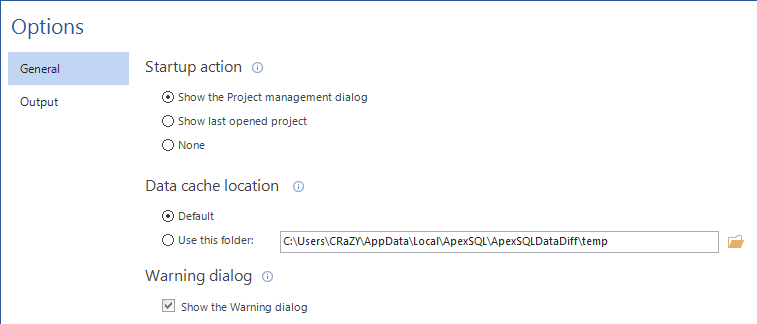
Under the General tab, from the Options window, application specific option can be set, such as Startup action, Data cache location, or Warning dialog:
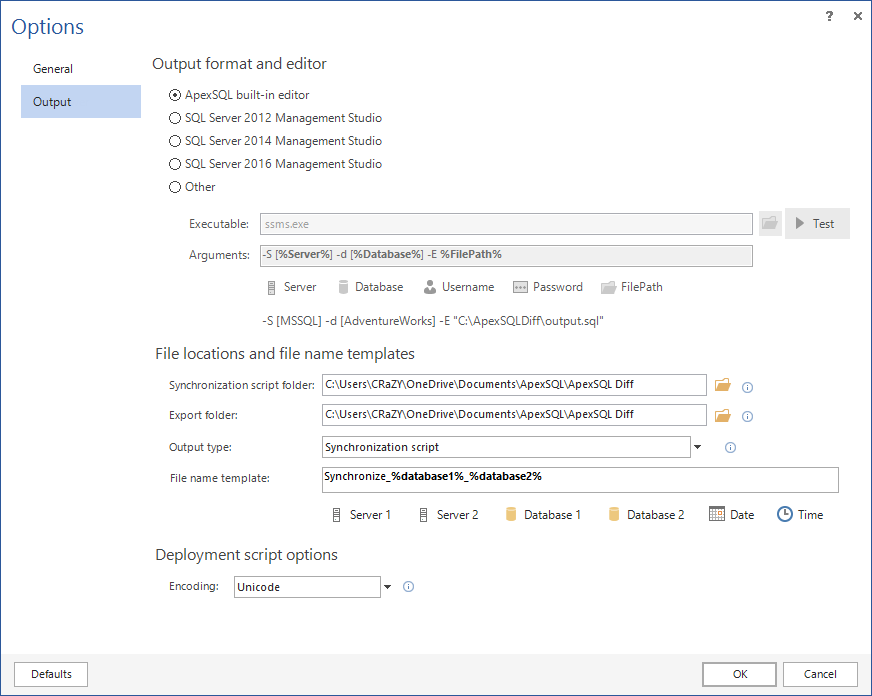
Under the Output tab, file locations and file name templates can be set as preferred, along with different editors and to specify different encoding for the deployment script:
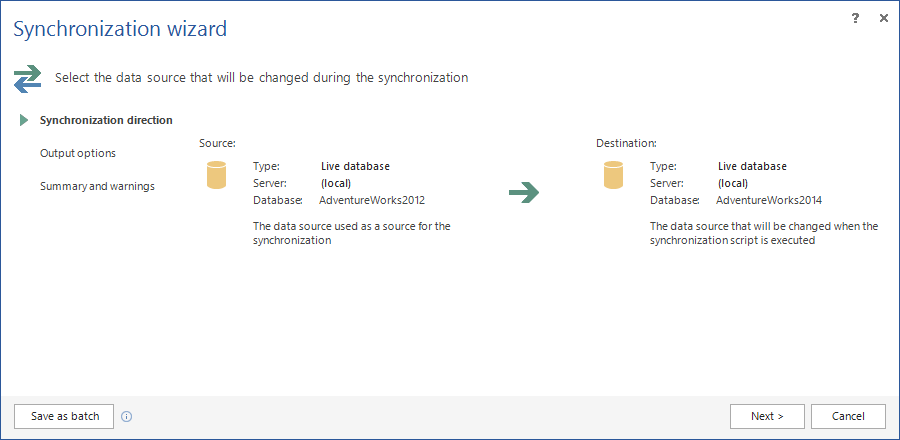
Once the Synchronize button from the Home tab is clicked, the first step Synchronization direction of the Synchronization wizard is shown:
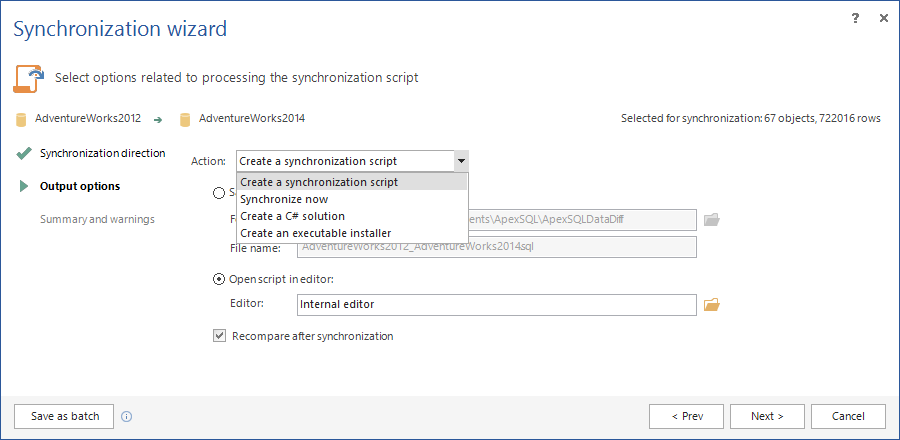
In the second step Output options, choose one of the Actions for synchronization:
The last step shows Warnings and Actions tabs that can be reviewed prior to synchronization:

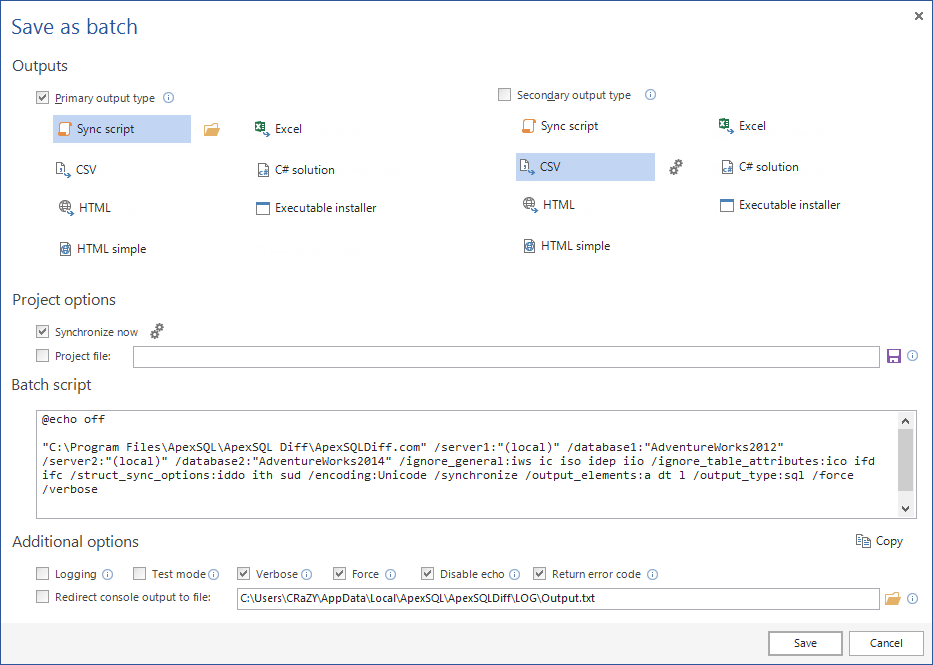
After everything is set up and reviewed, click the Save as batch button to create the batch script that can be used later for automatization and scheduling process:
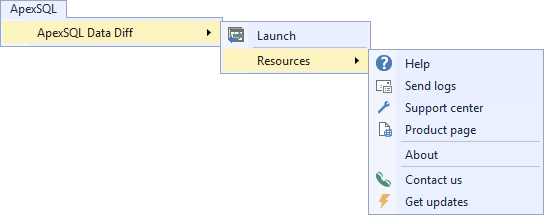
In addition to standalone application, ApexSQL Data Diff supports SQL Server Management Studio integration. Here is the main menu of ApexSQL Data Diff:
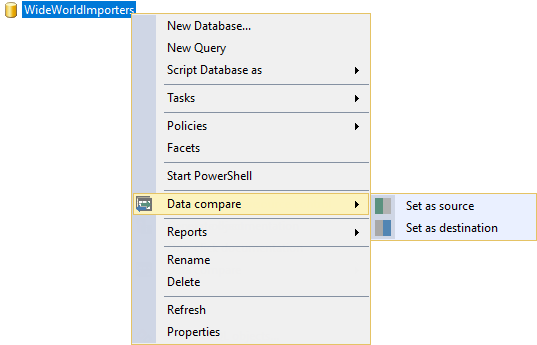
To set up comparison from SQL Server Management Studio, right-click a database from in Object Explorer:
After source or destination is chosen, the Data sources tab is shown:
Under the Options tab from SQL Server Management Studio, the same set of options can be set as in the standalone application before the starting the comparison process:
After everything is set up and the Compare button is clicked the comparison results will be shown in the Results grid of the standalone application.
April 4, 2017


