


Installation
ApexSQL Manage is SQL manage instance tool and as such is focused on four main areas:
- Instance discovery and inventory
- Health check and best practices rules enforcing
- Documentation
- Instance comparison and Instance snapshot creation
To install ApexSQL Manage, run its setup file where on the first step you will be greeted with the welcome screen:
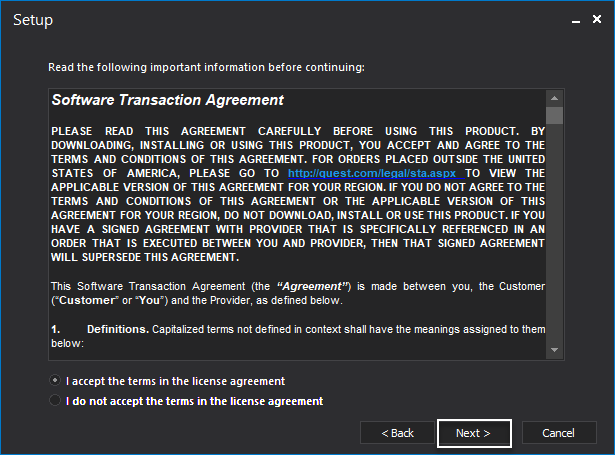
Following window displays the Software Transaction Agreement where the user must tick I accept the terms in the license agreement radio button followed by Next to continue with the installation process:
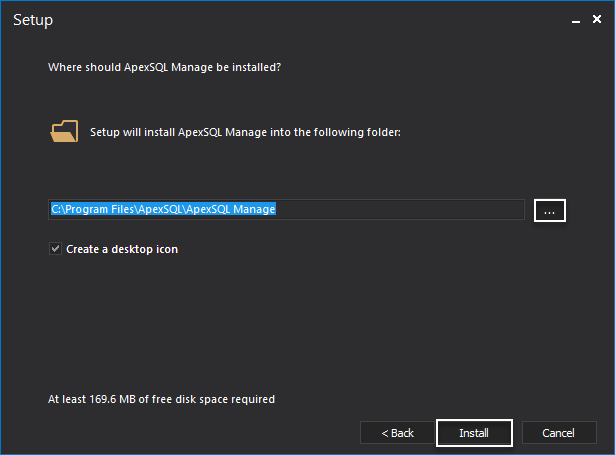
The next installation step offers the possibility to choose the installation folder for our SQL manage instance tool. Additionally, there is an option to create a desktop icon. Click the Install button to finish the installation:
Now that we have successfully installed ApexSQL Manage. To immediately run the SQL manage instance tool after installation setup, make sure that Run ApexSQL Manage checkbox is marked and click the Close button:
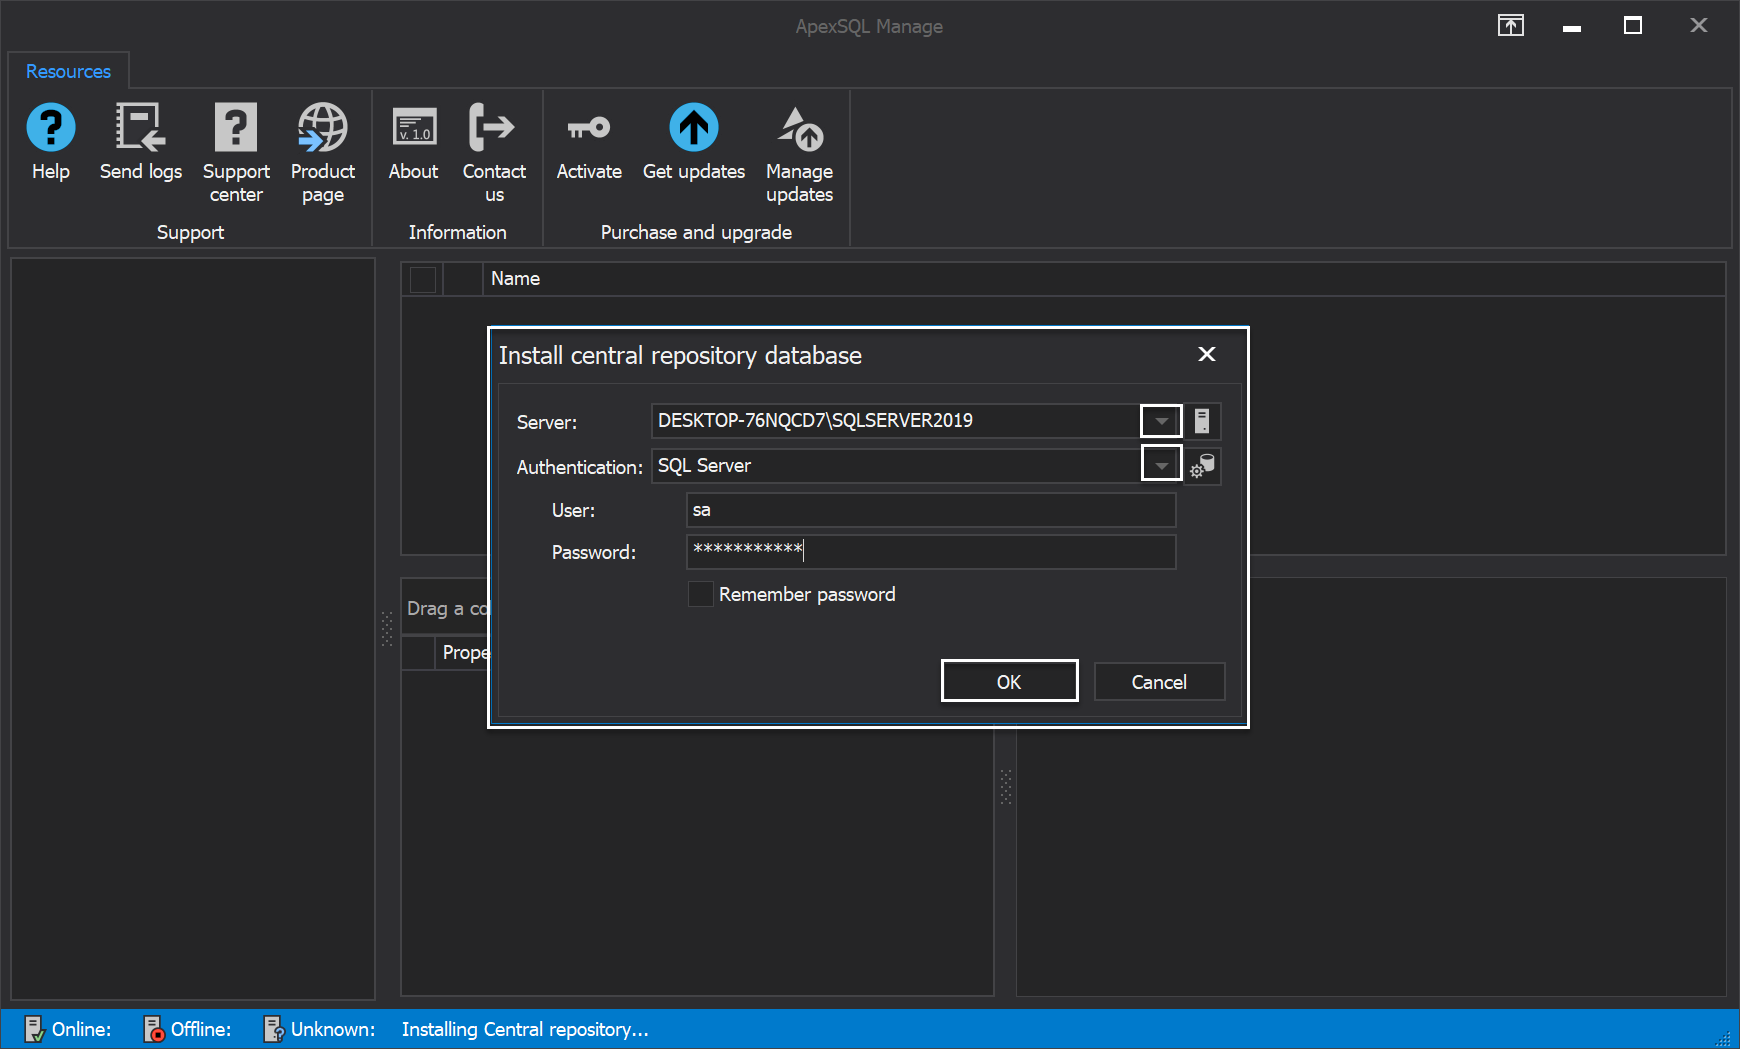
Immediately after starting our SQL manage instance tool, we are prompted to choose where to install the Central repository database (CRD).
The CRD is a database installed on a user-specified server with a purpose to store the information needed for communication between the User Interface and the monitoring agent service. Login credentials for connecting to various monitored SQL Servers are also stored in it. One central repository database is required for storing all information, i.e. to manage any number of servers. Please note that CRD needs to be installed on specified SQL Server instance:
ApexSQL Manage main menu consists of the seven tabs, all in the order listed below:
- Home
- Inventory
- Health
- Comparison
- Documentation
- Configuration
- Resources
Home tab
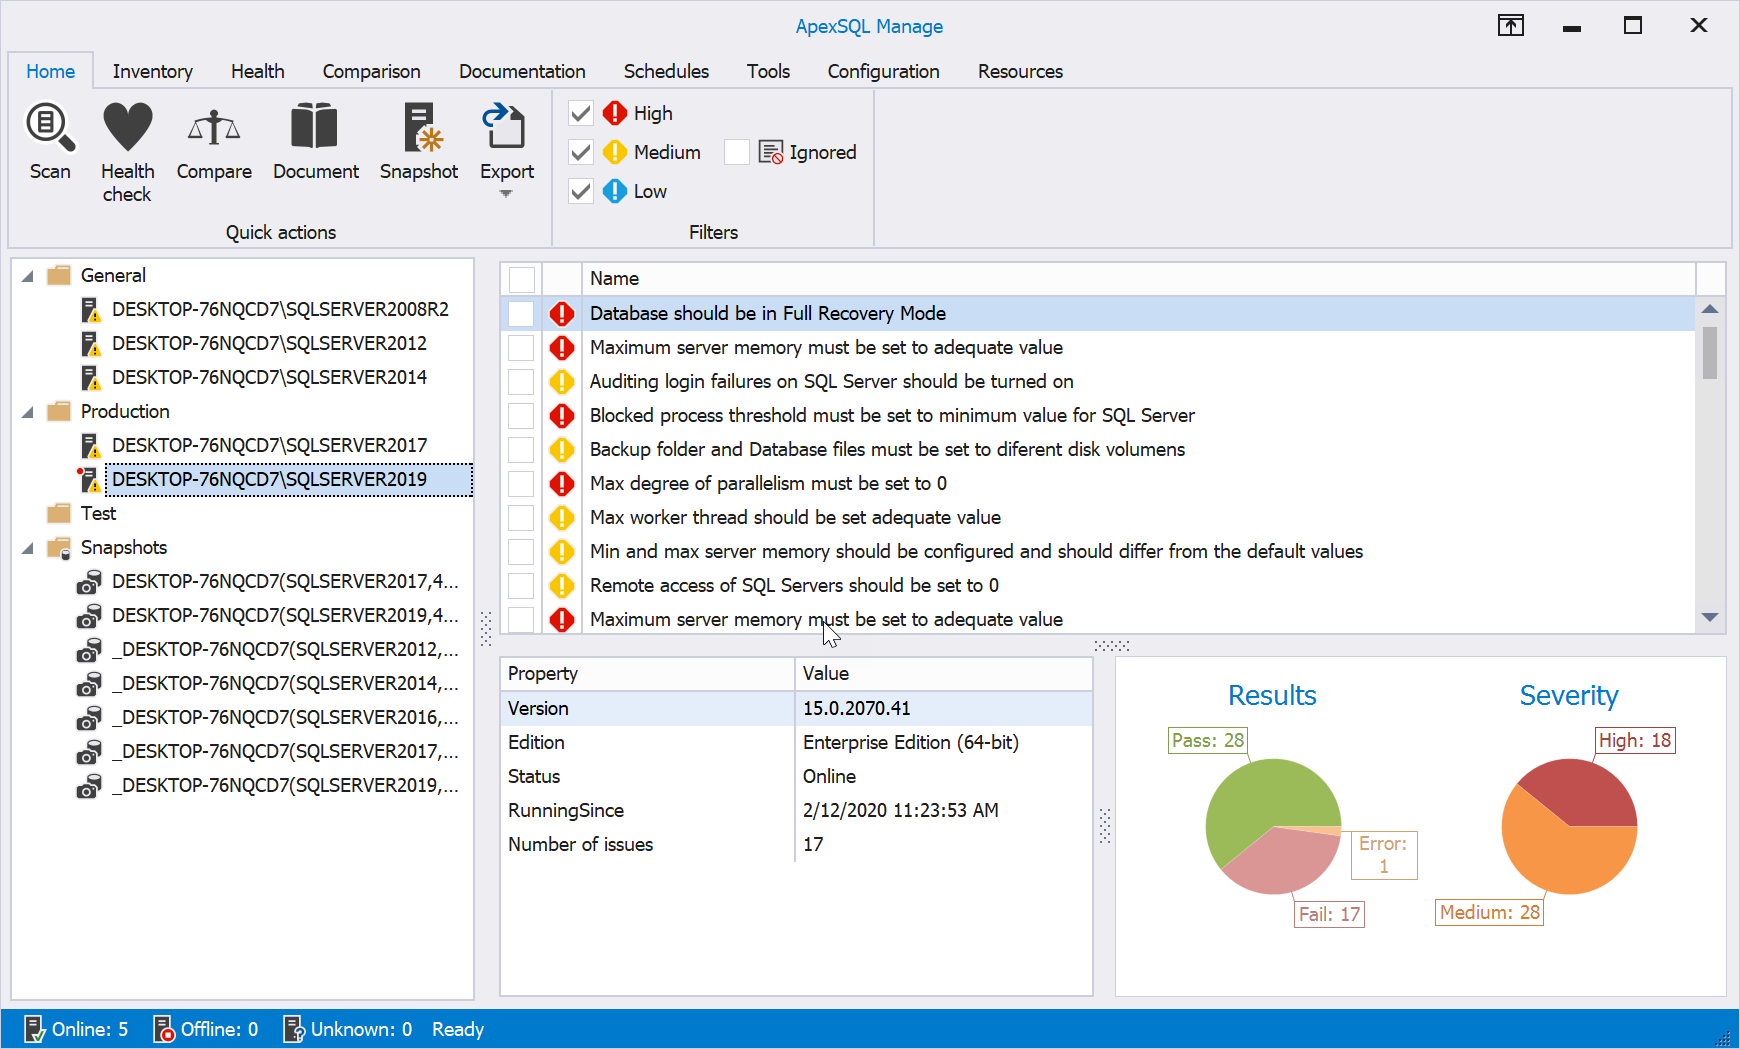
The Home tab of SQL manage instance tool separates its tasks into two categories: Quick actions and Filters:

Quick actions category allows user to quickly execute preferred action based on previously configured settings under the Quick settings options window from the Configuration tab (more on this later)
In other words, tasks from Quick actions category sum up tool’s wide broad potential into just one group allowing simpler and more straightforward user experience:

Here is the Home tab in light theme:
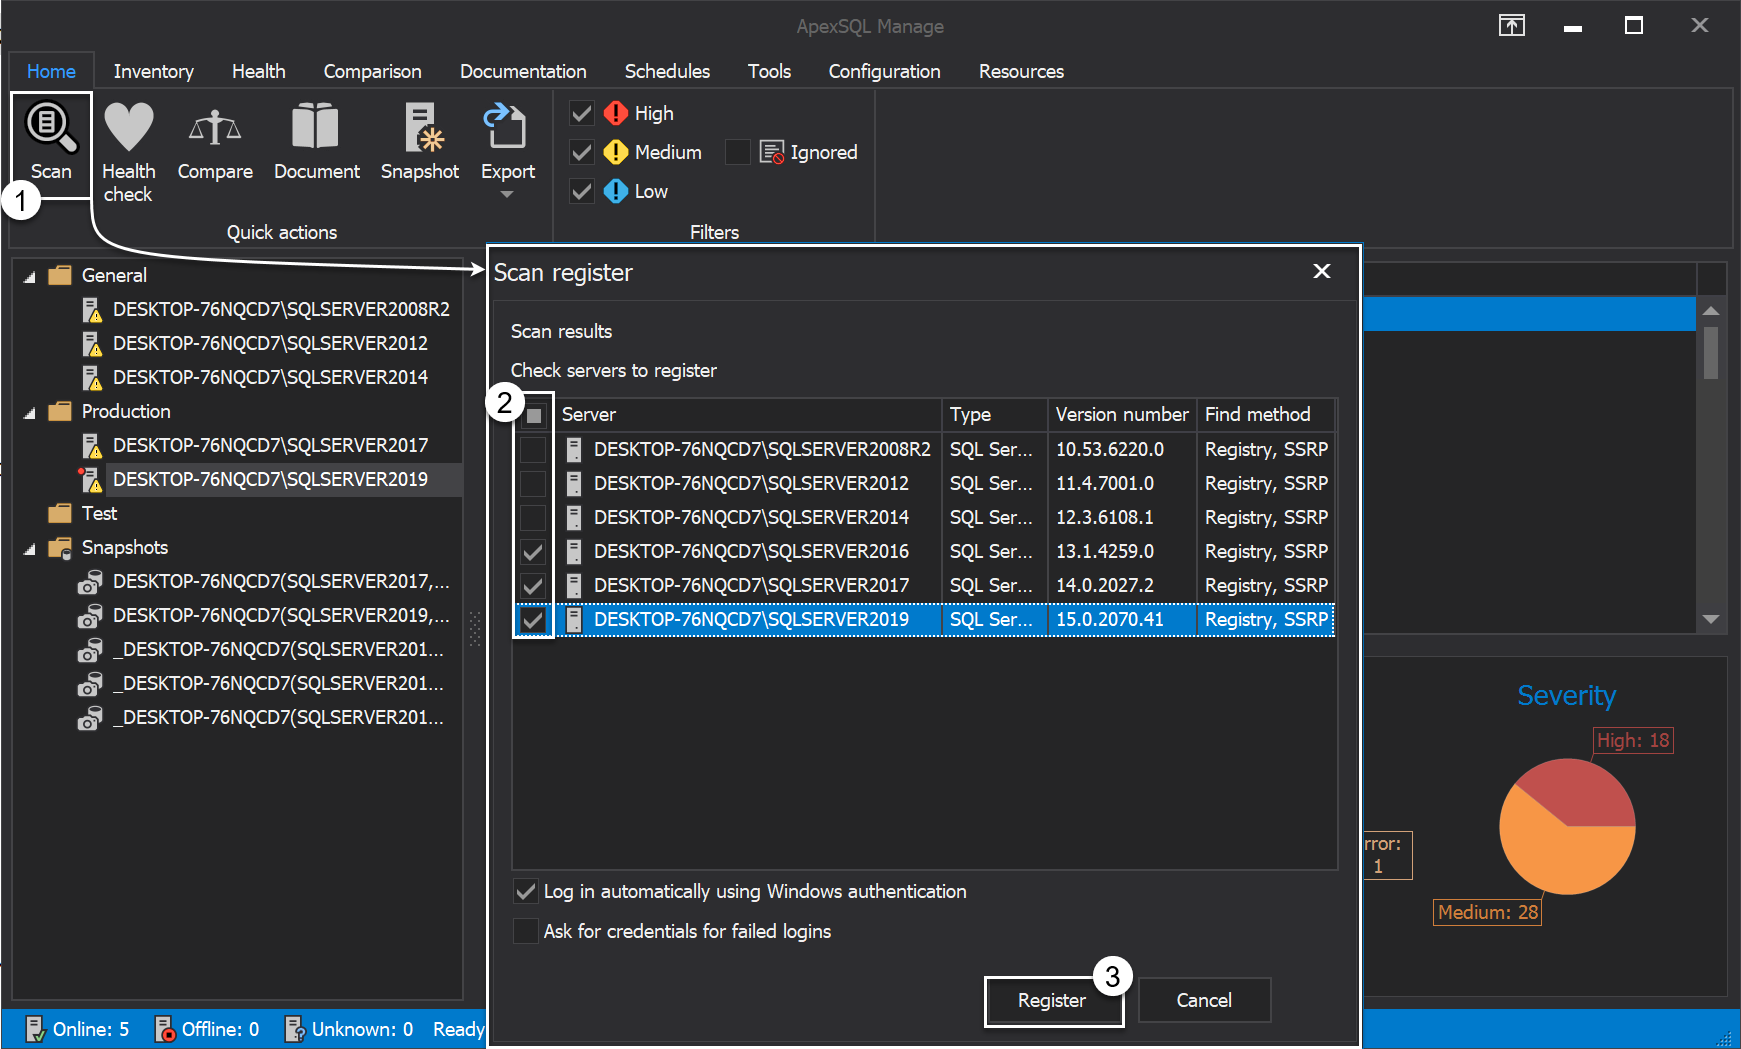
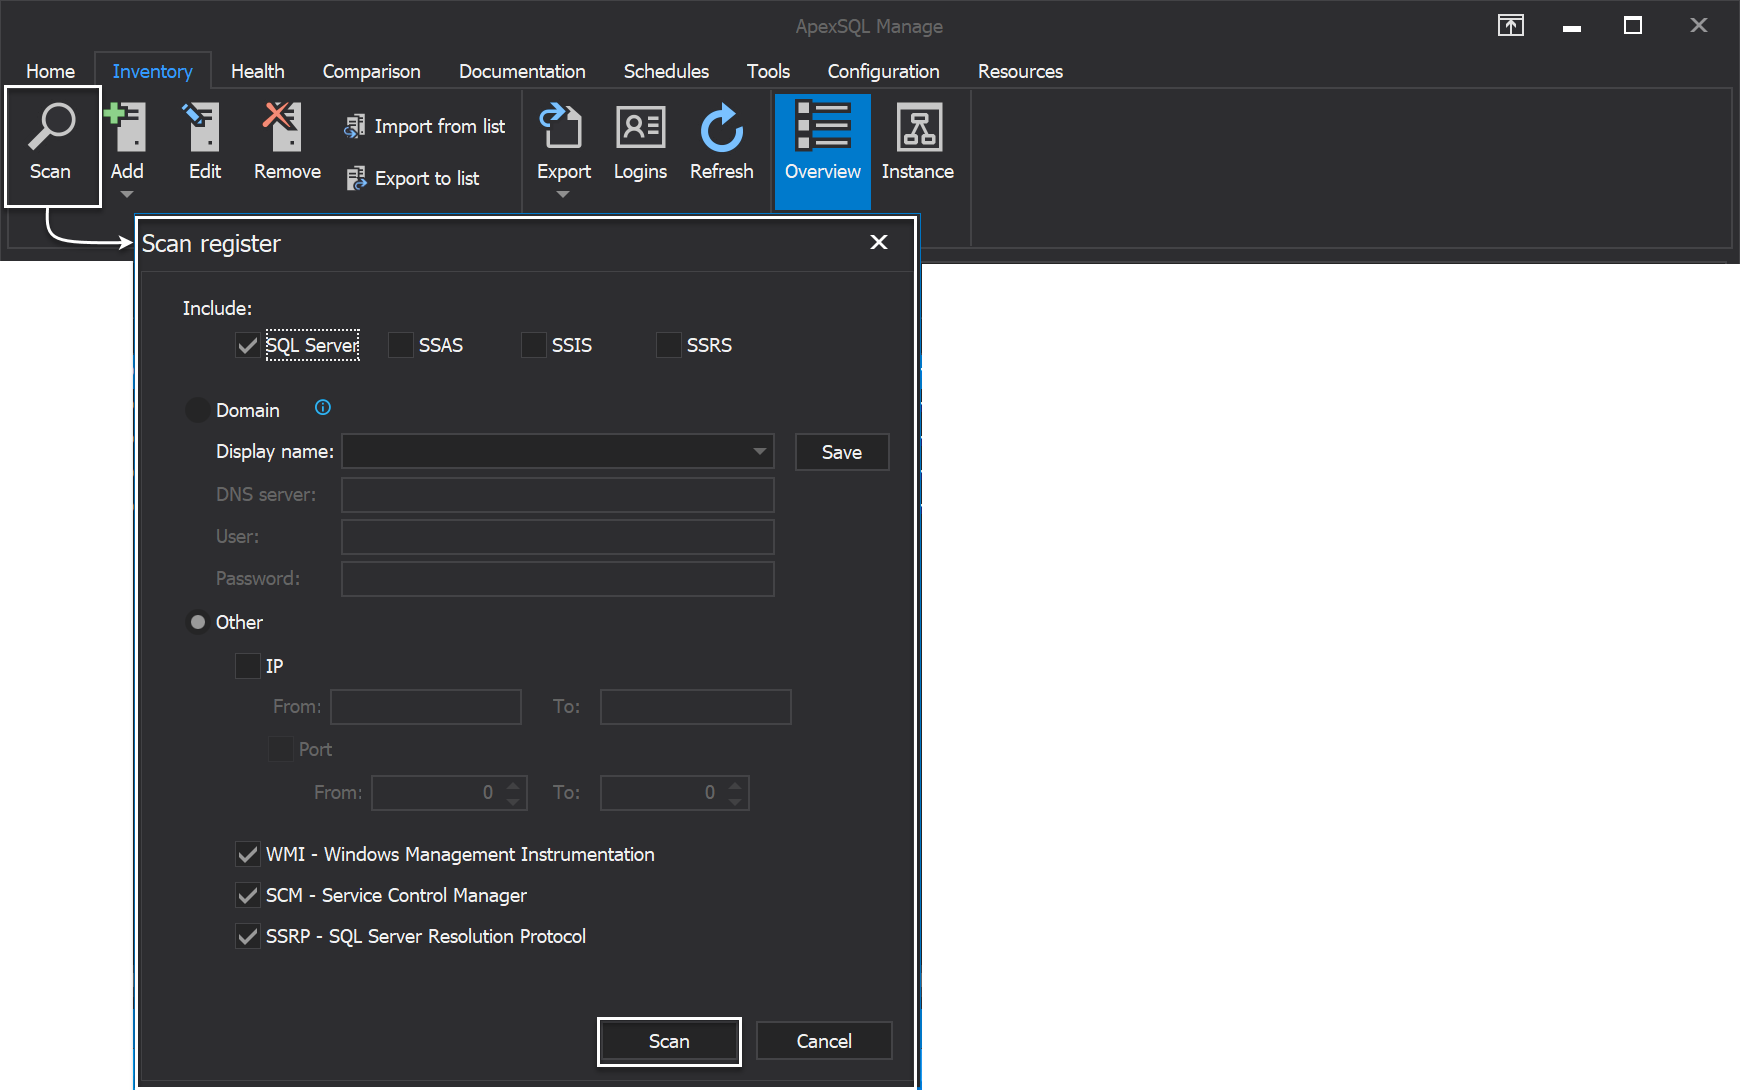
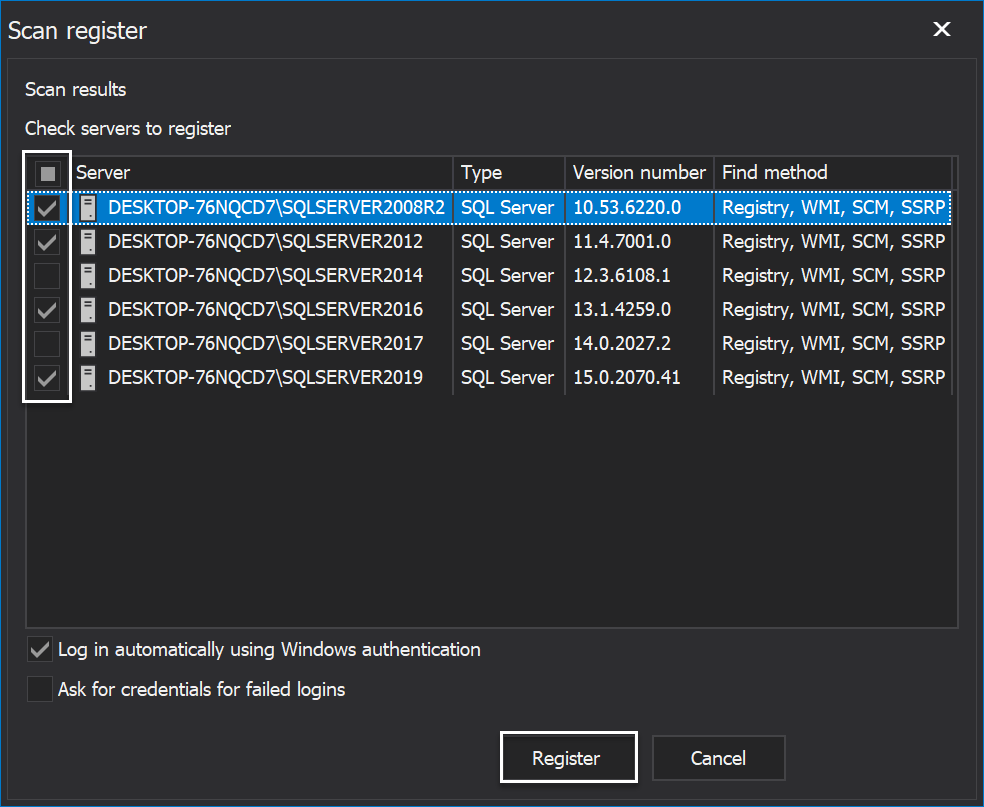
By clicking on the Scan button user performs a quick scan, with previously defined scan settings, and afterward is prompted with Scan register window where scan results are displayed listing found SQL Server instances and its services that user can then select to register:
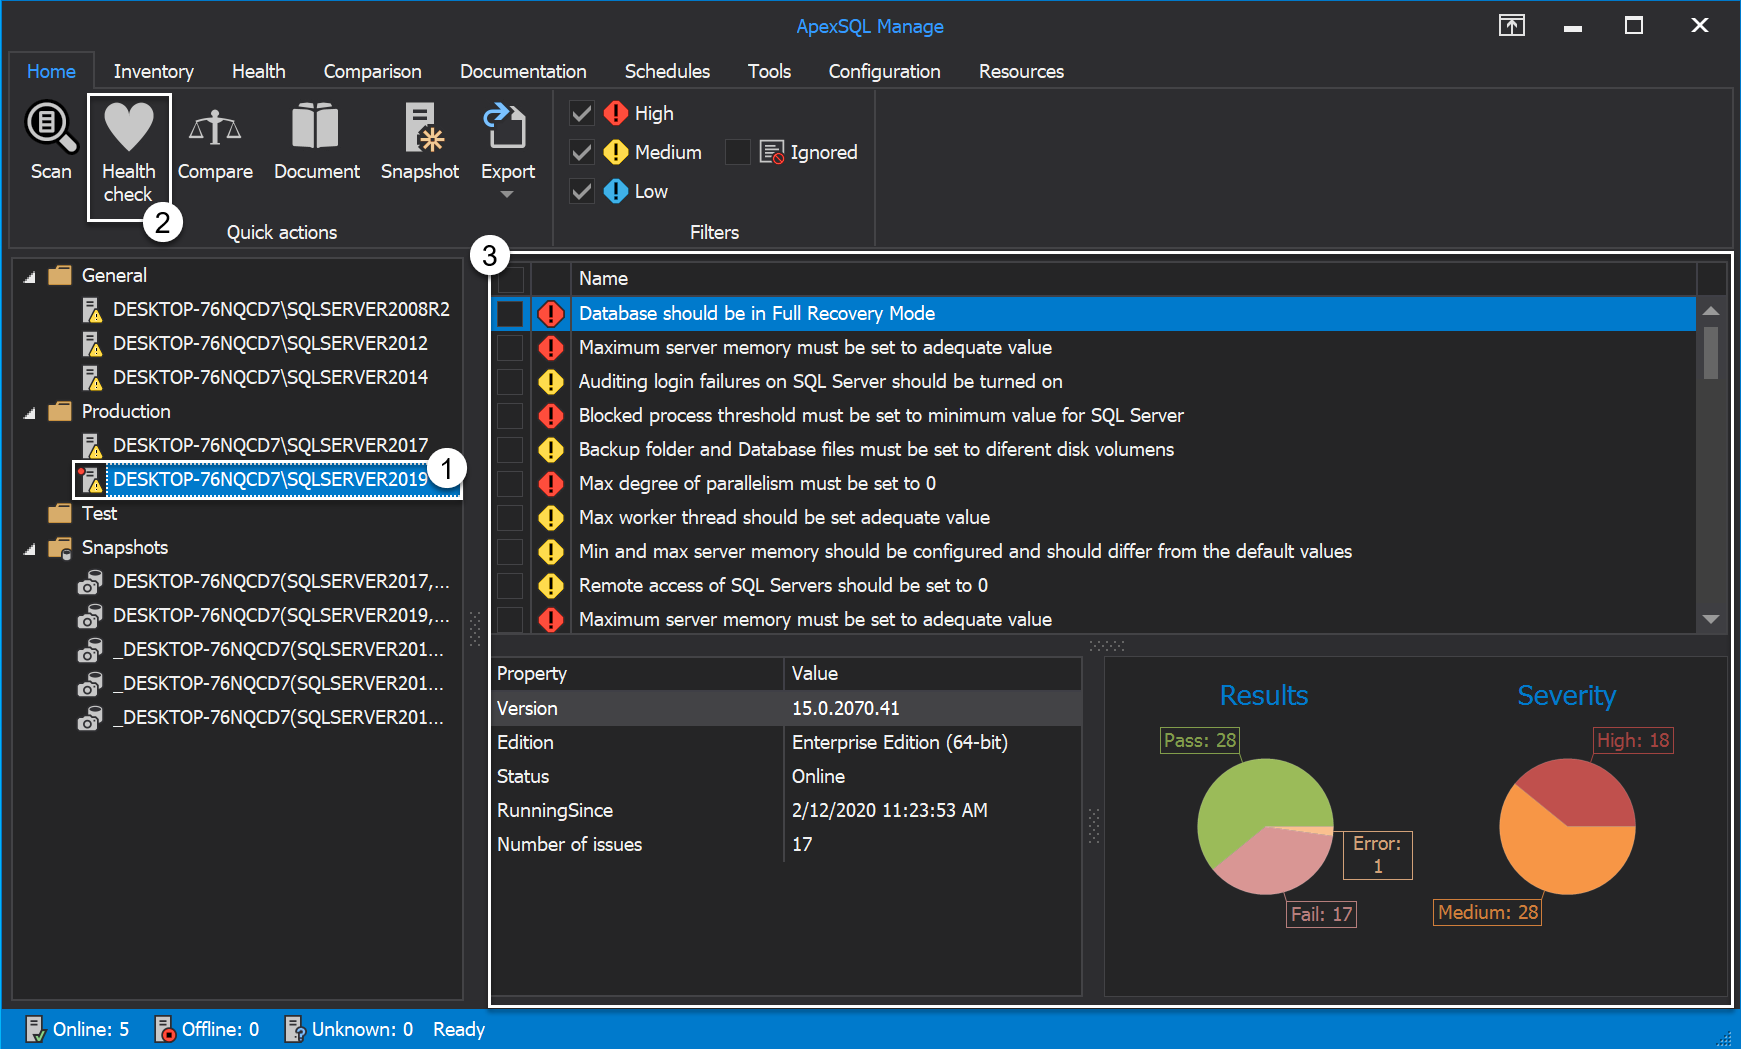
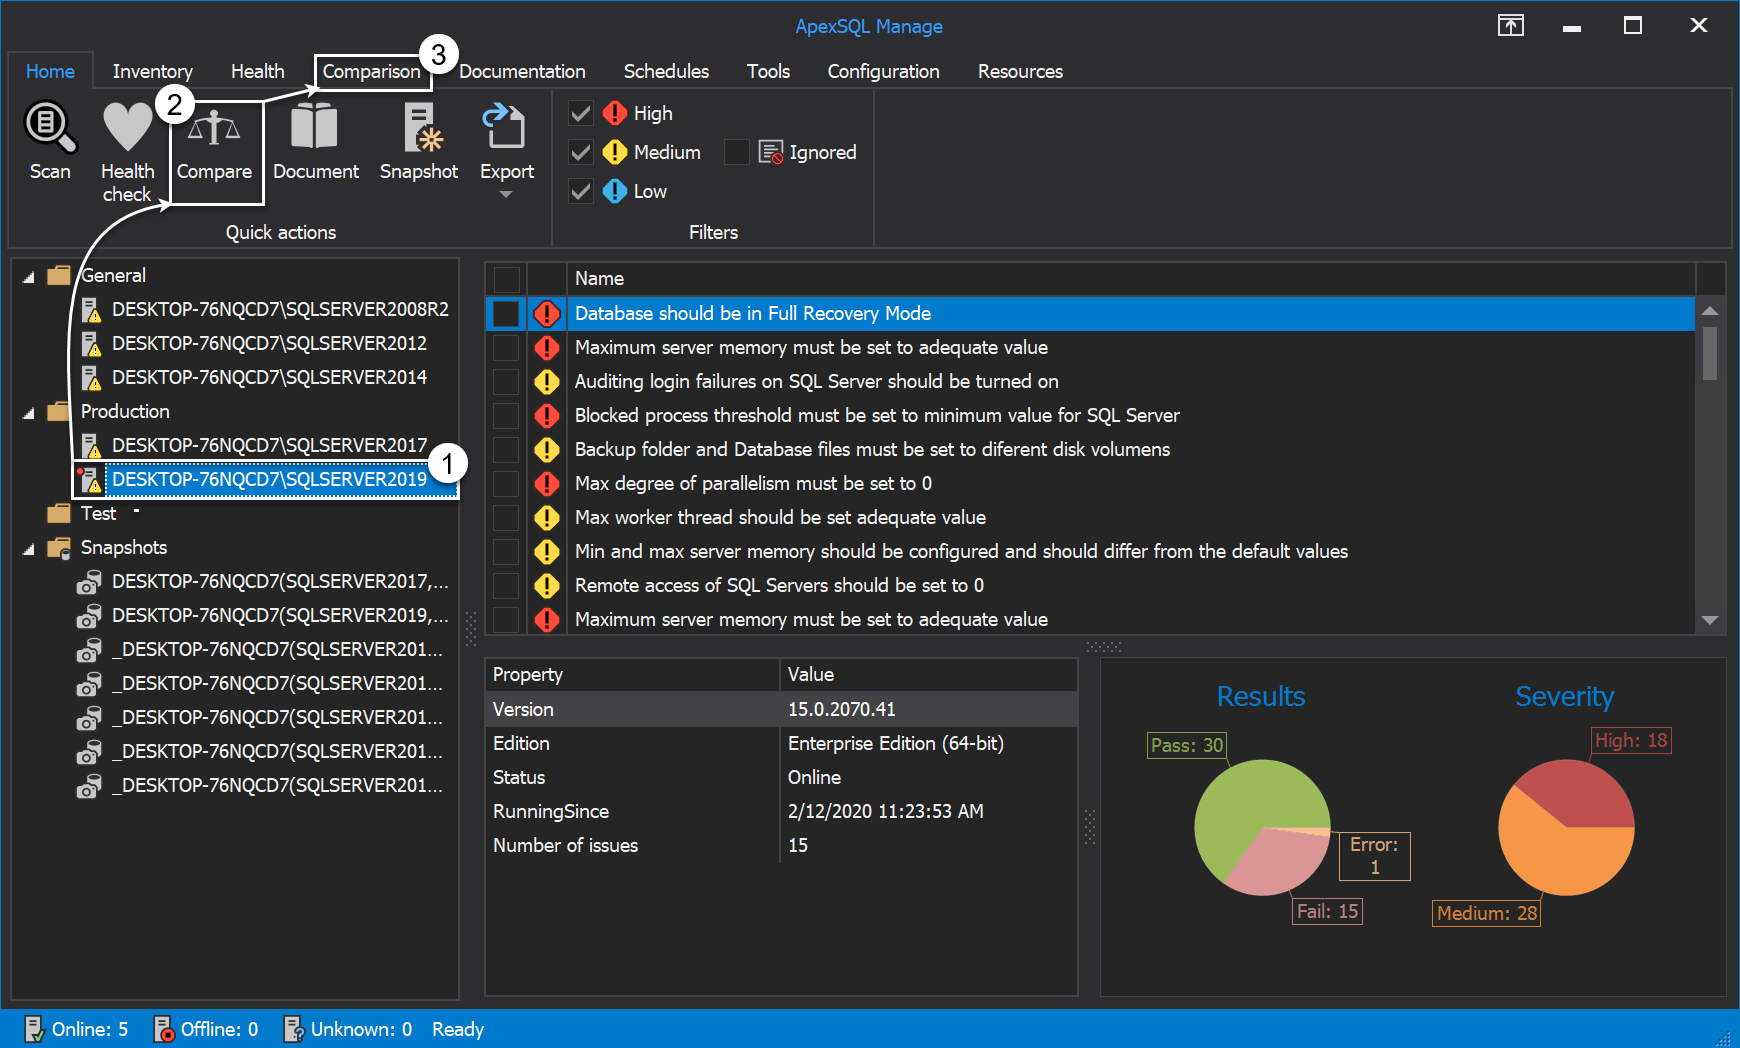
Health check option runs health check rules against SQL Server instance previously selected from the server panel on the left side of the Home tab:
Compare option quickly execute comparison between, from the server panel, selected SQL Server instance or its snapshot with SQL Server instance that we, by default, chose to be a source in Quick settings window under the Configuration tab. Here, only, by default, chosen filters in the same window will be included in this comparison:
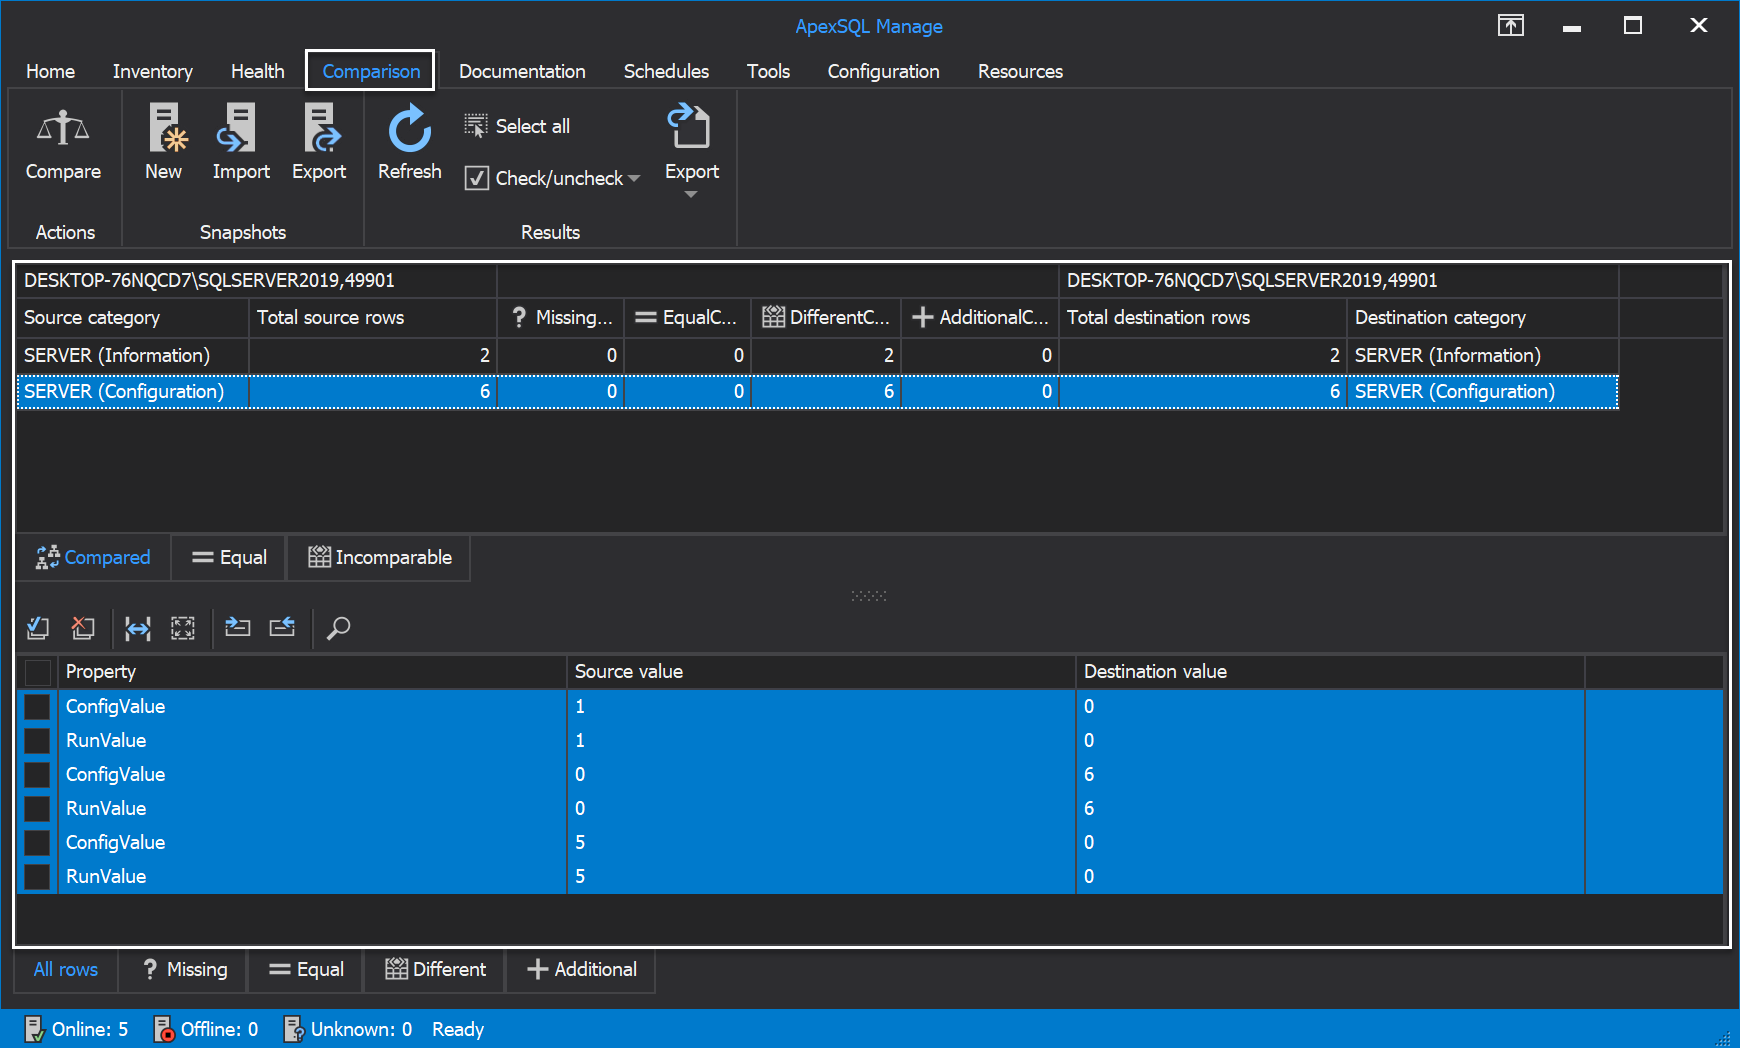
Immediately after quick comparison is finished, we will be taken to the Comparison tab so we can view comparison results from its grid:
The Document option under the Home tab of SQL manage instance tool creates quick documentation for a selected SQL Server instance or it’s snapshot-based on previously configured documentation settings:
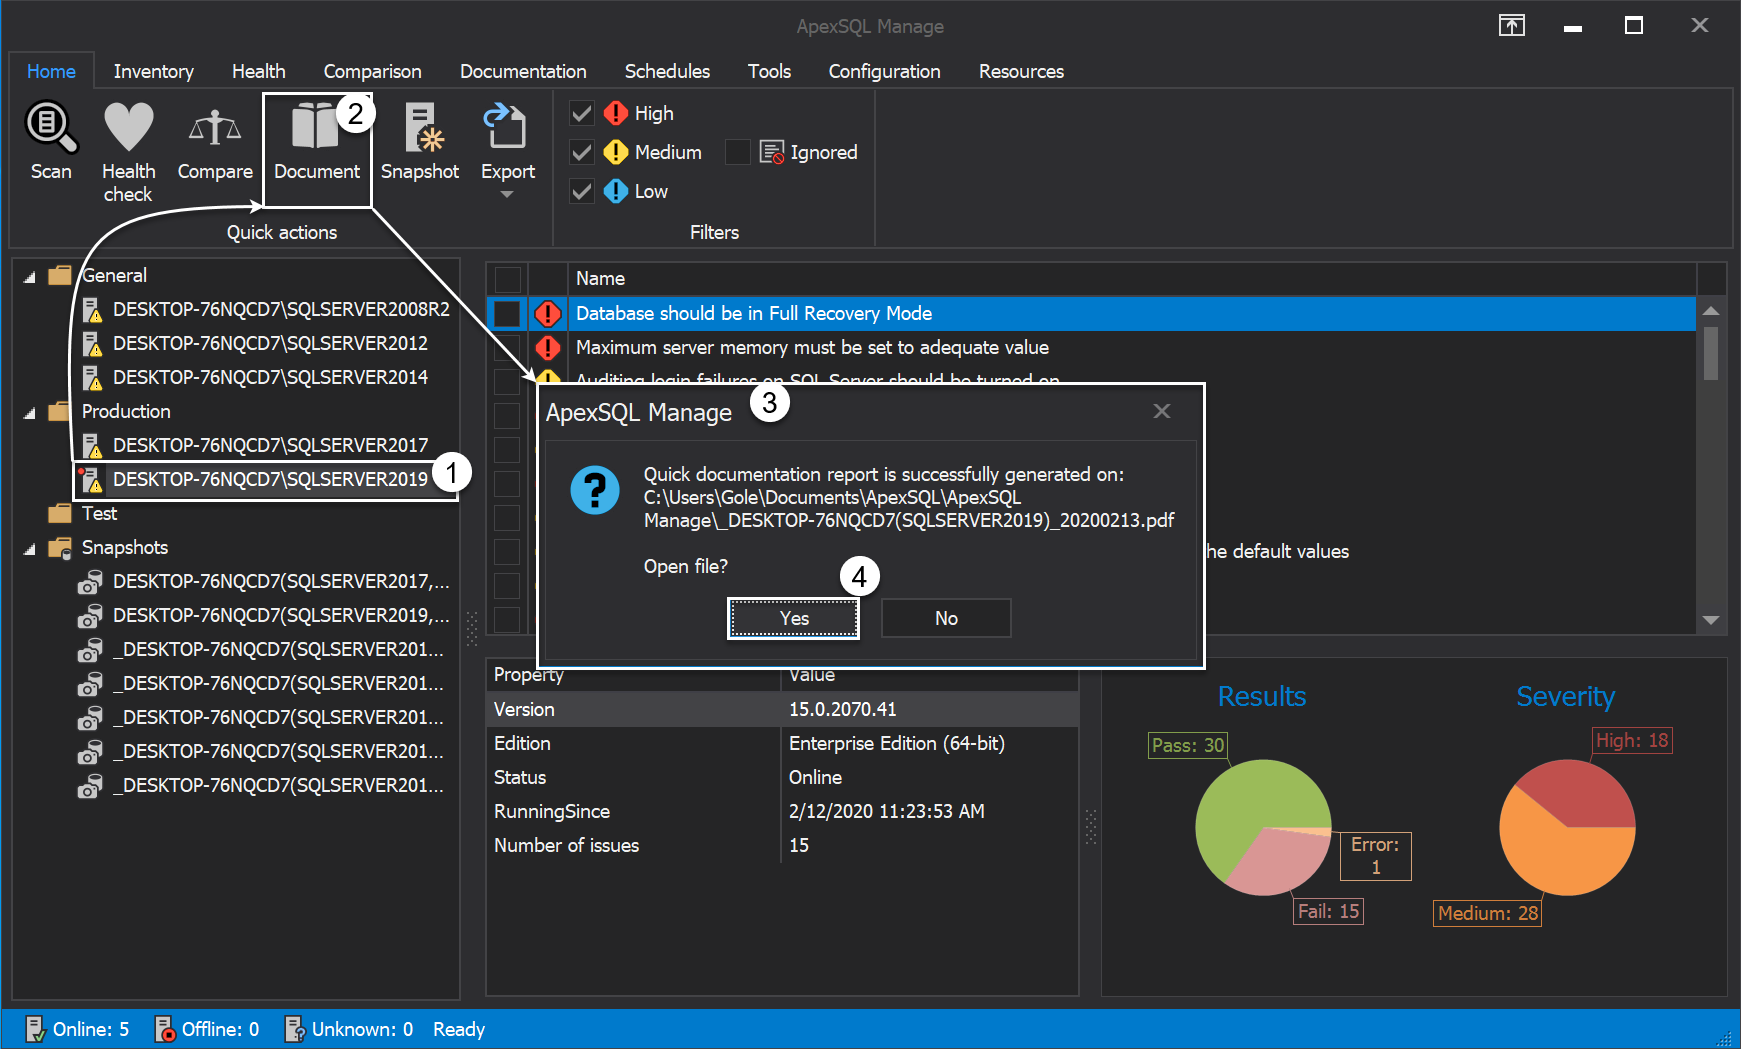
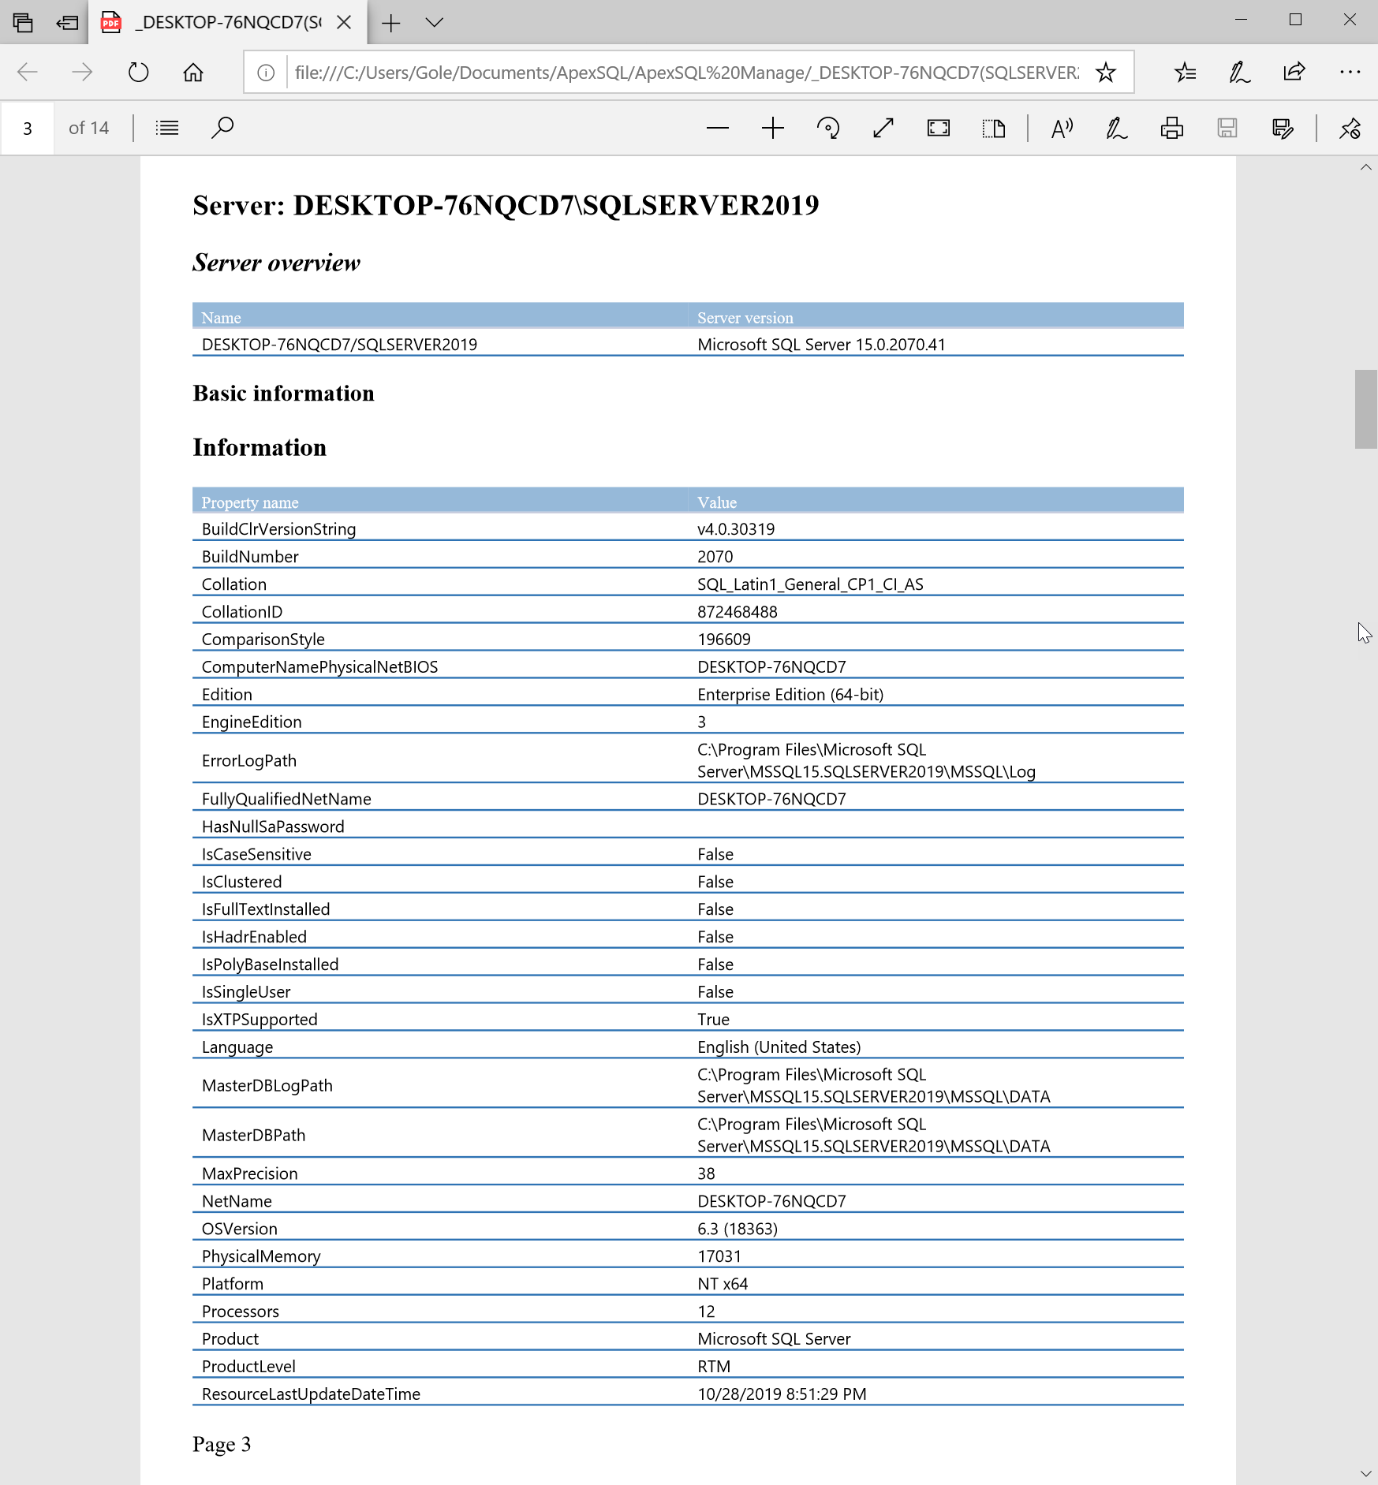
Immediately upon generating a document, we will be asked to open it. The end result will look like this:
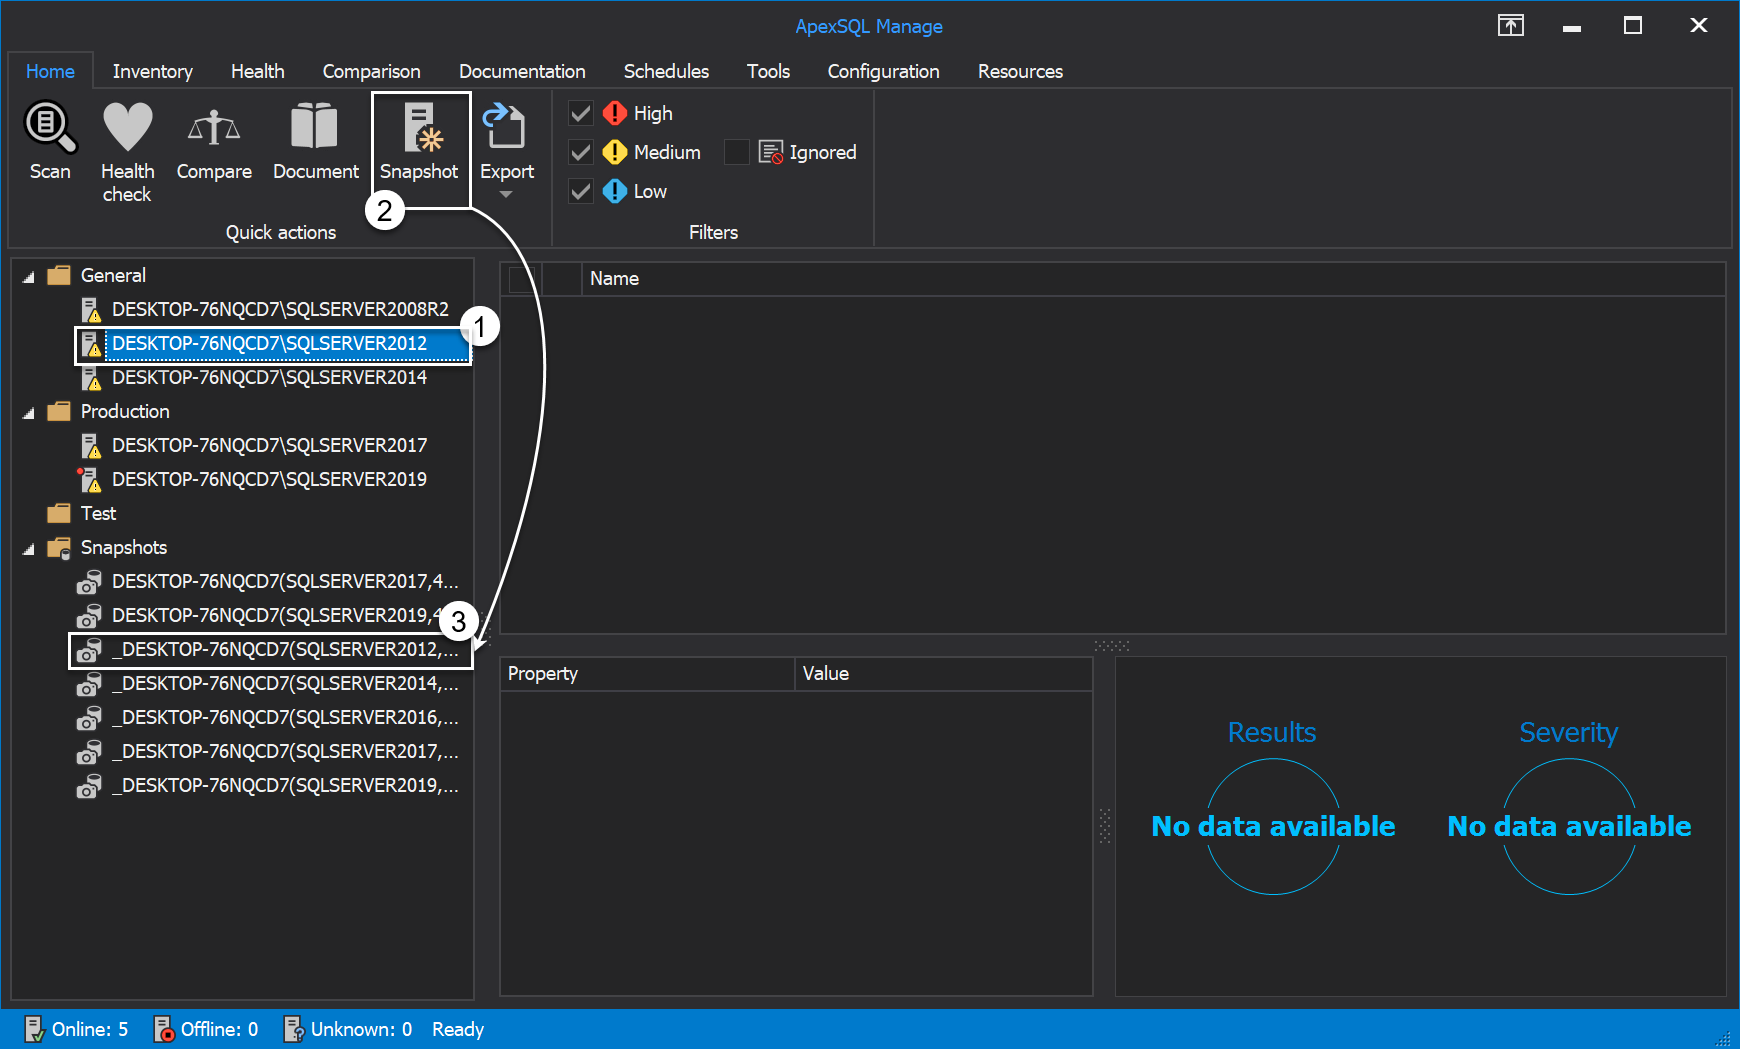
By clicking on the Snapshot button under the Quick actions category one can create a quick snapshot for selected SQL Server instance in the server panel area:
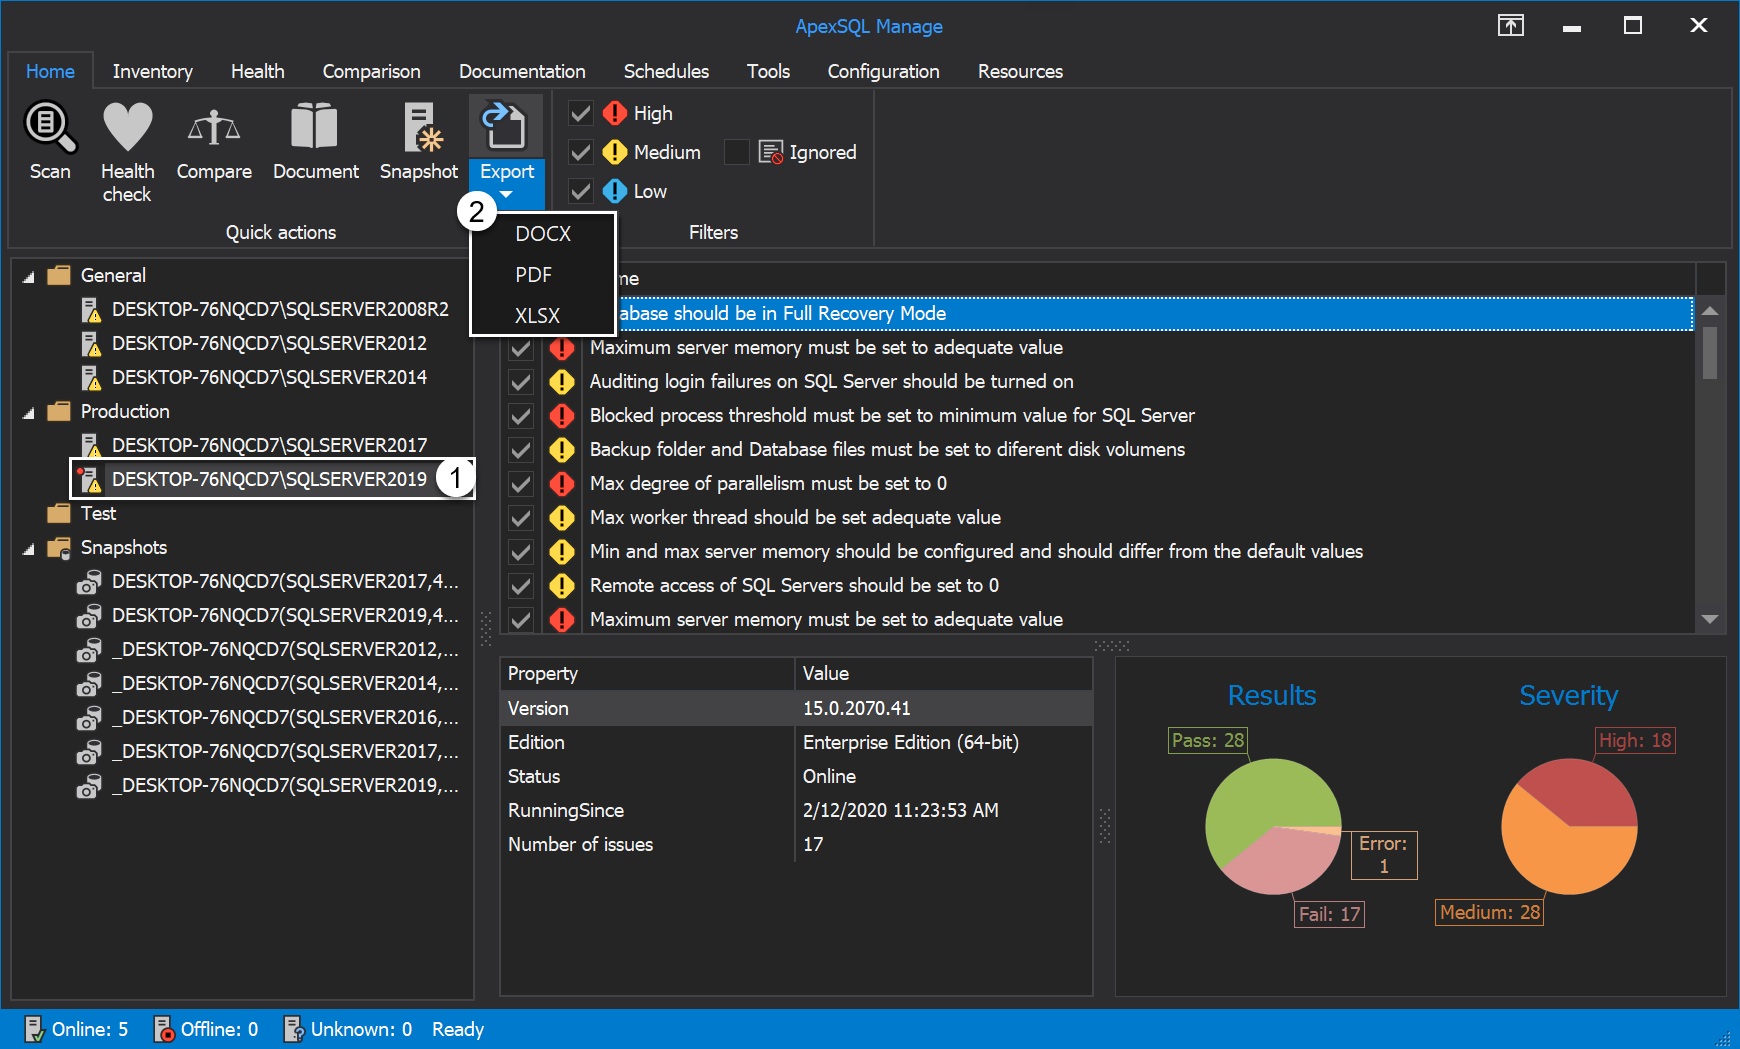
The Export option exports from the grid selected results of executed health check rules for SQL Server instance. Those results can be exported to DOCX, PDF and XLSX file formats:
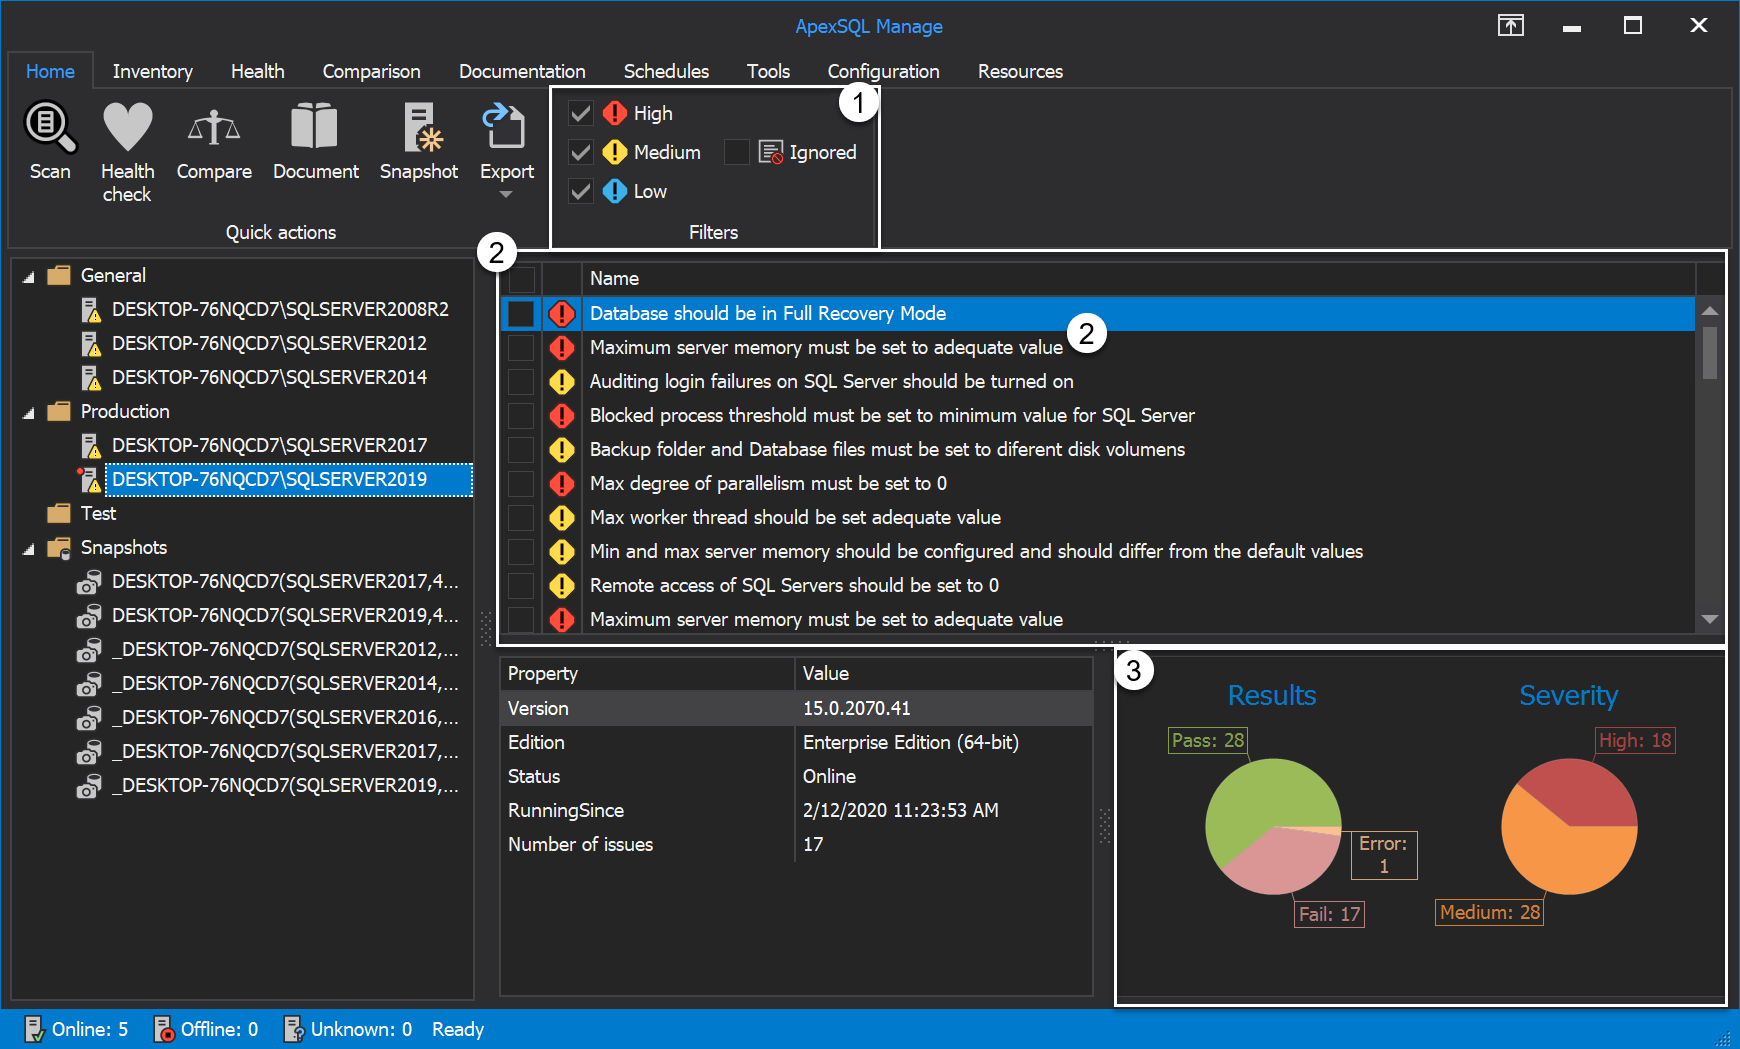
Under the Filters category of the Home tab presented are the High, Medium, Low and Ignored filters and each of them filters the severity of health check results from the grid. Additionally, same filters apply on the small graph in the bottom left corner of the Home tab that is displaying results and severity of performed health check:
Inventory tab

To scan in search for SQL Server instances and its services on local machine one must click on the Scan button and choose preferred scan settings in Scan register window:
After the scan is performed, the Scan register window displays found SQL Server instances in the form of a list:
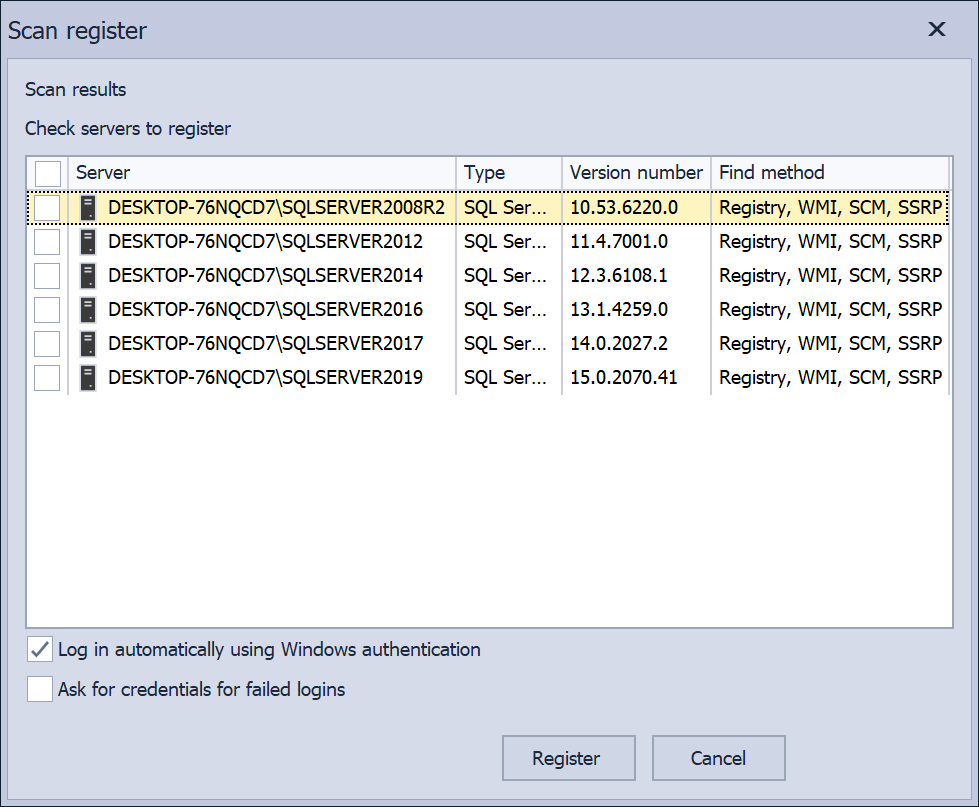
The Scan register window of SQL manage instance tool in blue theme:
To add SQL Server instance manually or from the last performed scan, click on the Add button where are displayed, the mentioned, two options to choose from:

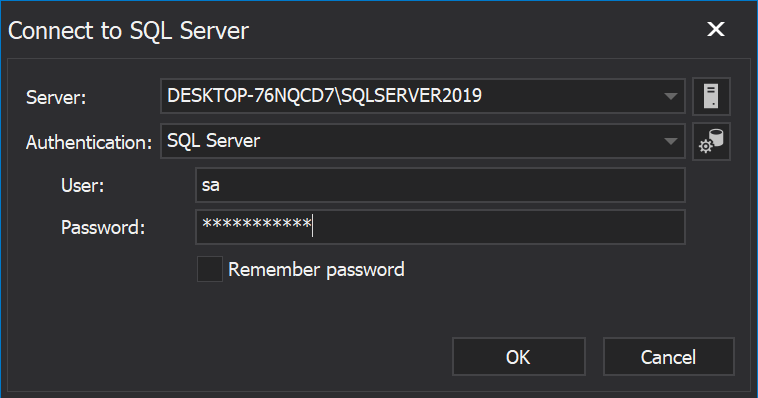
By selecting the Add manually option, the Connect to SQL Server dialog is shown and manually the instance from the Server drop-down list can be added.
Additionally, one can choose the authentication type, enter the credentials and click OK:
The Edit button edits the connections of previously added SQL Servers and Remove button removes added SQL Servers:

The Import from list option imports SQL Server instances from the previously saved list and Export to list option exports selected SQL Servers from the grid:

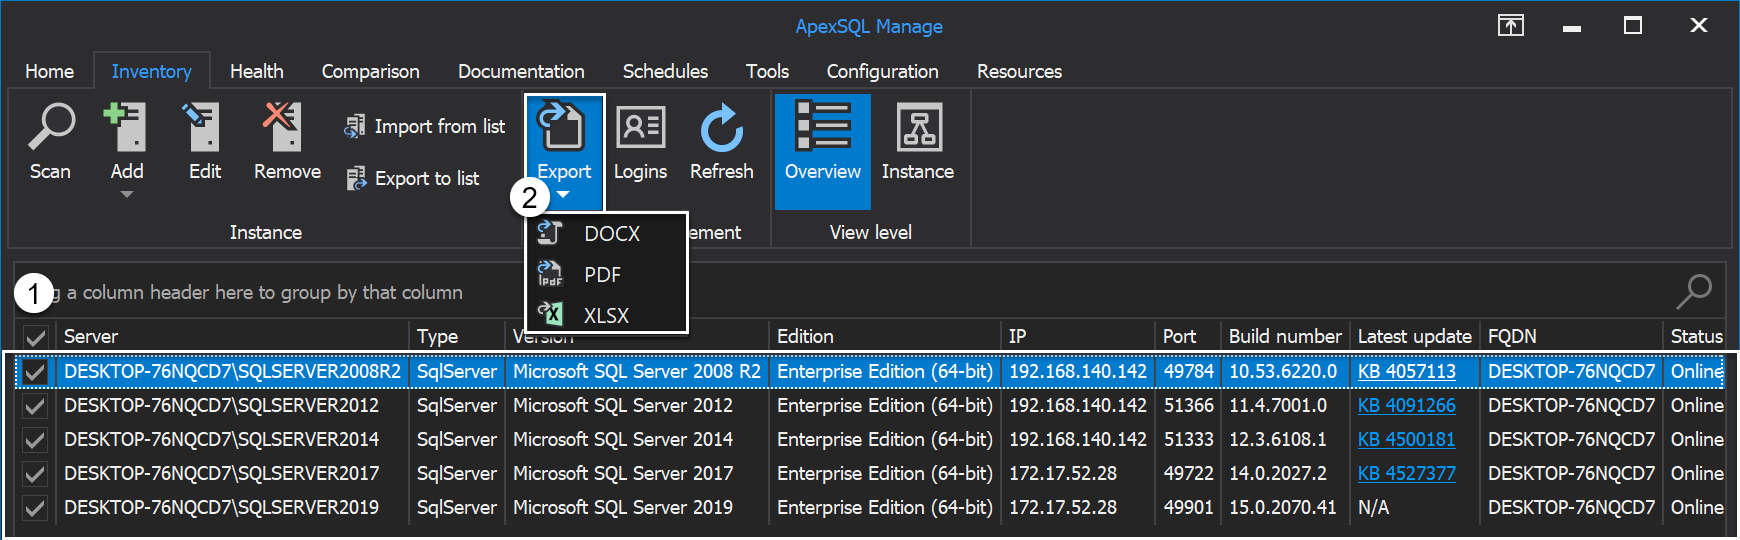
Additionally, there is a neat option to export selected SQL Server instances to DOCX, PDF and XLSX file formats:
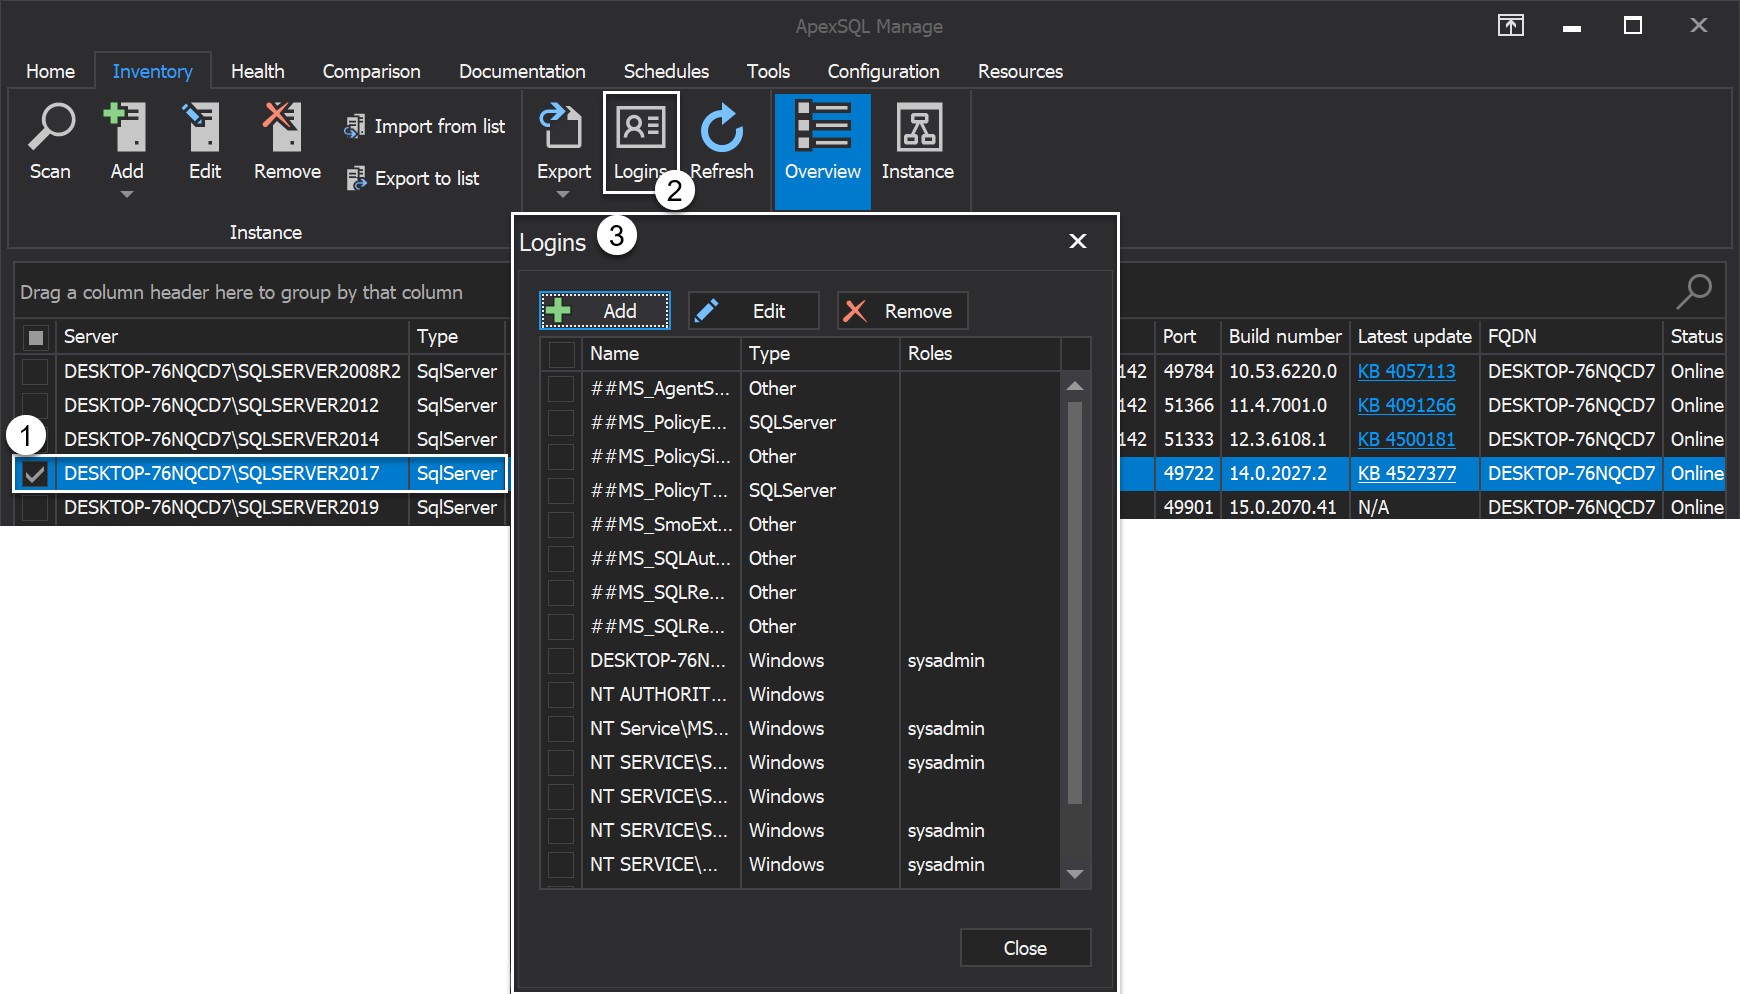
Logins button manage logins for selected SQL Server instance from the grid:
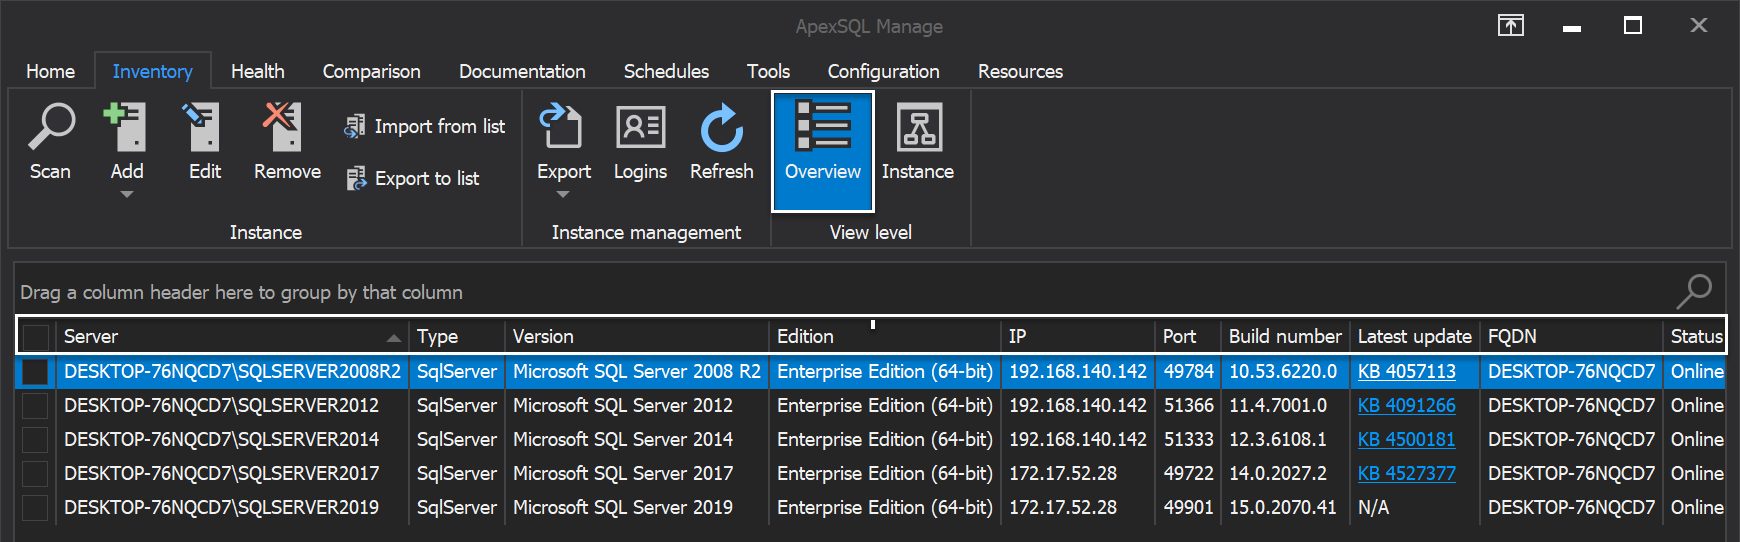
There are two different view levels under the Inventory tab of SQL manage instance tool: Overview and Instance view:

Overview is by default selected view level and it presents following details for registered SQL Server instance: its name, version, edition, IP port, build number, its latest update info and link to the Microsoft official site with details of it, etc.:
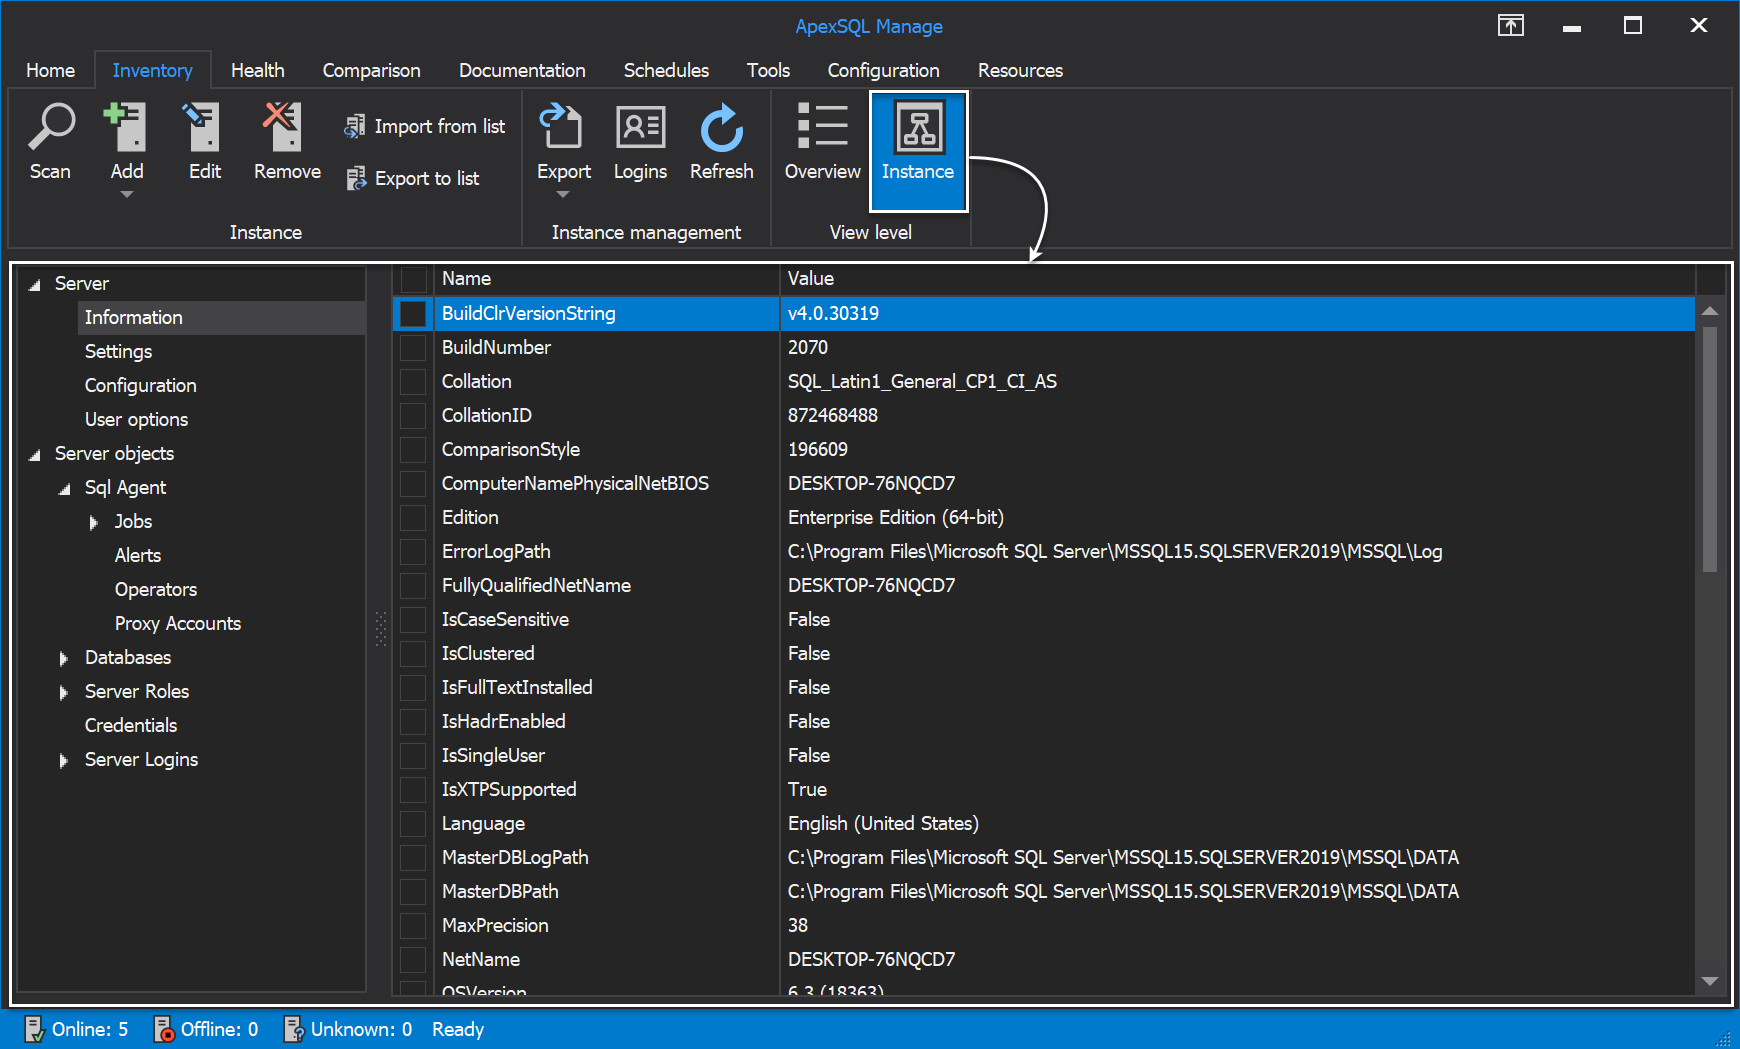
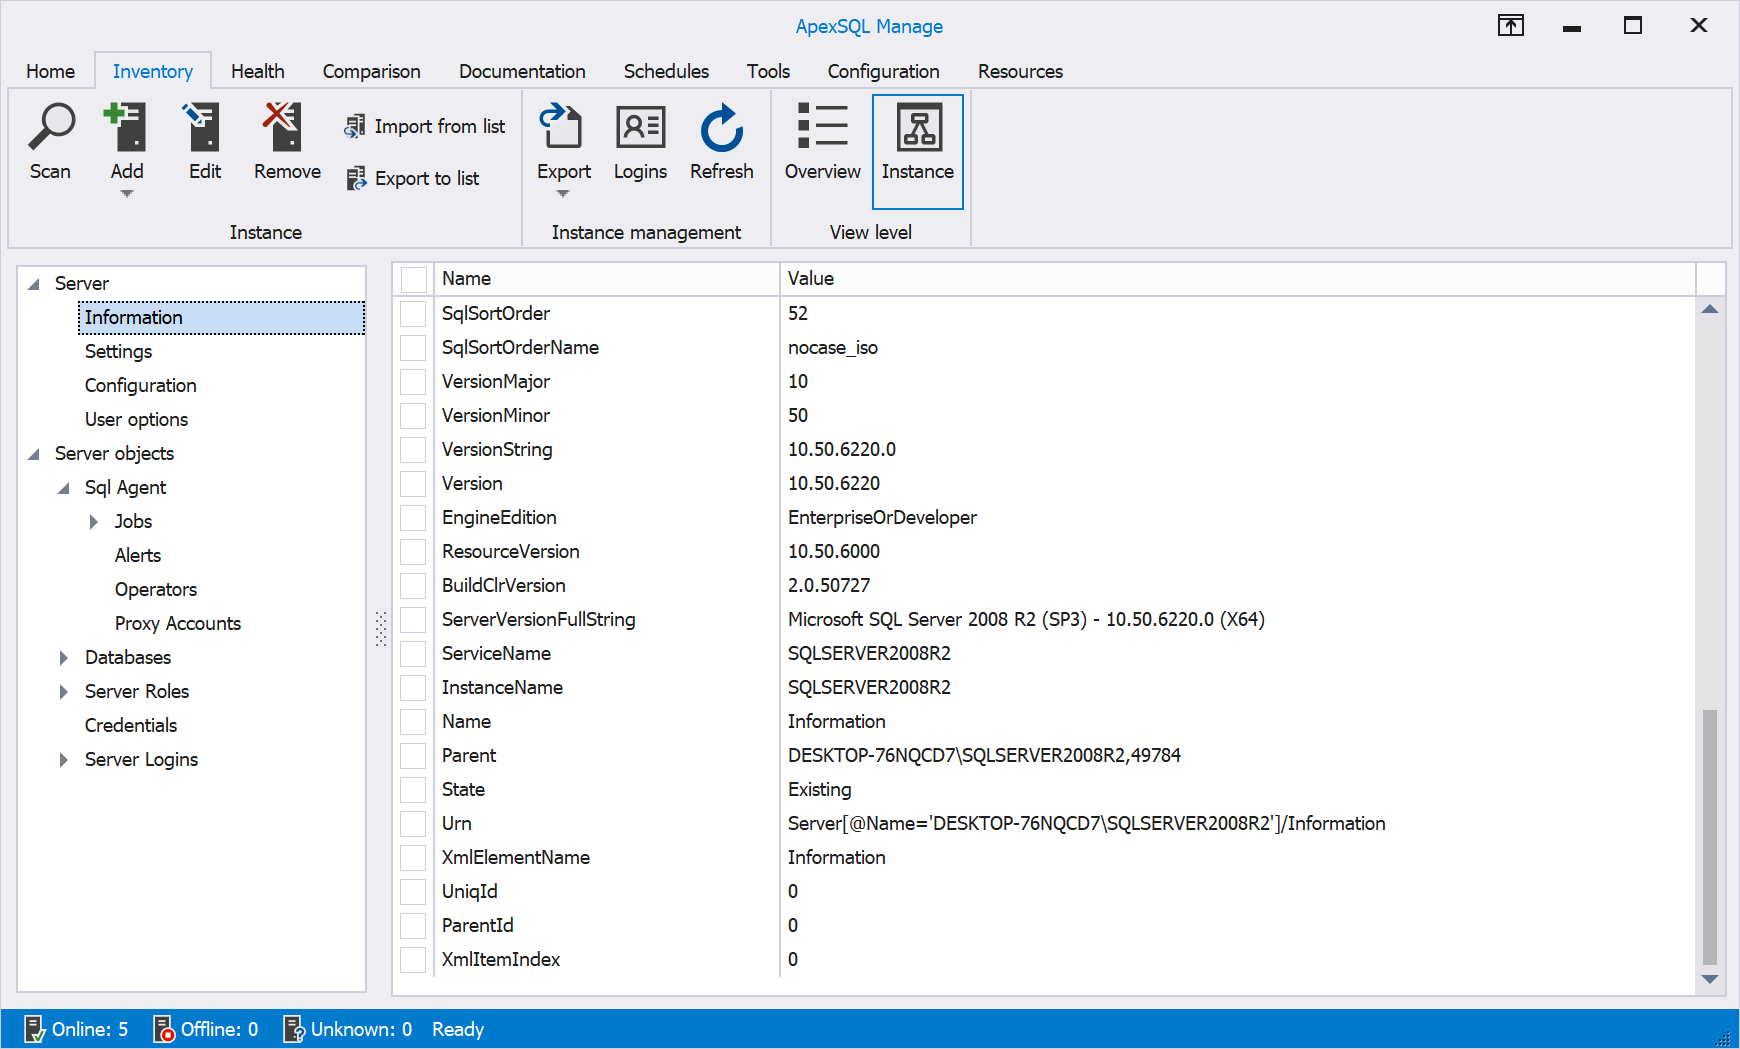
Instance view level shows instance details for selected SQ Server:
For those who prefer the light theme:
Health tab
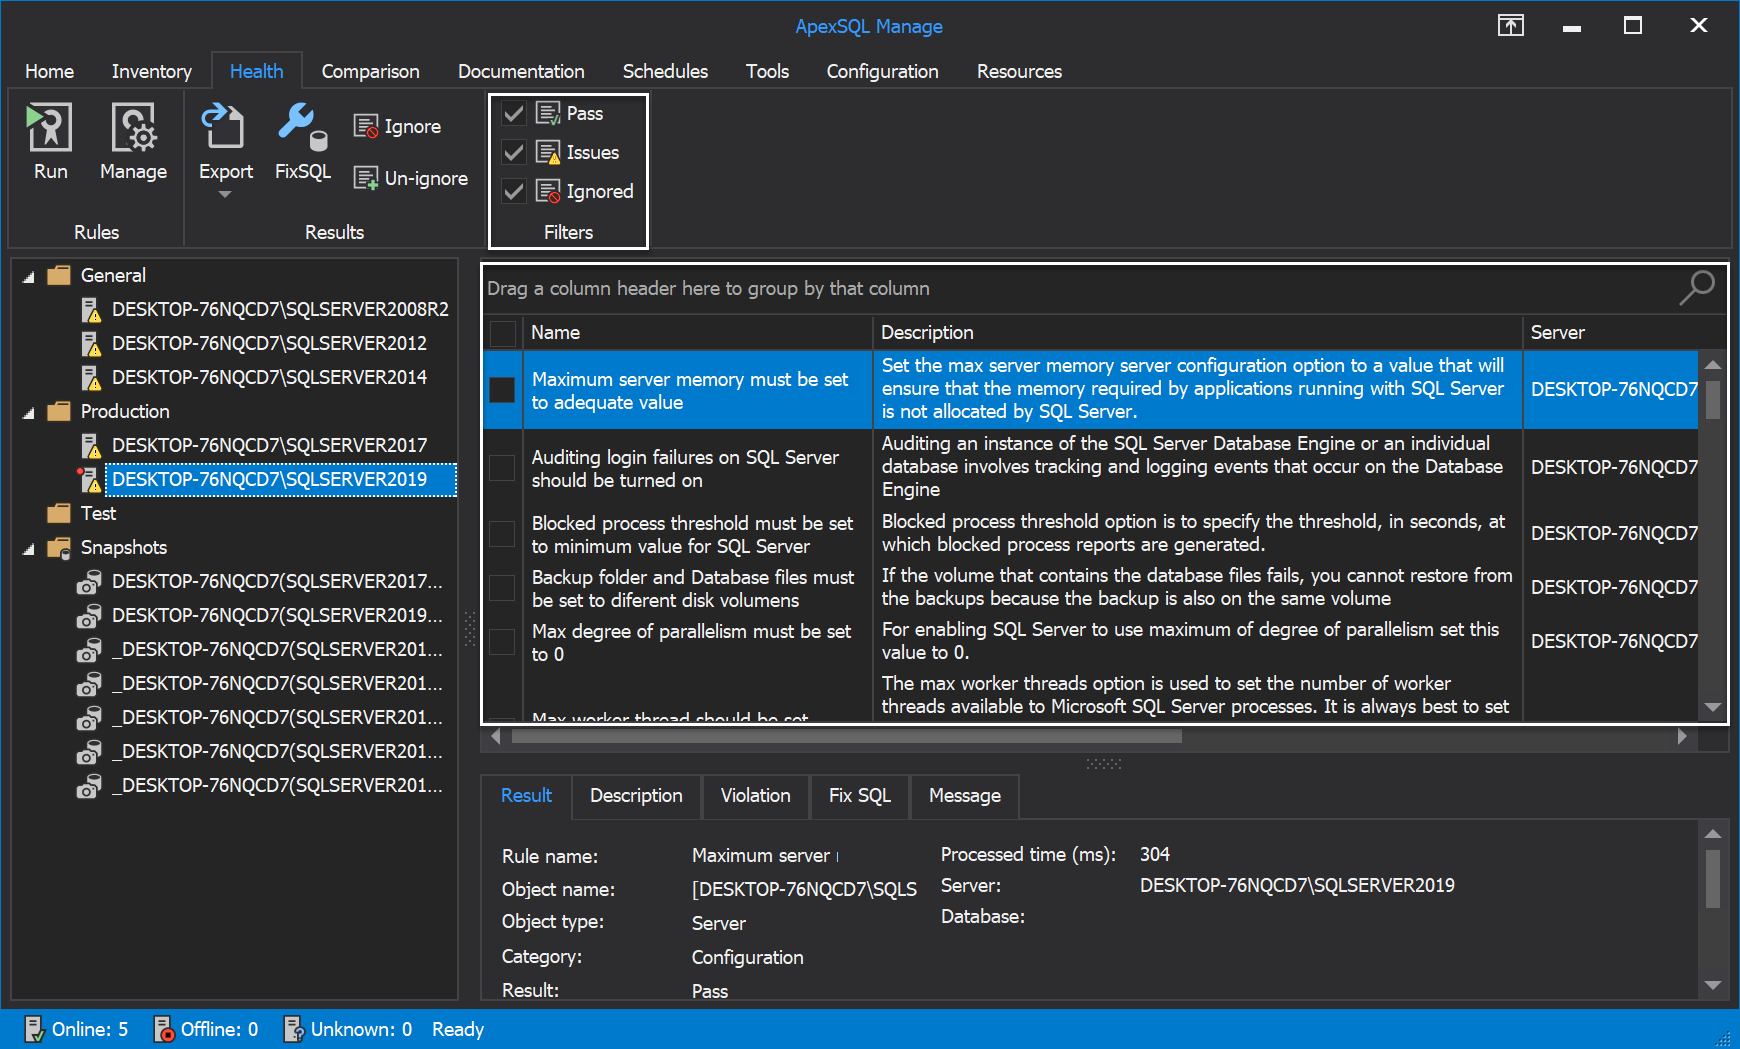
The Health tab displayed in blue theme:
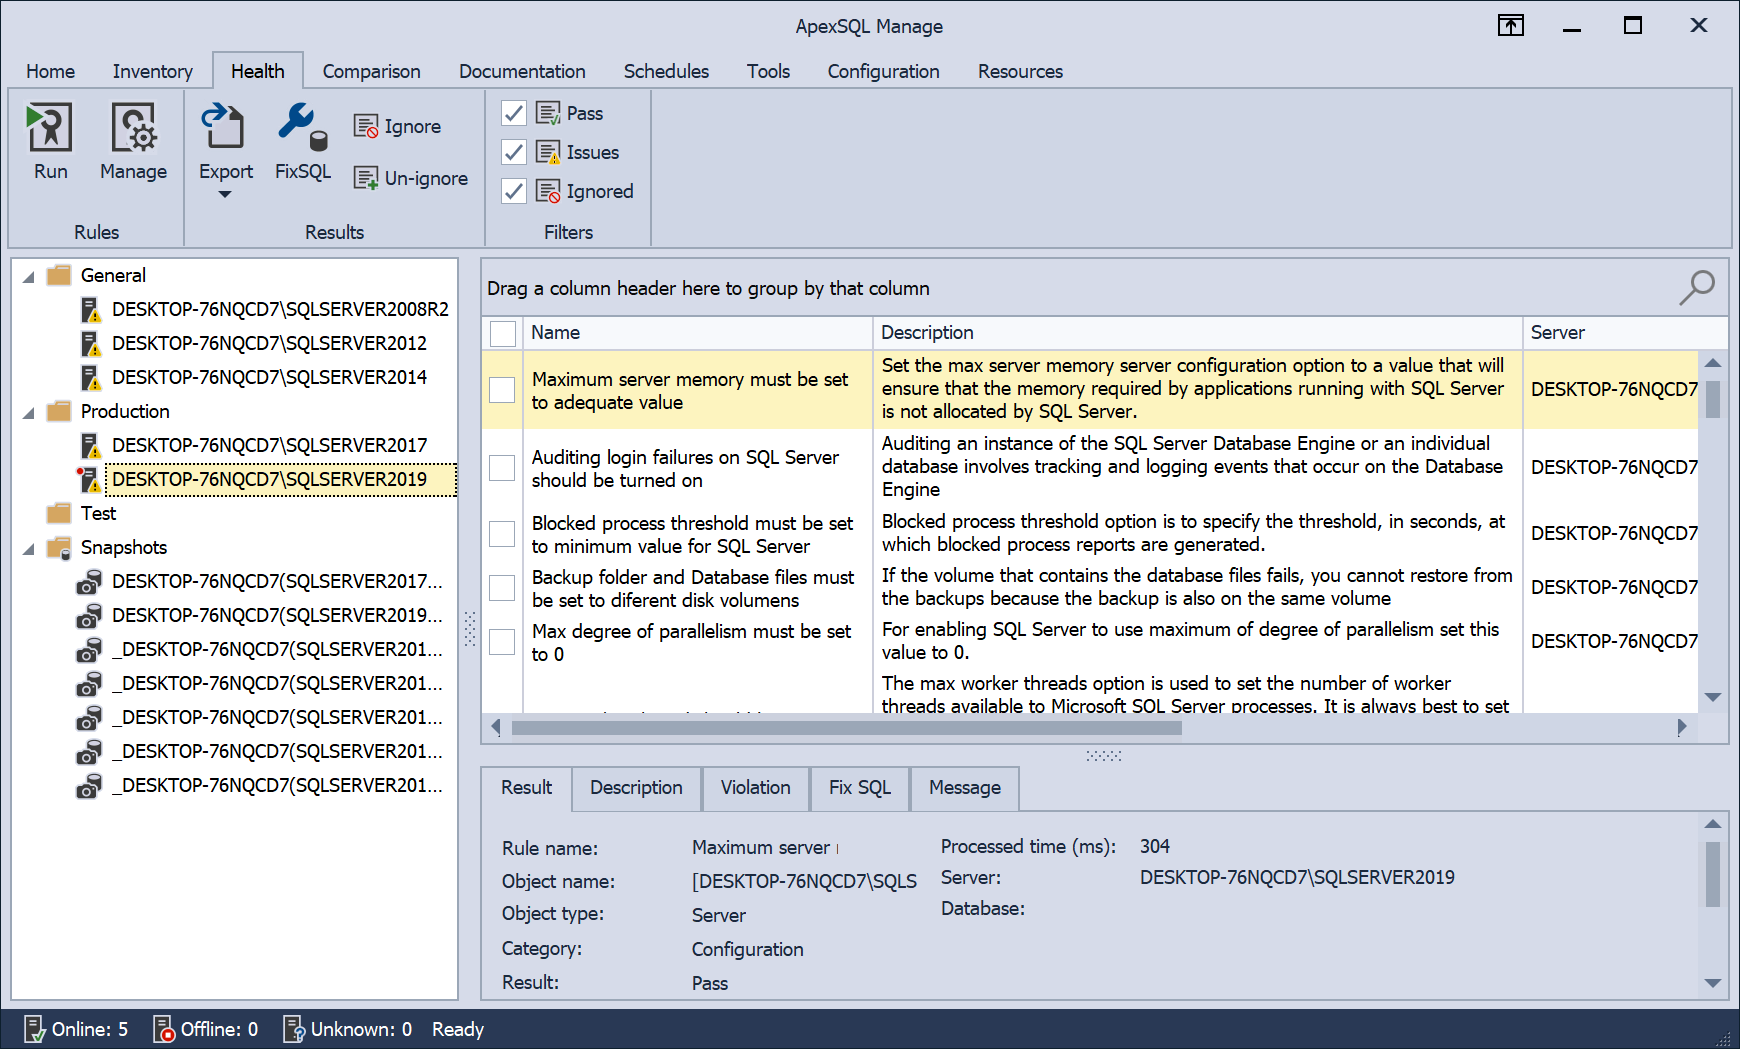
The Health tab of SQL manage instance tool includes options separated in three different categories: Rules, Results, and Filters respectively in that order:

By clicking on the Run button, we are prompted with the Run health check wizard allowing us to choose a pre-defined set of rules that we want to run against our SQL Server instance(s):

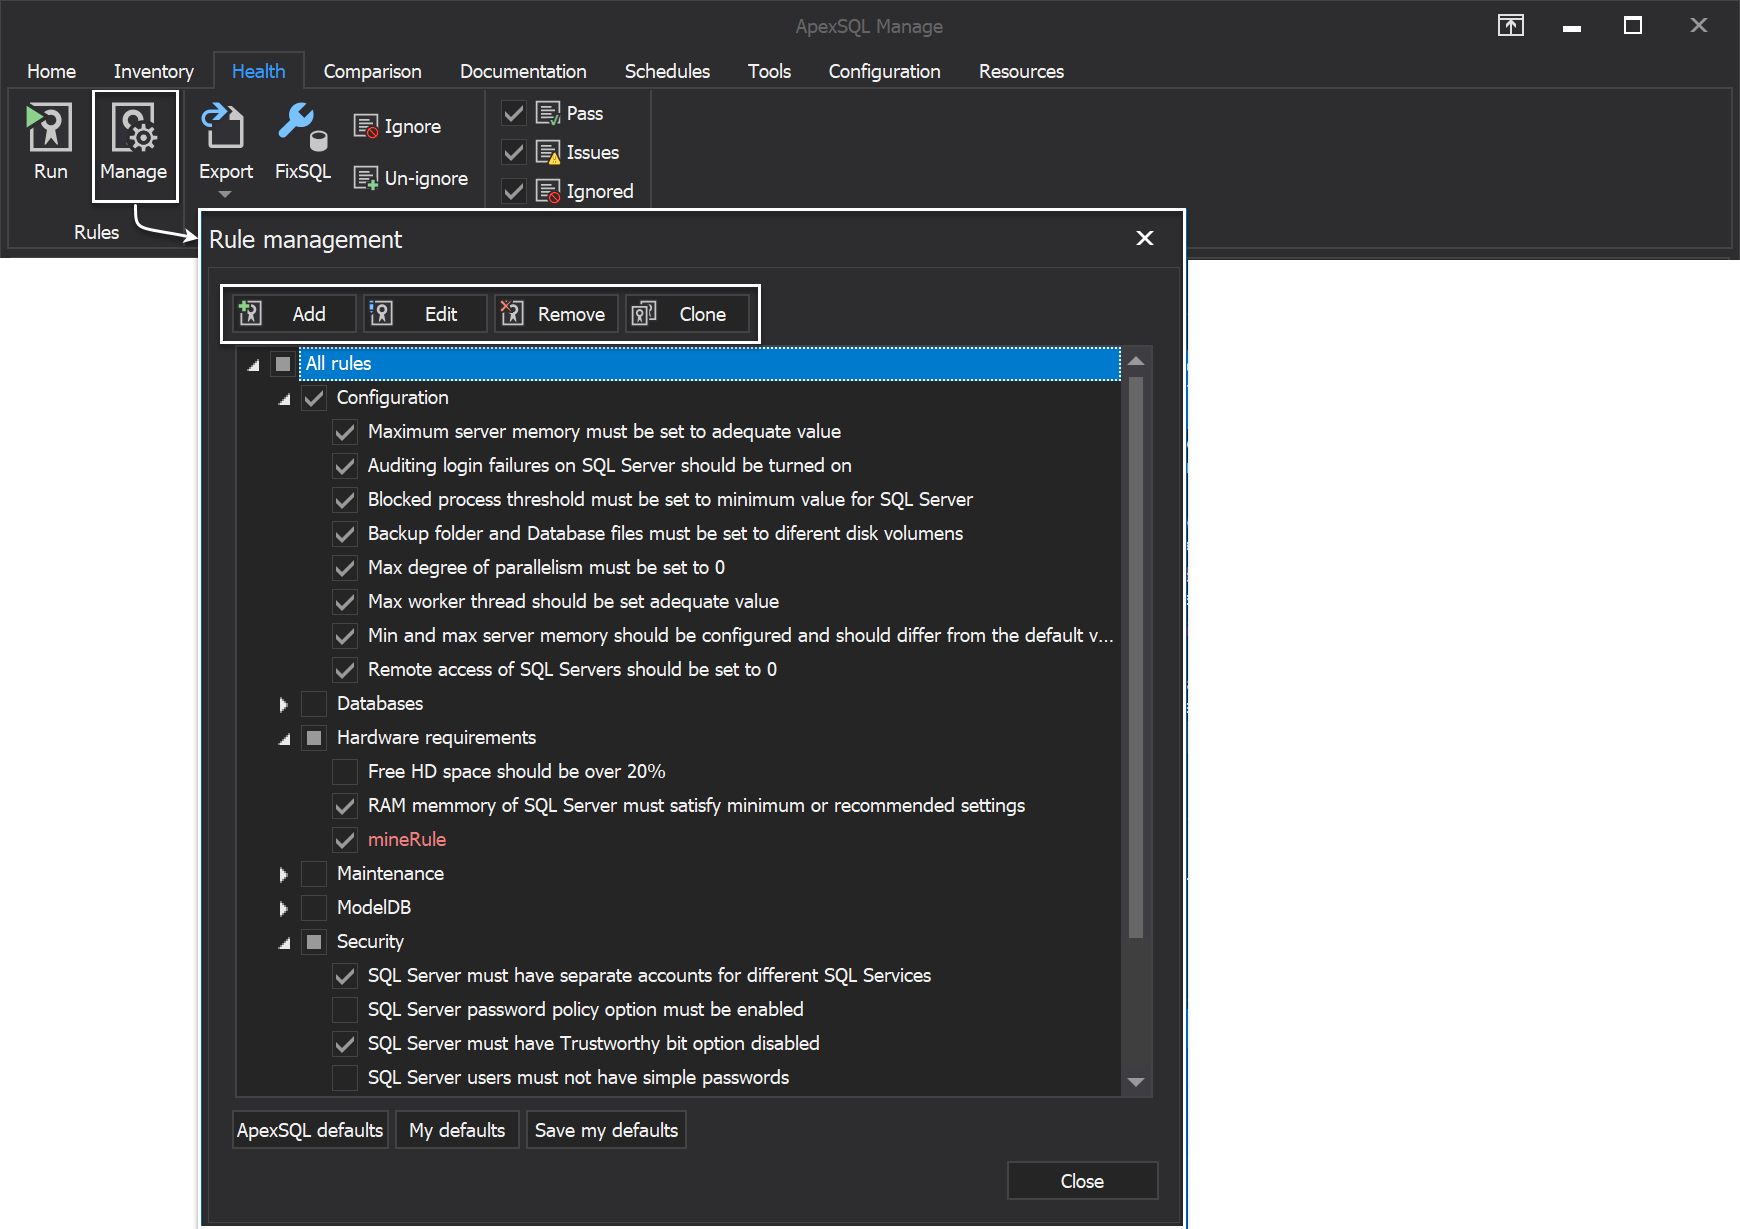
Manage options allow users to manage the set of health check rules by adding new rules, editing them, removing or cloning with a click on the corresponding button. It’s worth noting that pre-defined set of rules cannot be changed in any way, the mentioned options apply only on newly created rules:
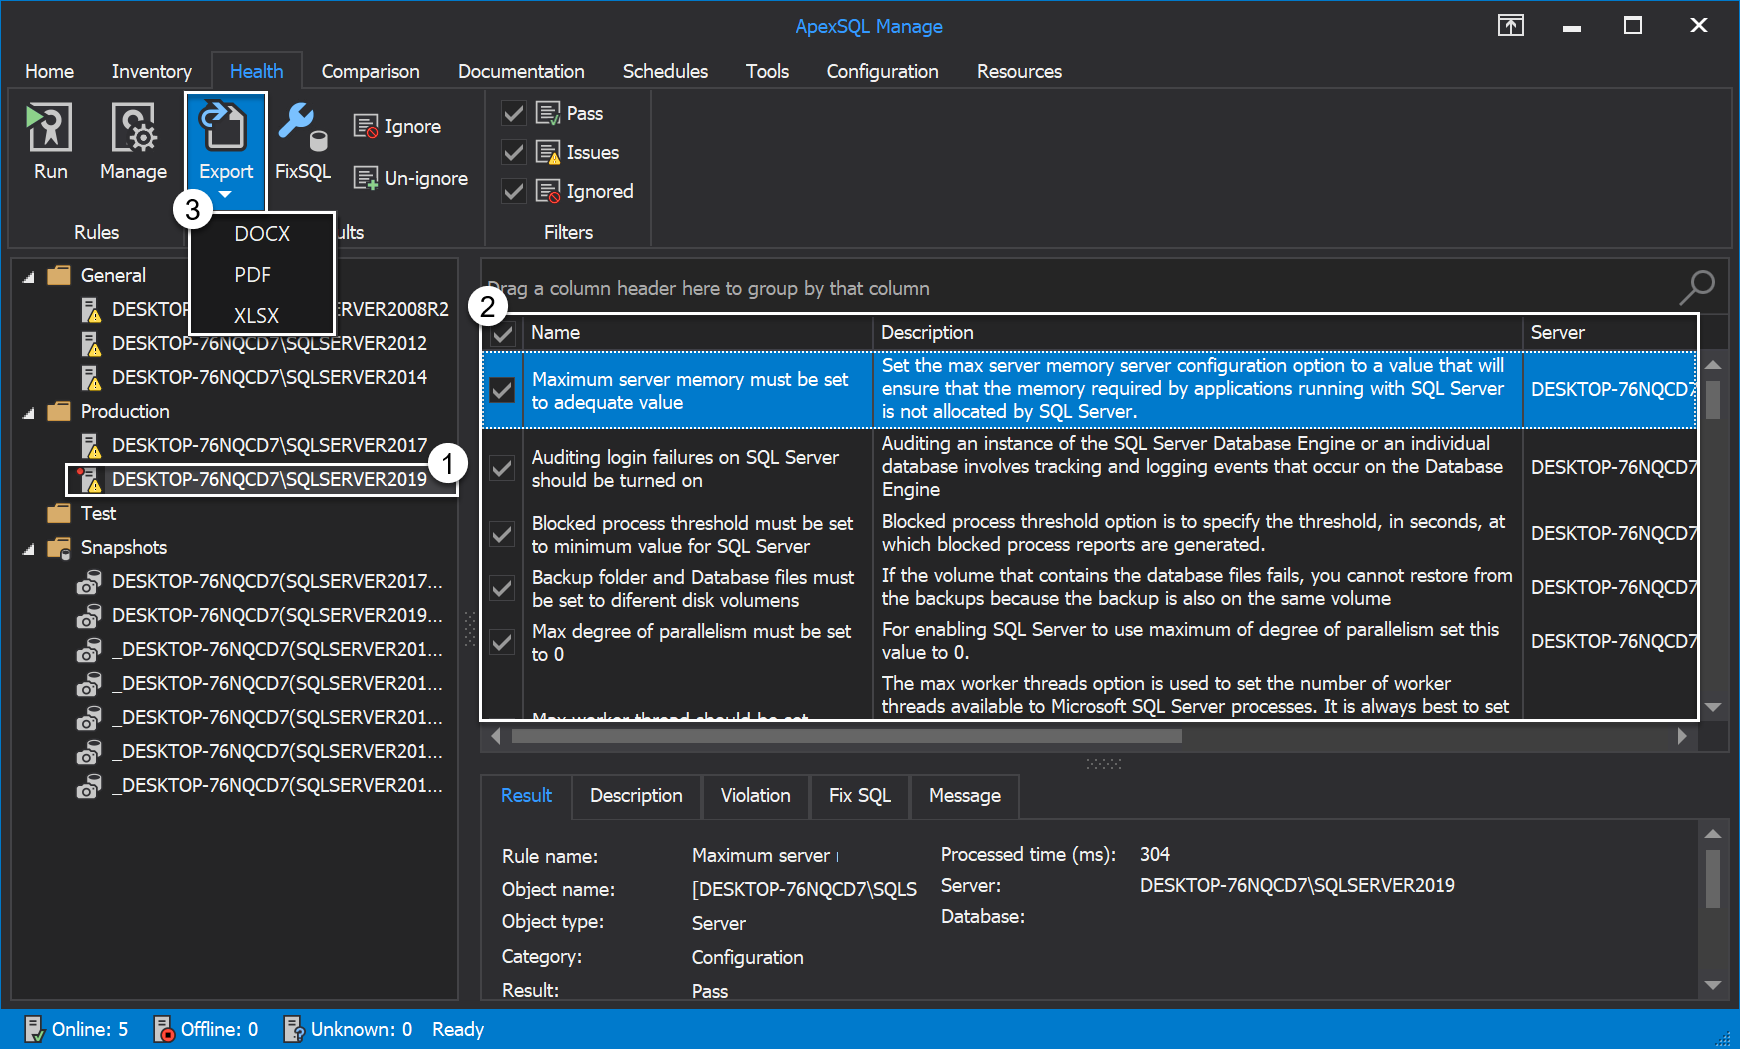
Export option exports the selected health check results from the grid into one of the offered file formats:
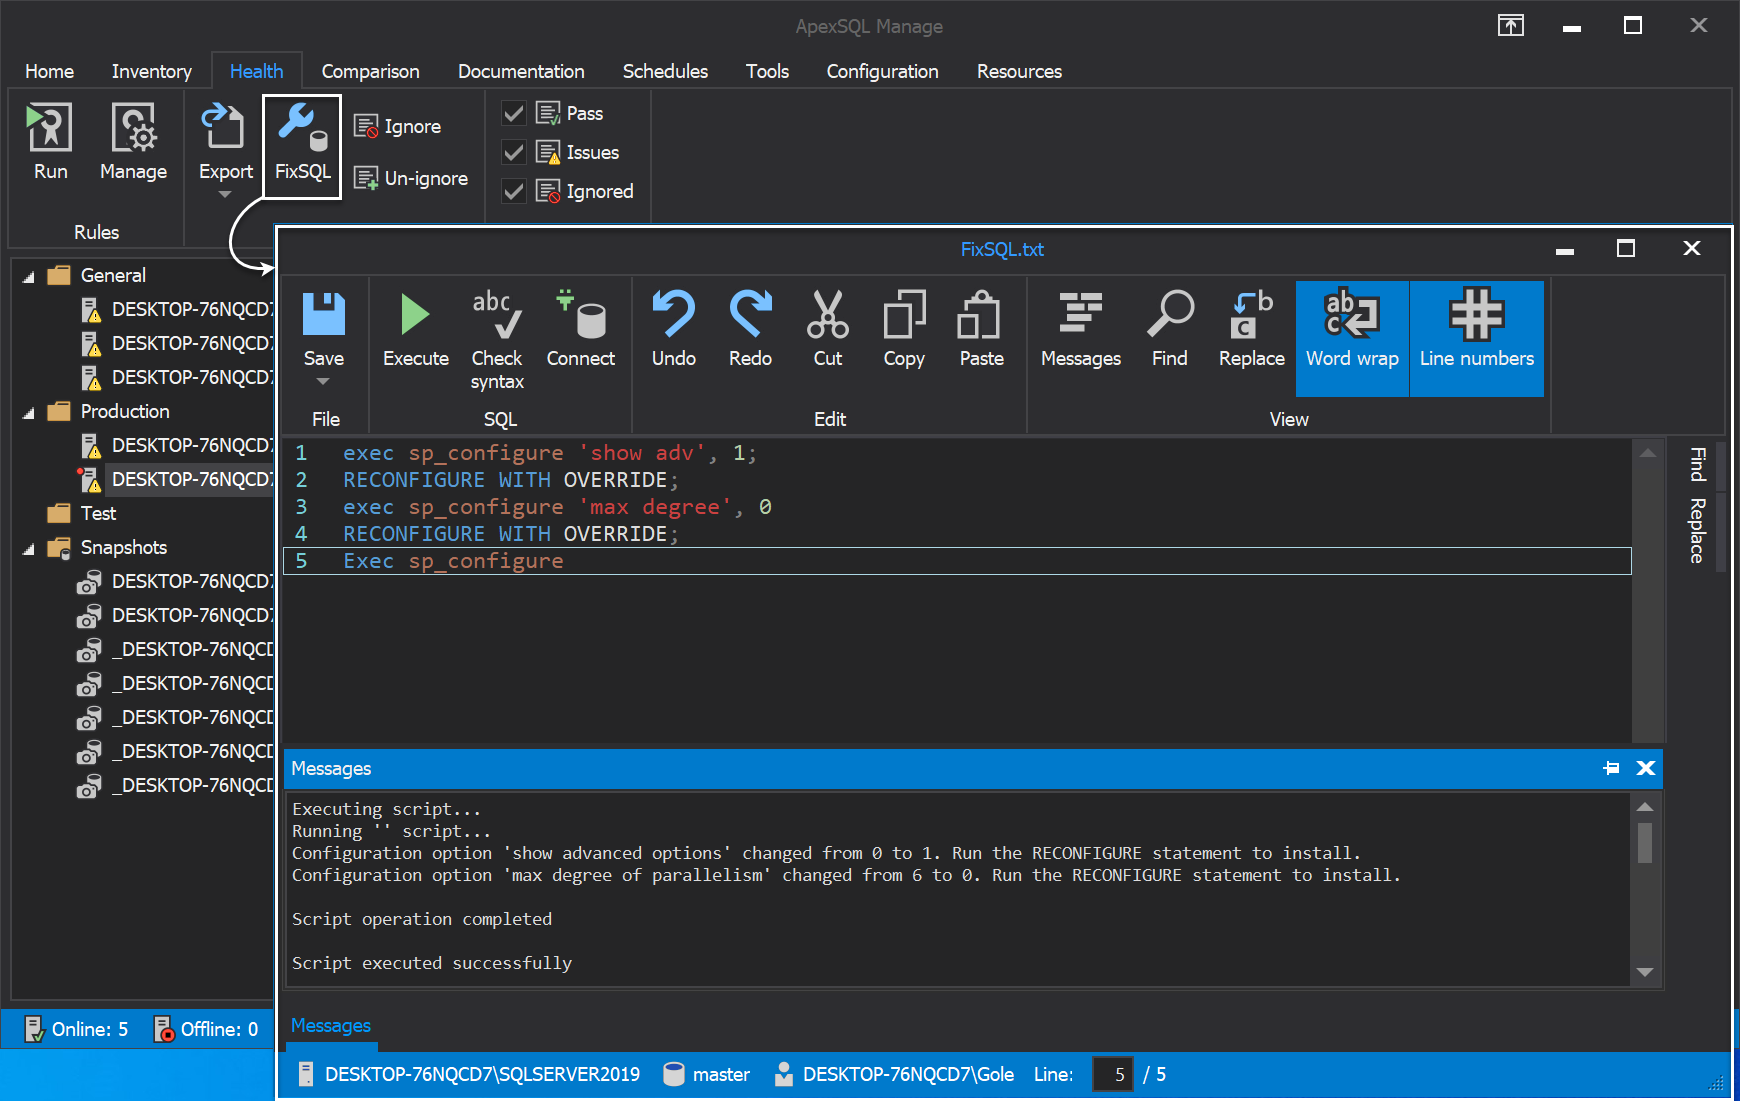
By clicking on the FixSQL button, right after the appropriate row from health check grid is selected, we are prompted with the window allowing us to execute the set of SQL scripts that will correct any errors that this particular rule found on our SQL Server instance:
Ignore and Un-ignore options from the Results category of the Health tab allows us to choose to ignore, and later un-ignore, any number of presented health check rules from the grid:

Filters Pass, Issues and Ignored gives us an accurate display of health check results from the grid that successfully passed the test, the ones with issues and the one we previously chose to ignore:
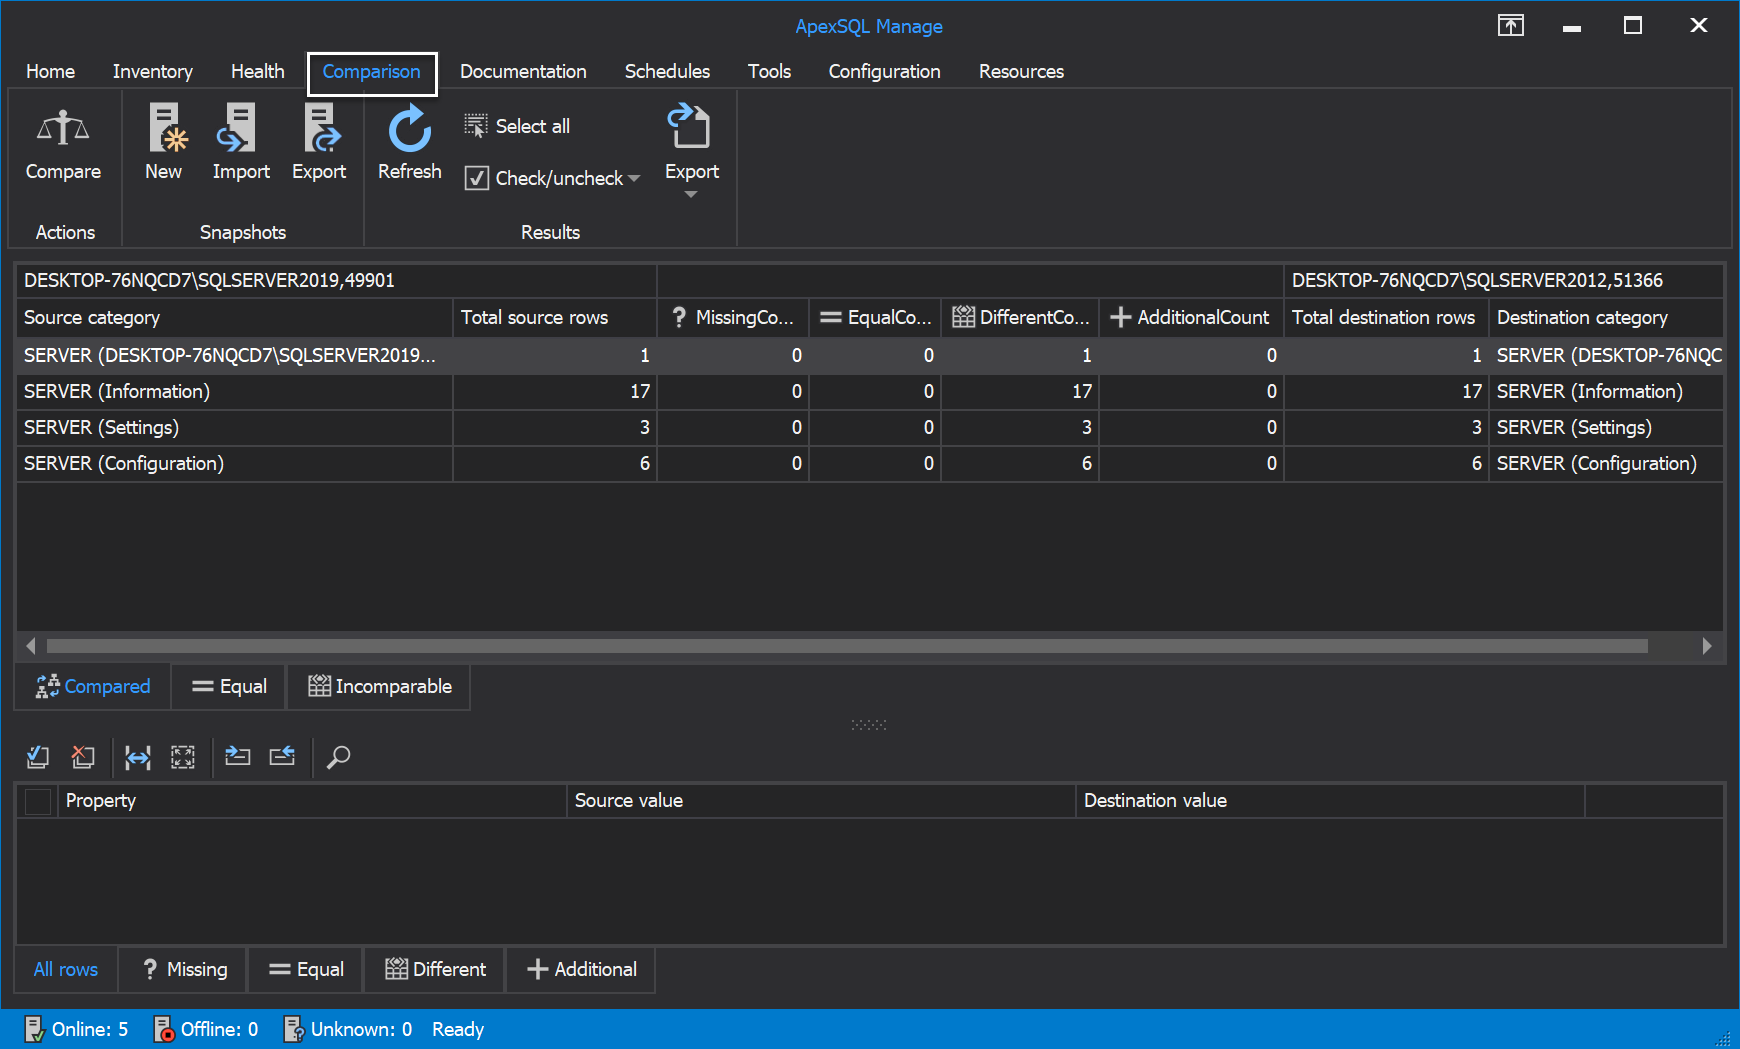
Comparison tab
The Comparison tab consists of options that allow the user to run a SQL Server instance comparison, SQL Server instance snapshot comparison and a comparison mix of the two as well:
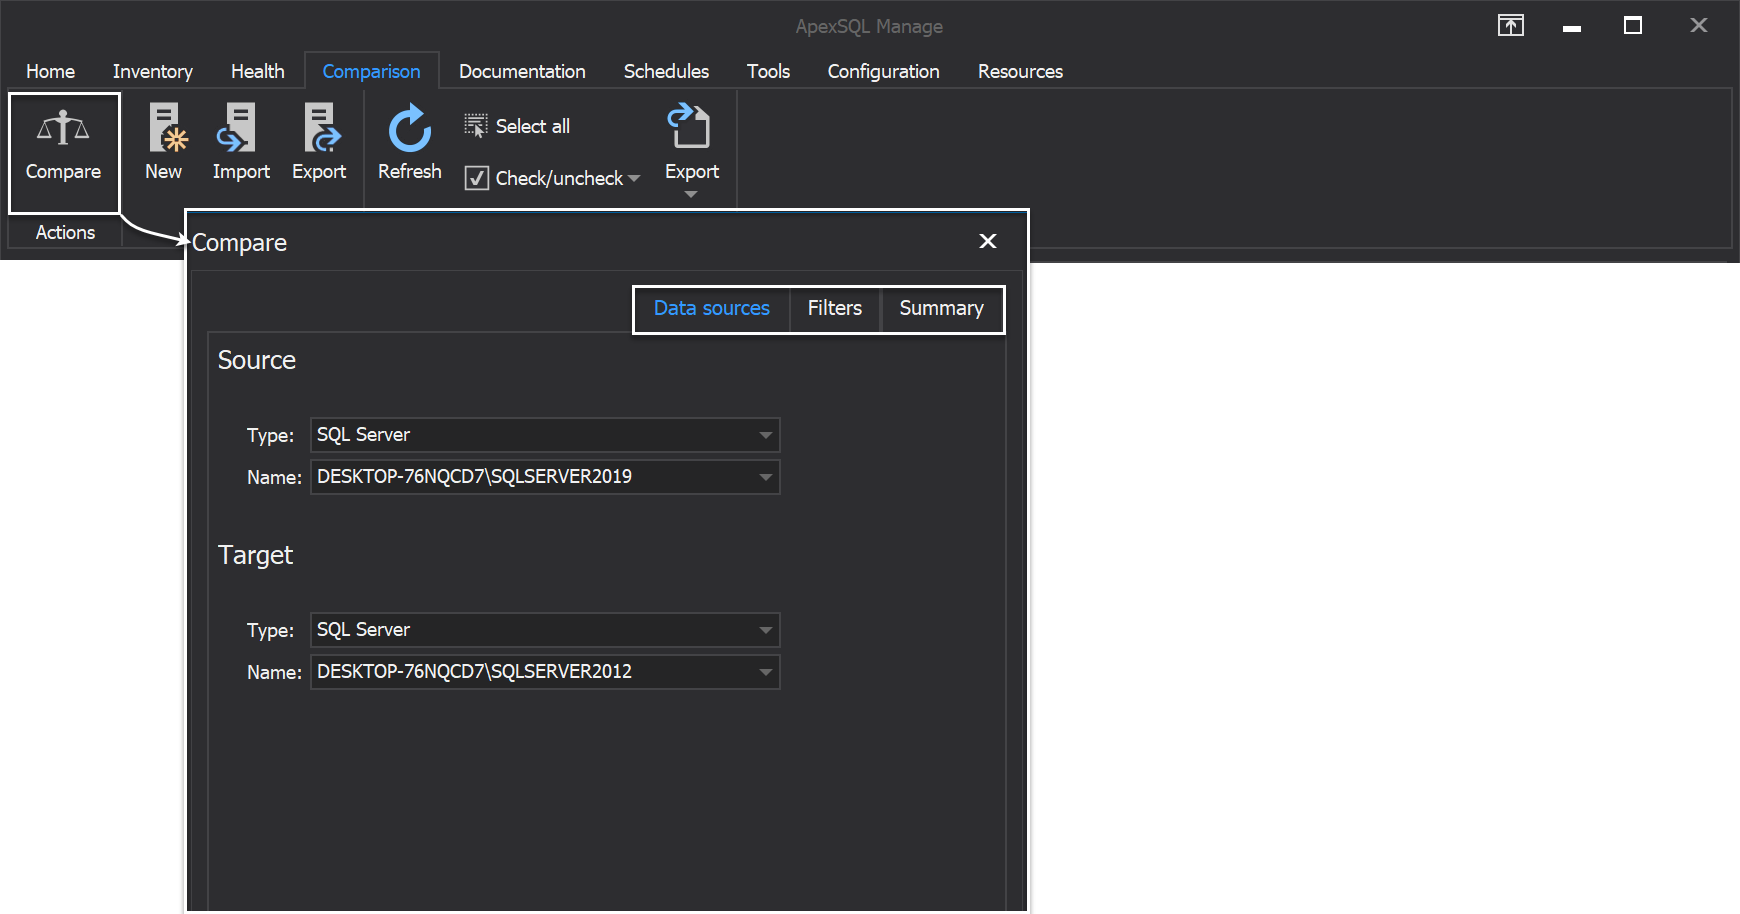
With a click on the Compare button we are prompted with the Compare wizard where we can choose the source and target of our comparison, as well as the filters to we want to include in it:
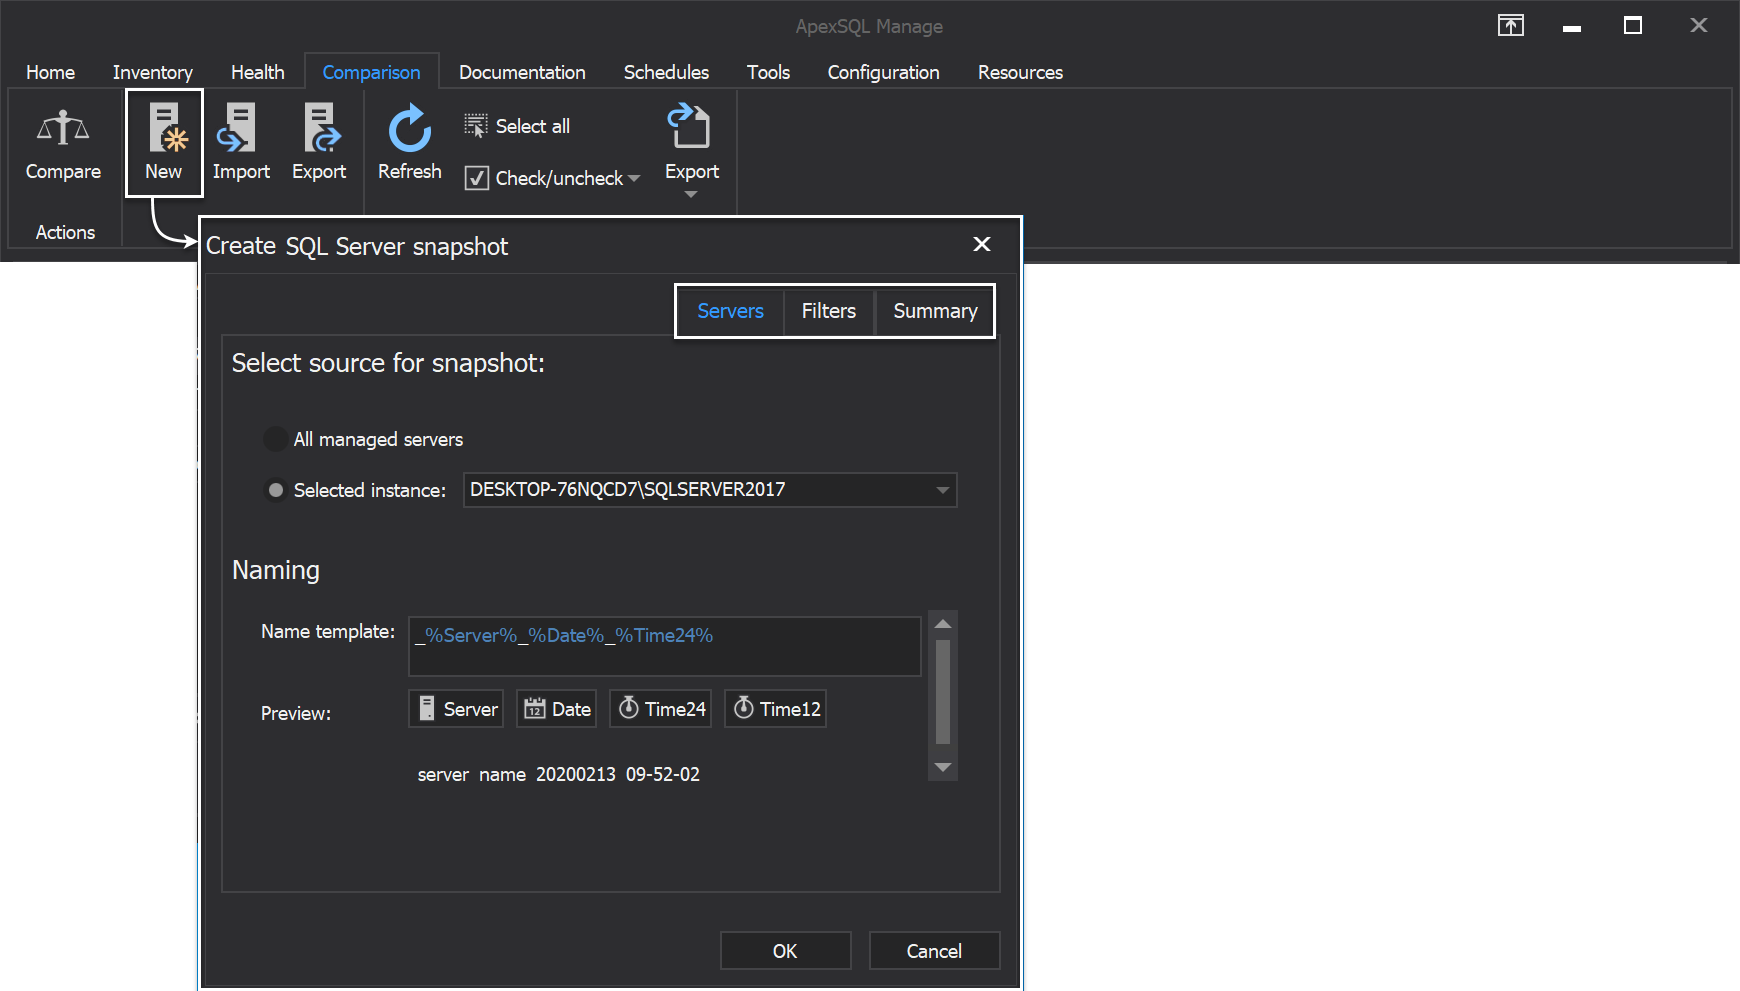
The New button runs the Create SQL Server snapshot wizard where we could choose from various settings and filters before proceeding with that task of new snapshot creation:
Import and Export options allow us, as their names imply, to import or export the selected SQL Server snapshots:

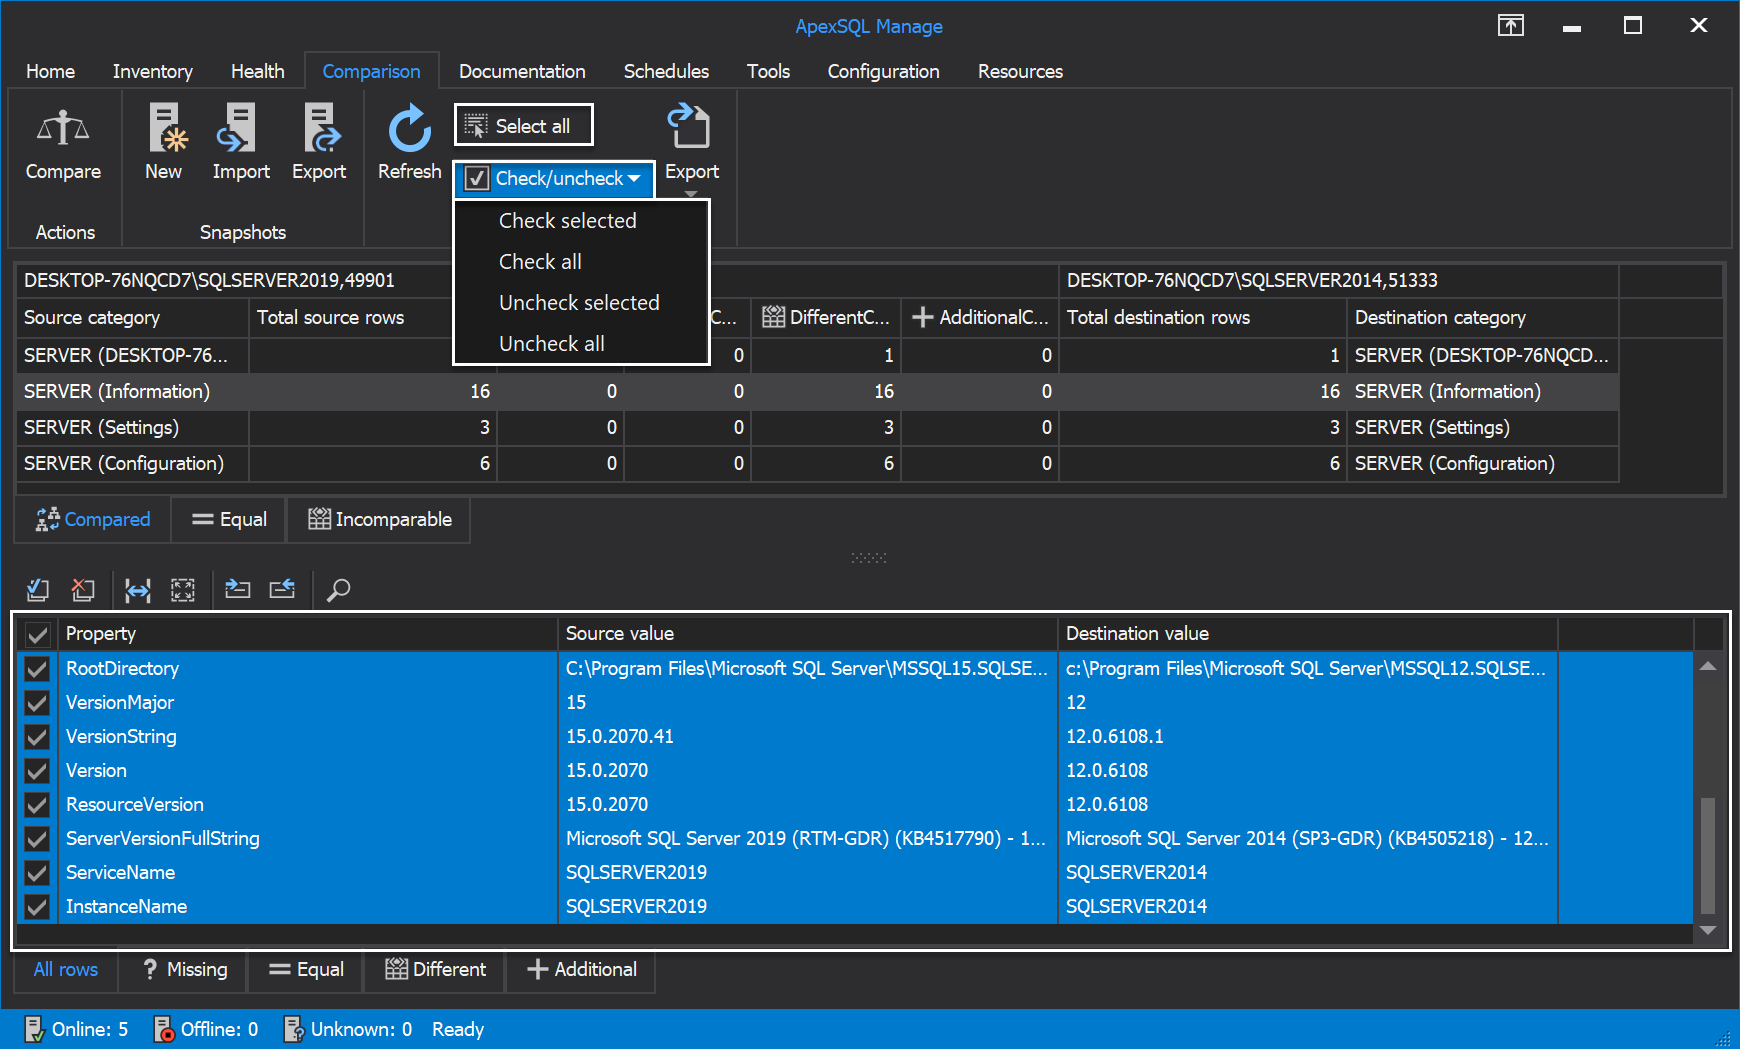
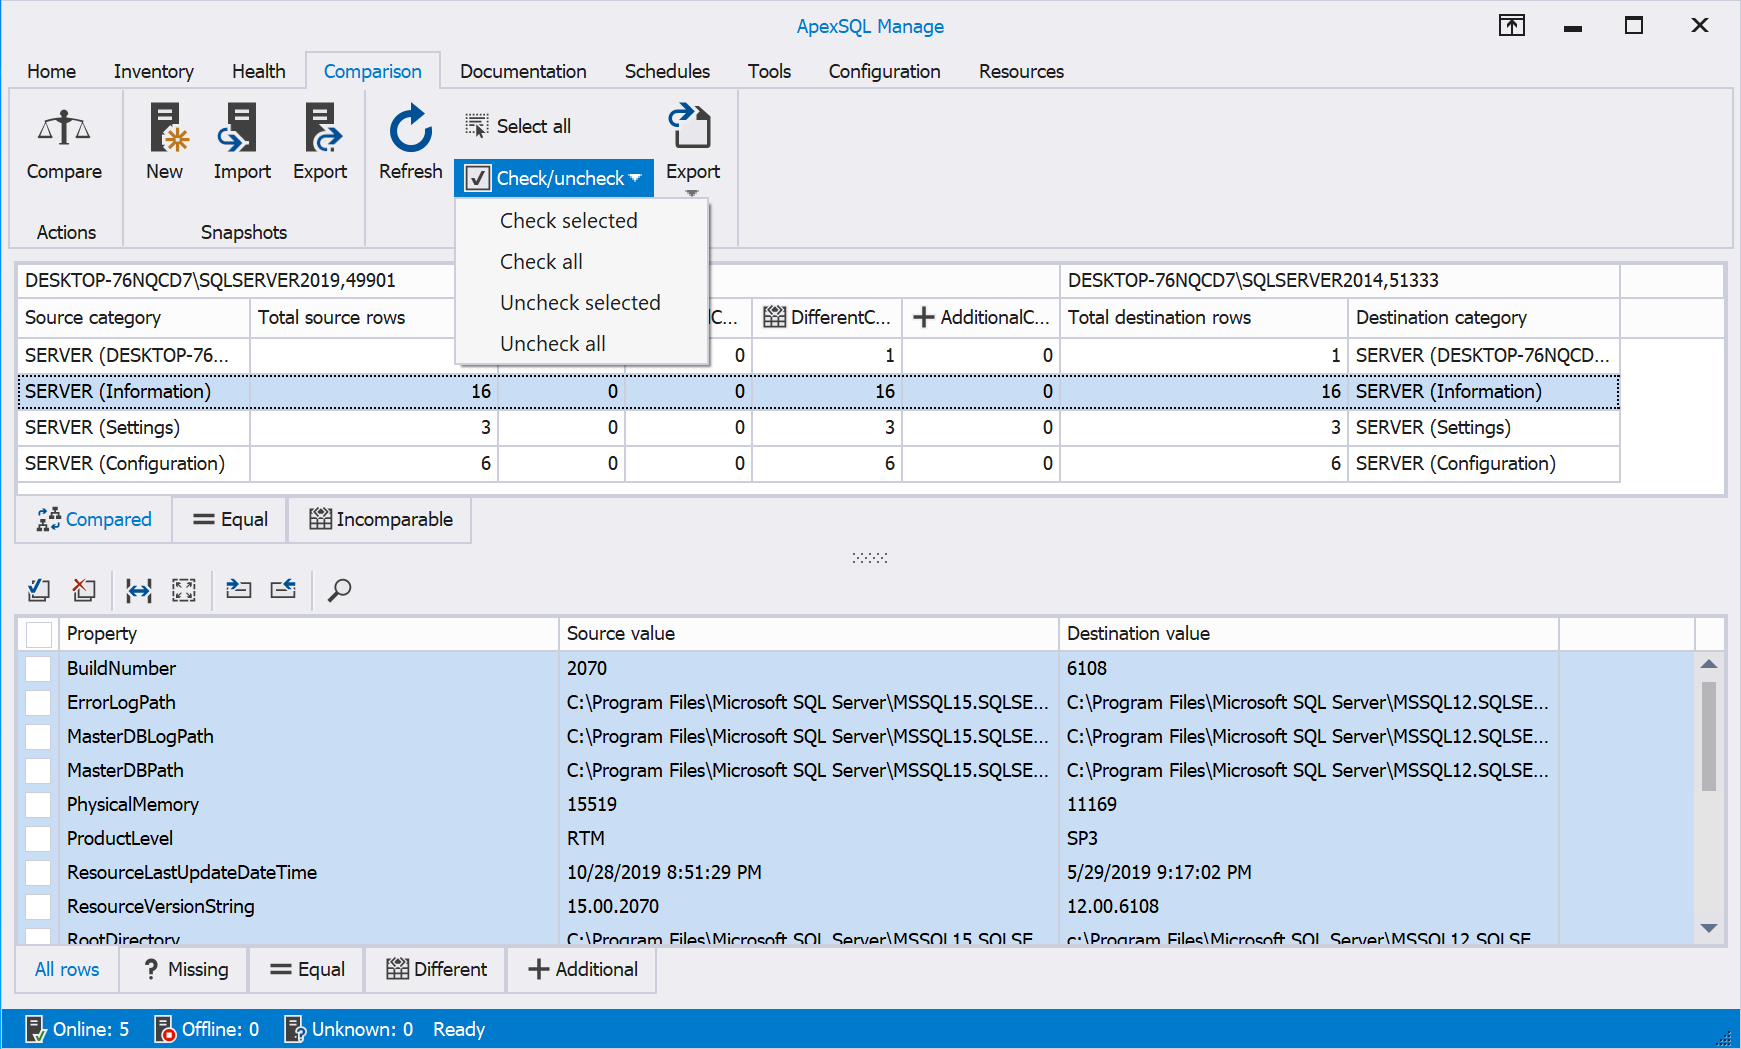
The Select all button selects all items displayed in the bottom area of the app window as shown below. The Check/uncheck drop-down menu offers options allowing us to more easily select, or deselect, comparison details we want to further export to desired file format:
Same form in light theme:
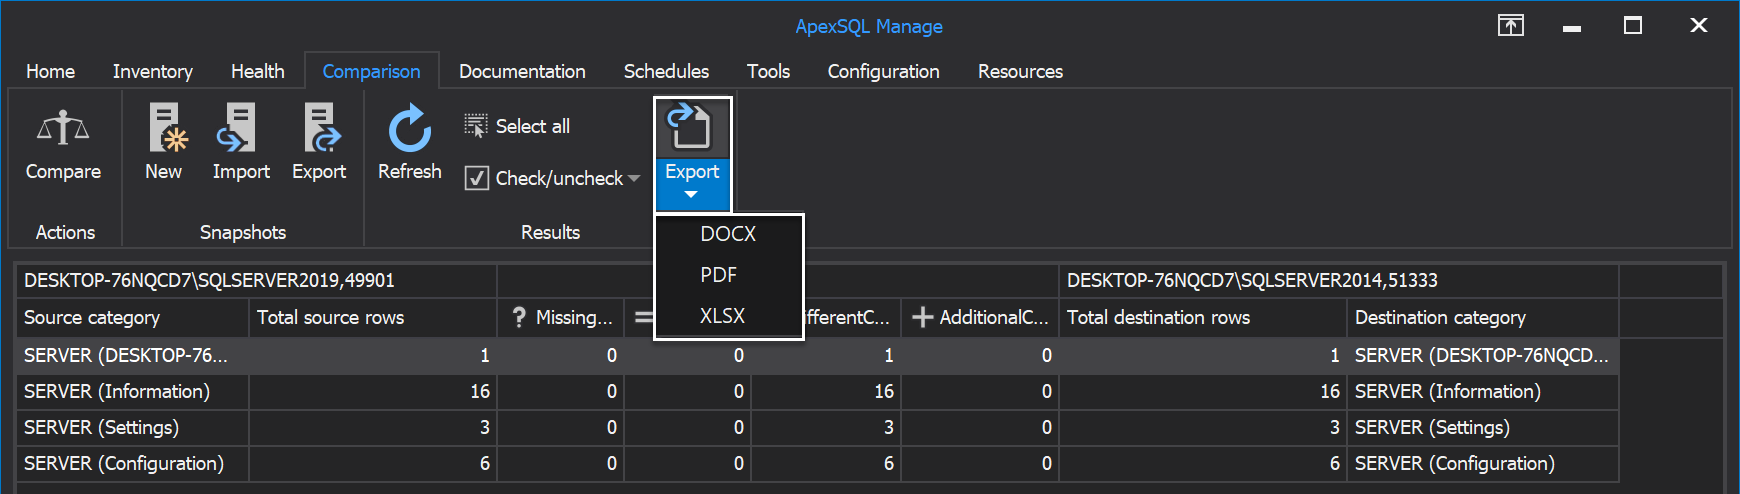
Again, there is an option to export comparison results to DOCX, PDF and XLSX file formats by clicking on the Export drop-down menu and choosing the preferred file format:
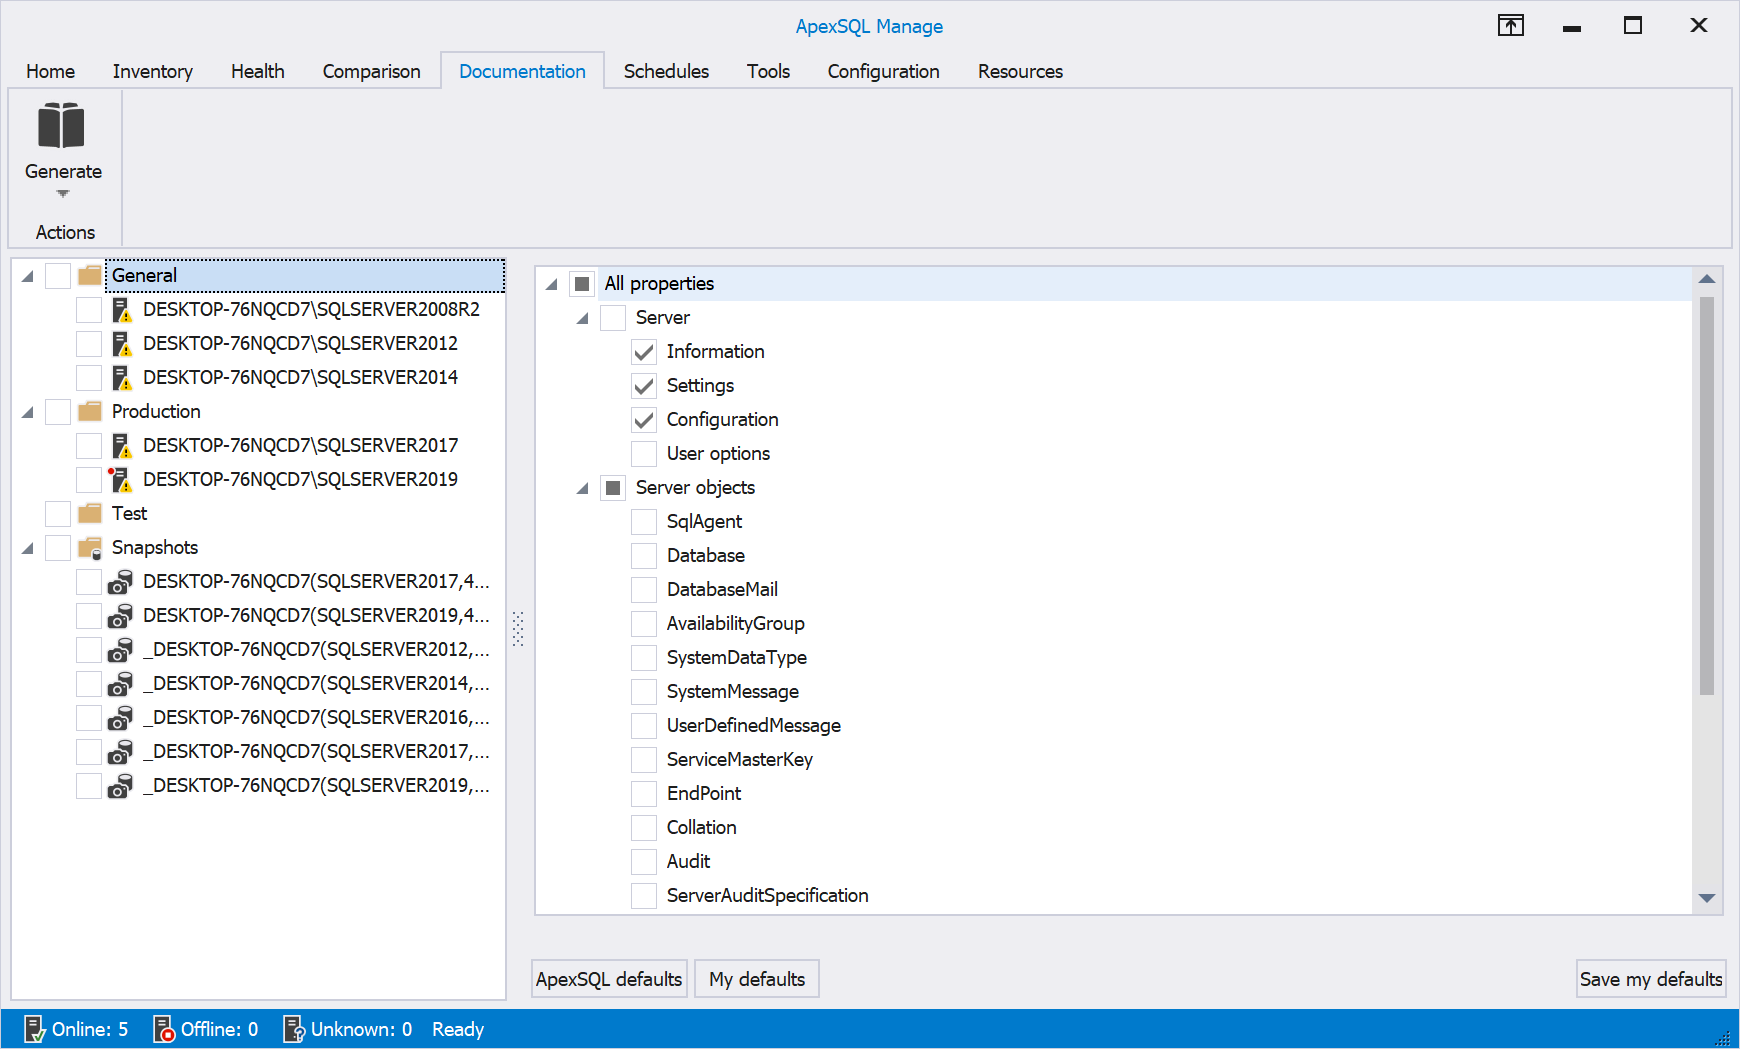
Documentation tab
The Documentation tab allows us to create documentation for selected SQL Server instance(s) and/or its snapshot(s) from the server panel on the left. Additionally, choose preferred SQL Server information, on the right side of the main app UI, to be a content of the documented file:
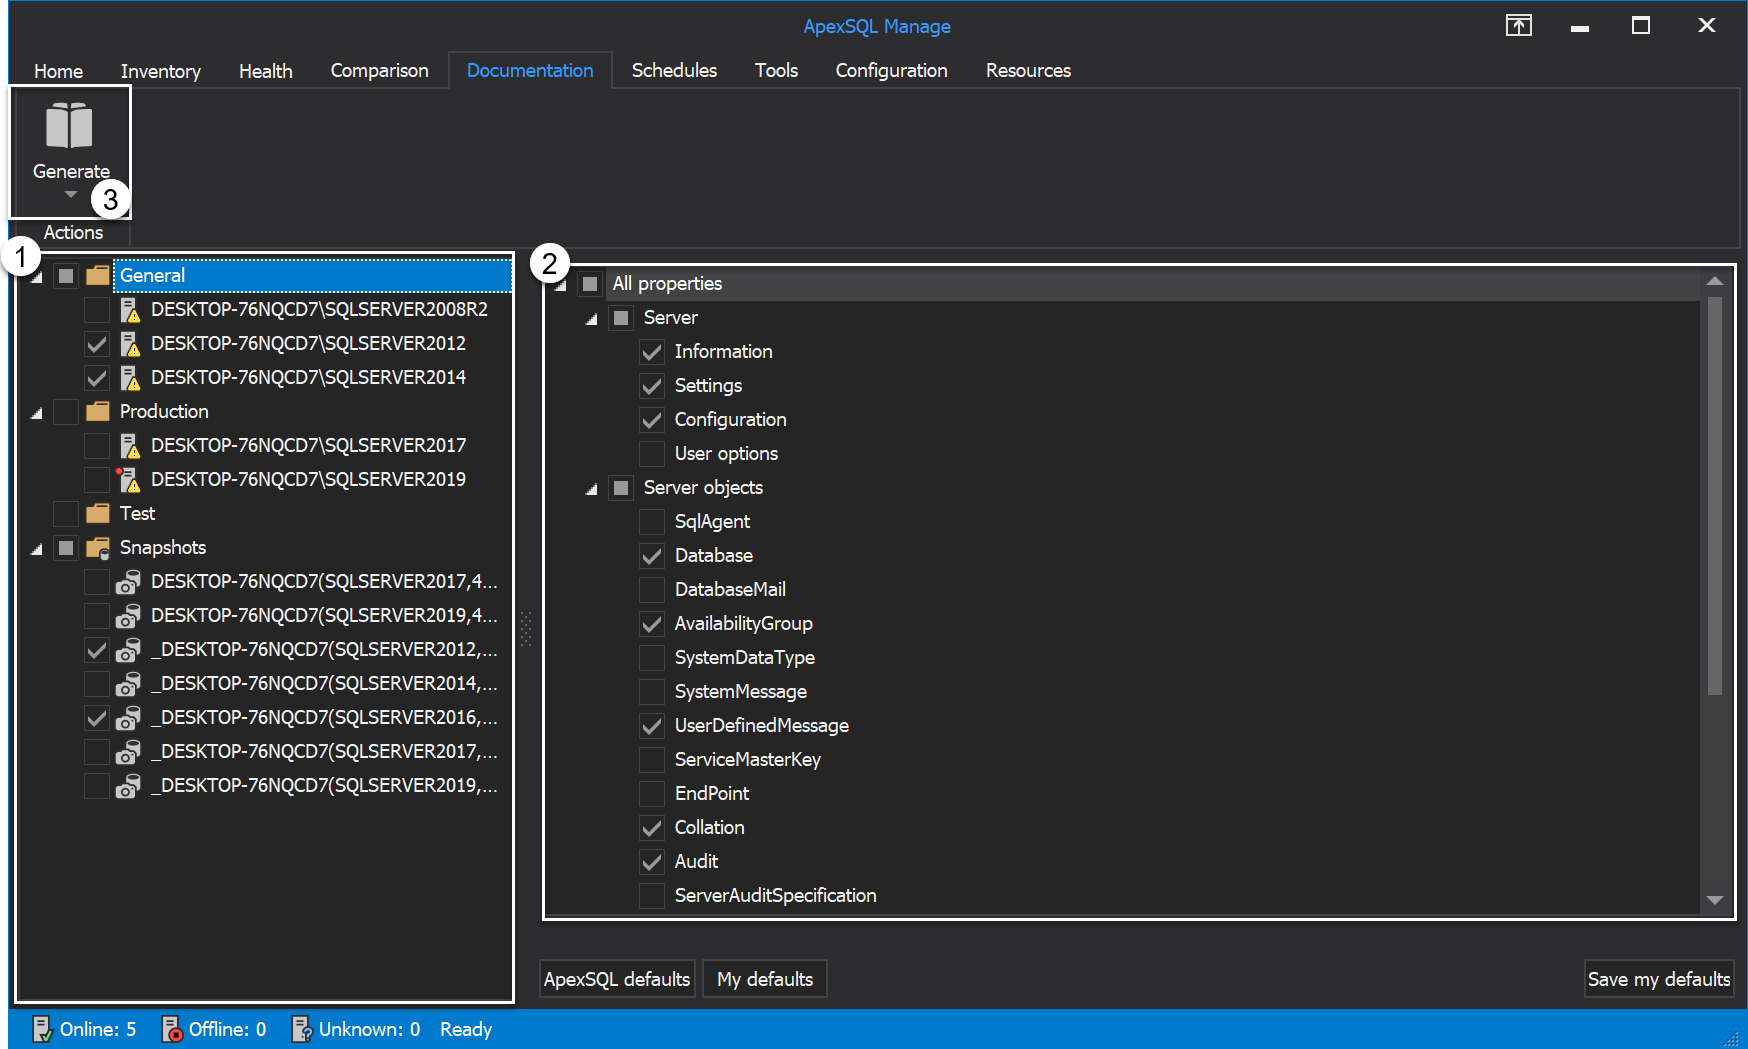
The Documentation tab of SQL manage instance tool in light theme:
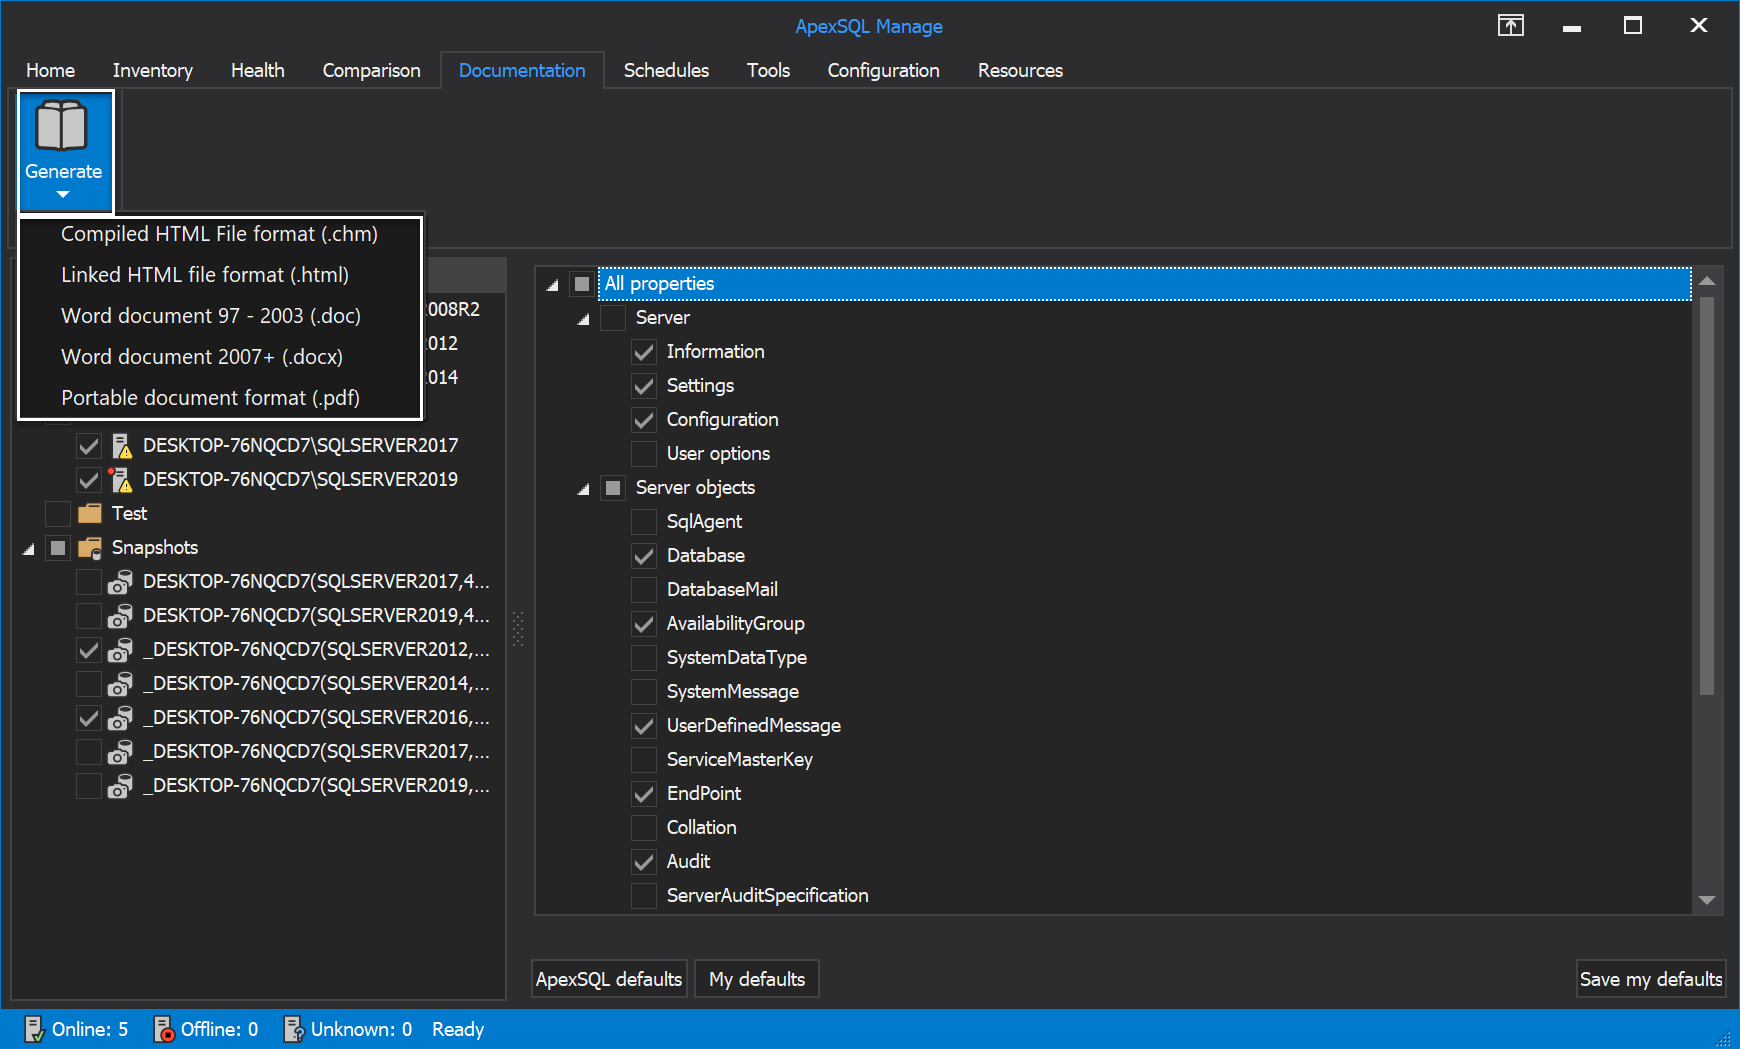
There are five different file format options to choose from when generating, i.e. creating documentation: CHM report, HTML, Word document 97-2003 (.doc), Word document 2007+ (.docx), and PDF:
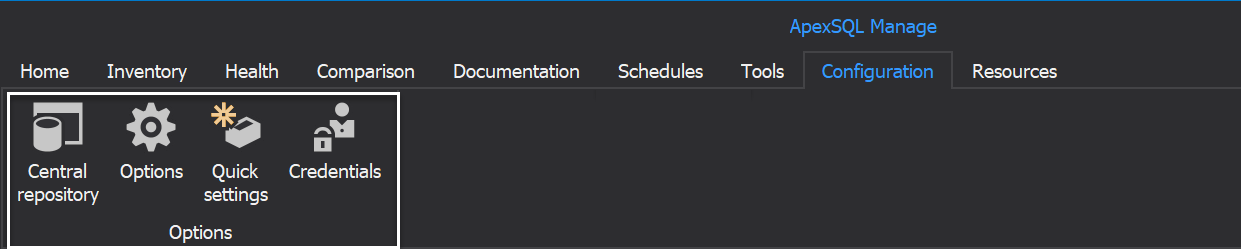
Configuration tab
In the Configuration tab presented are the options that allow us to quickly configure the main features of the tool:
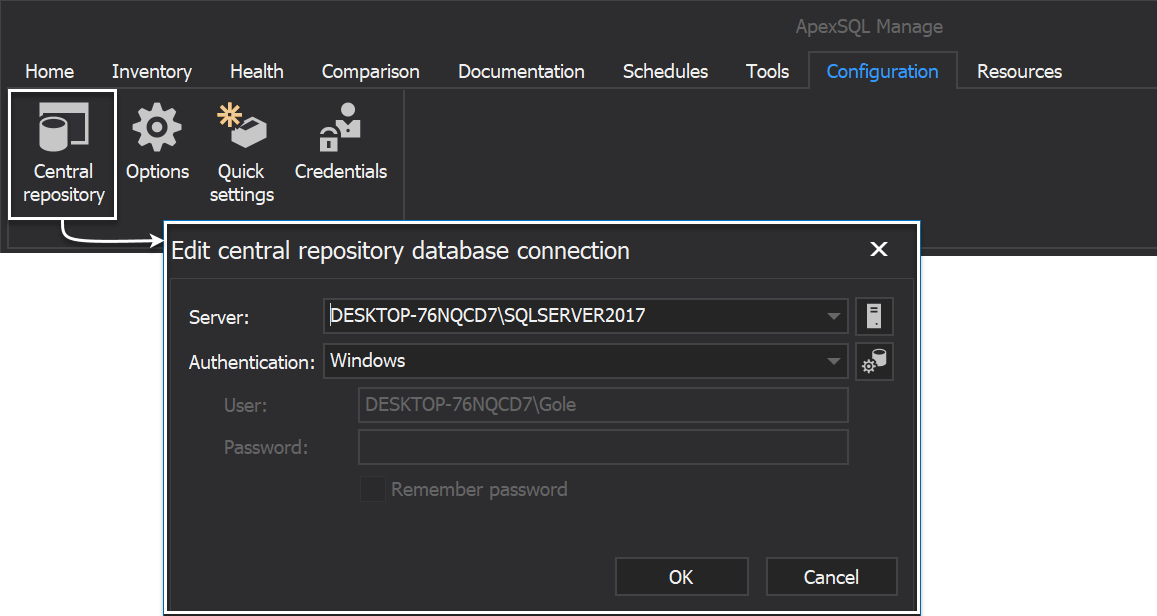
If we wish to change the location of the central database repository it can be done by clicking on the Central repository button, and in the new window, choose new SQL Server instance to create CRD to and optionally change its authentication type. The Windows is selected by default:
The Options window offers some tool configuration options. We can set the action to be performed after SQL Server instance is registered, choose to configure our custom copyright mark when exporting data, to change application theme, etc. Various other configuration options can also be found under the Inventory, Health and Documentation tabs respectively:

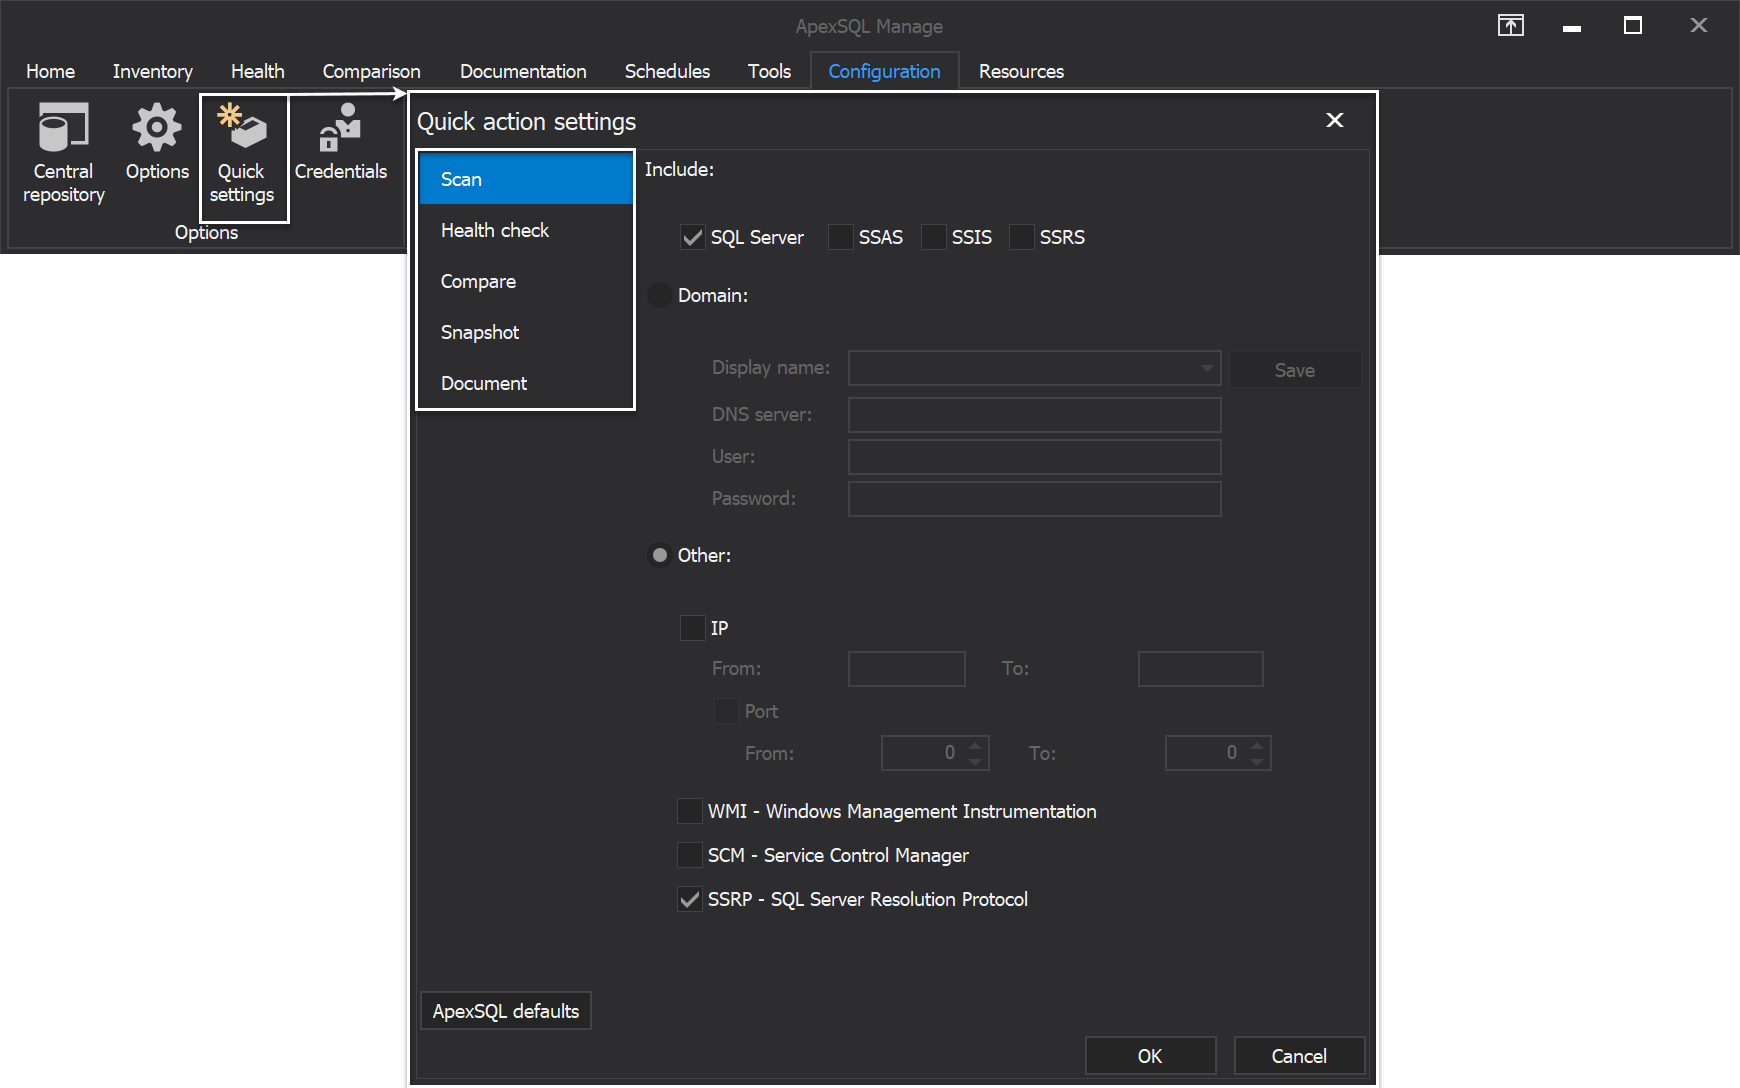
Quick action settings are directly connected to the Quick actions category under the Home tab and offer configuration set of options that we want to be a starting point when we’re executing Scan, Health check, Compare, Snapshot and Document from the main tab of the application, i.e. the Home tab:
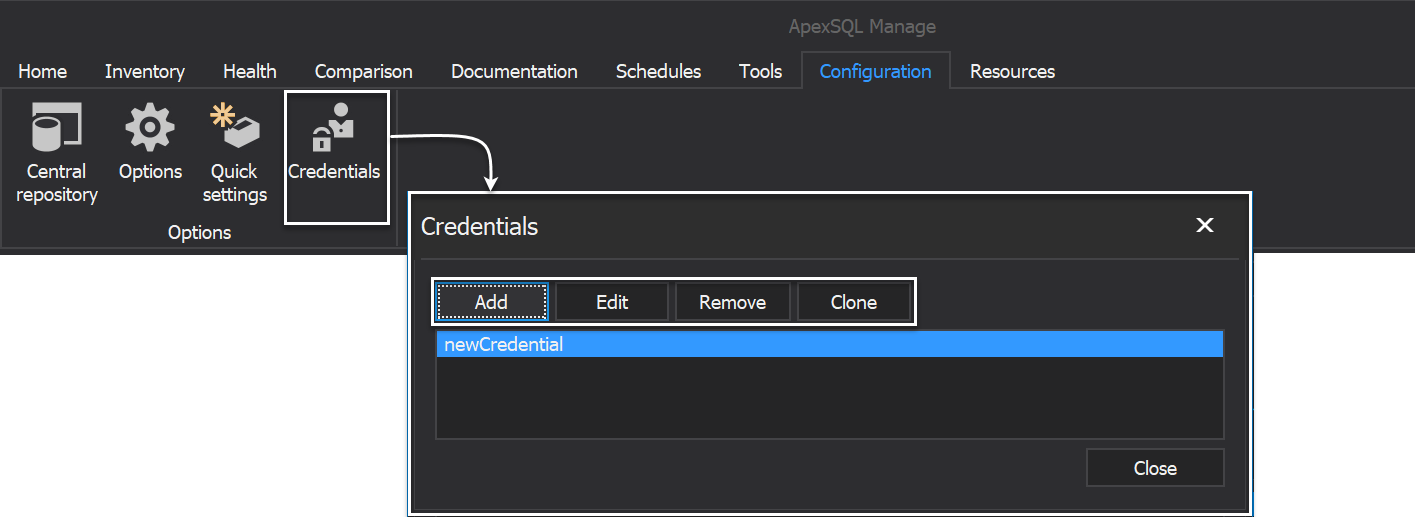
By clicking on Credentials button, we are prompted with the Credentials window where we can add, edit, remove or clone credentials with a click on matching button:
February 28, 2020


