


Installation
The ApexSQL Script installation wizard is a simple 3-step task.
The first step of installation is welcome screen of the ApexSQL Script wizard:
In this step, users can review the ApexSQL license agreement:
The next installation step allows users to choose installation folder and option for creating a desktop icon:
The final step confirms finishing of the installation and allows users to directly run ApexSQL Script from here:
ApexSQL Script main window consists of three Ribbon tabs:
-
The Home ribbon tab:

-
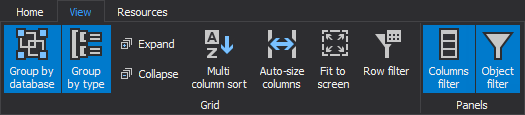
The View ribbon tab:
-
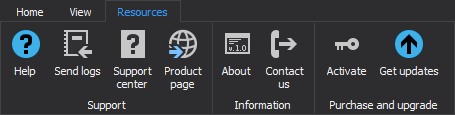
The Resources ribbon tab:
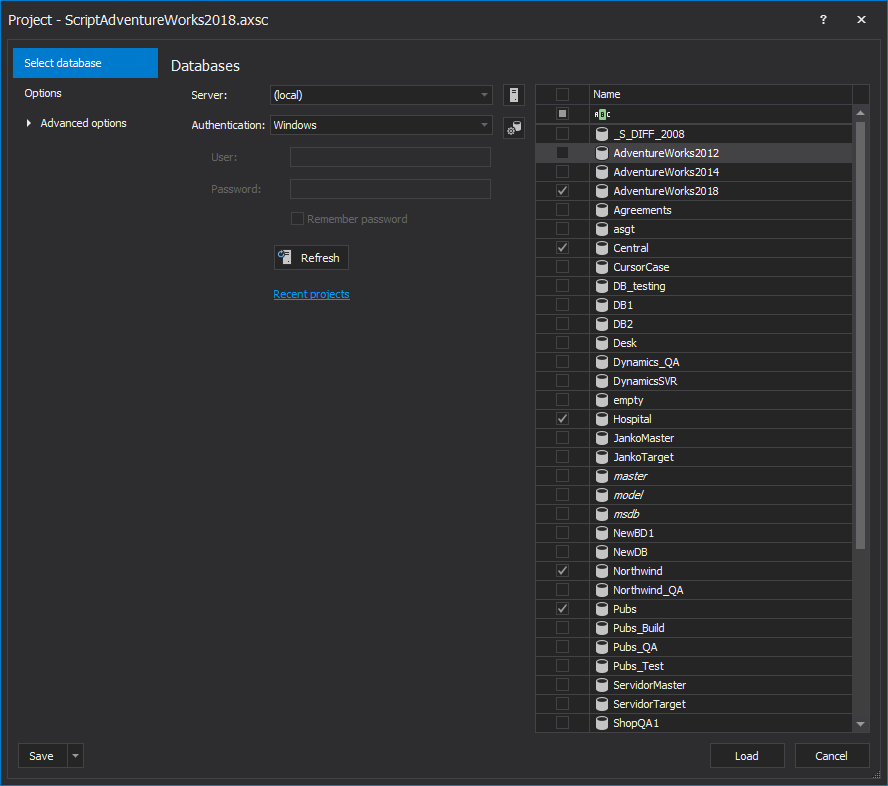
Once the application is run, by default, the New project window is shown, along with its first Select database tab, in which one or multiple databases can be selected for the scripting process:
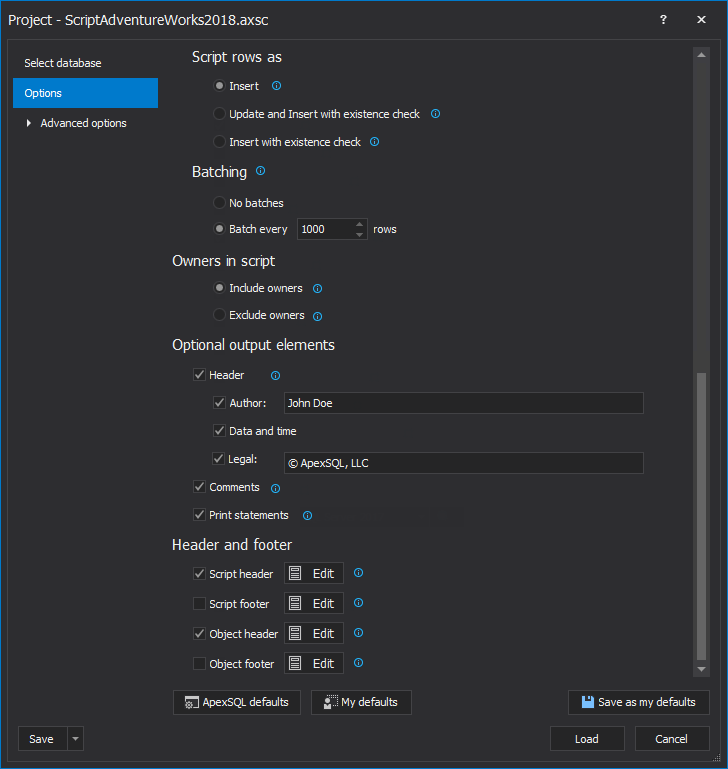
The second tab in the New project window is the Options tab, in which the Structure and Data scripting options can be set:
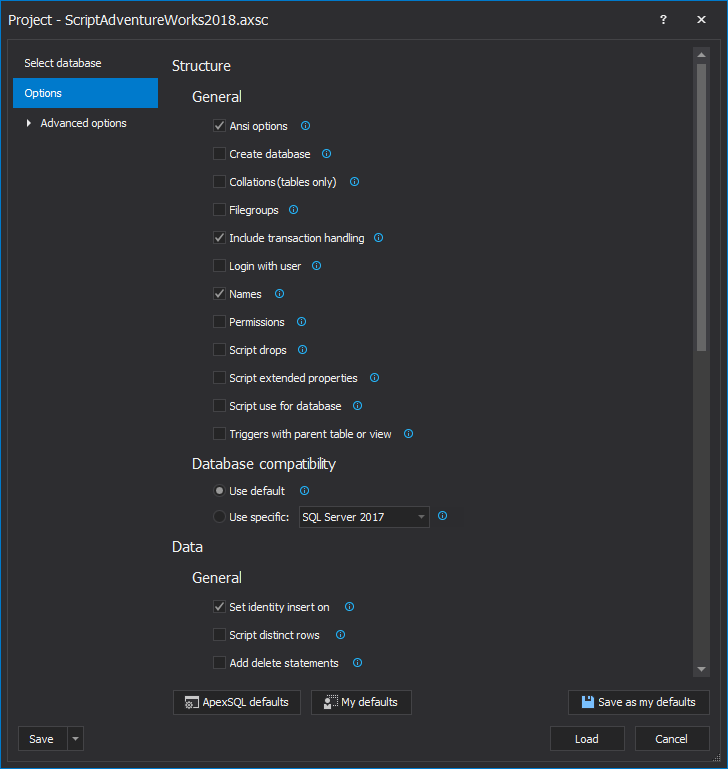
In addition to the above-mentioned options, the Owners in script, Optional output elements and Header and footer options can be set in the Options tab as well:
With a click on the Advanced options, it will be expanded and four additional tabs with options are shown.
In the first tab – the Schema mapping tab, under the Advanced options, by default it shows the list of mapped schemas with the same name, but also the custom schema mapping of schemas with different names can be done:

The schema mapping list can be exported/imported with a click on the Export/Import buttons in the top-right corner and used for scripting the same databases on different servers.
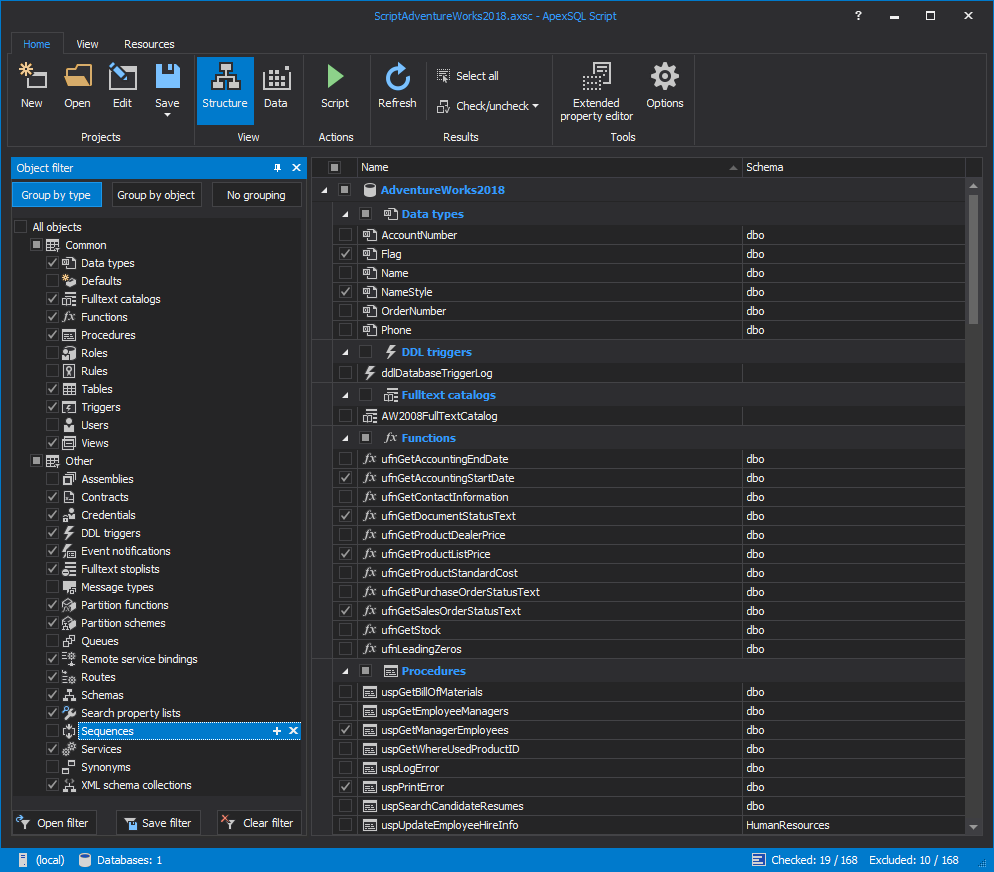
The second tab – the Object filter tab, can be used to filter out object type that should be included/excluded from the scripting process, along with specific objects from the list on the right side:
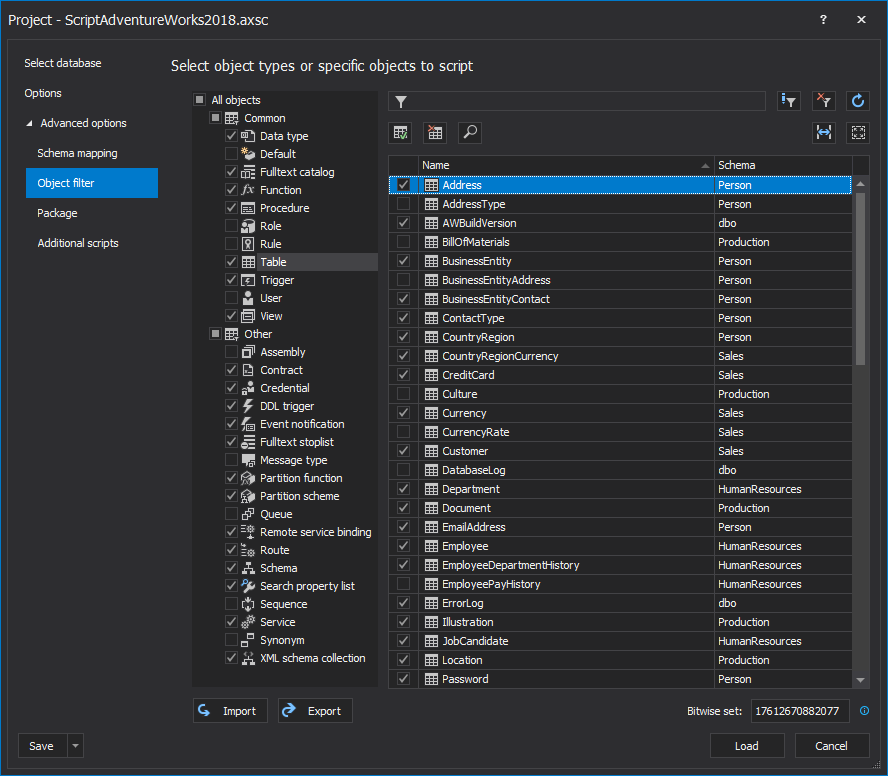
The object filter list can be exported/imported with a click on the Export/Import buttons in the bottom-left corner and used for filtering the same databases on different servers.
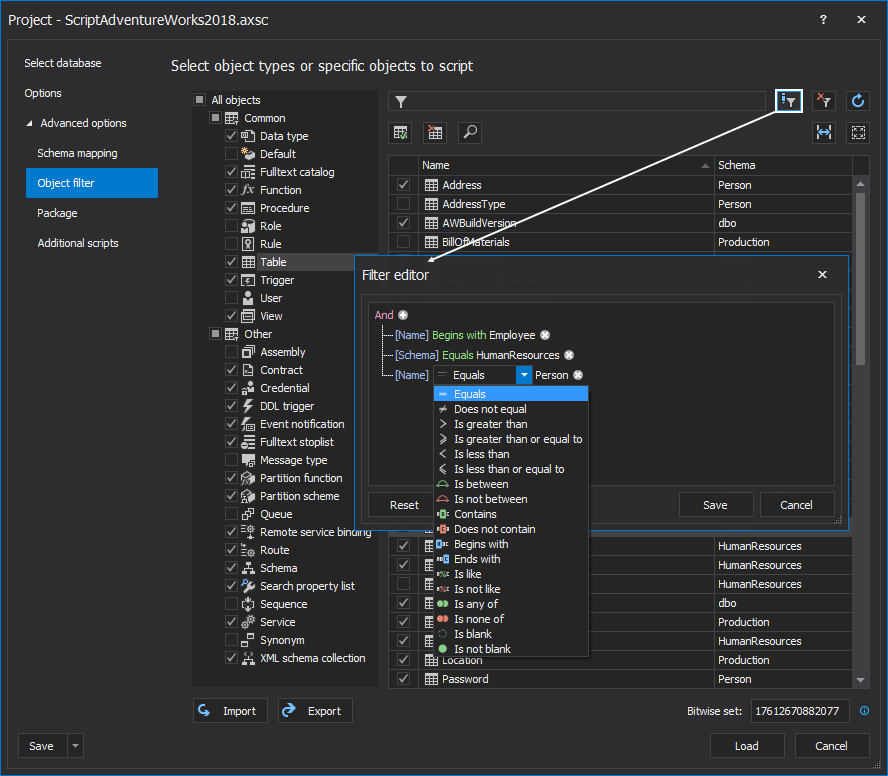
Additionally, the object list on the right side can be filtered more with a click on the Edit filter button in the top-right corner, which opens the Filter editor window where specific conditions can be set:
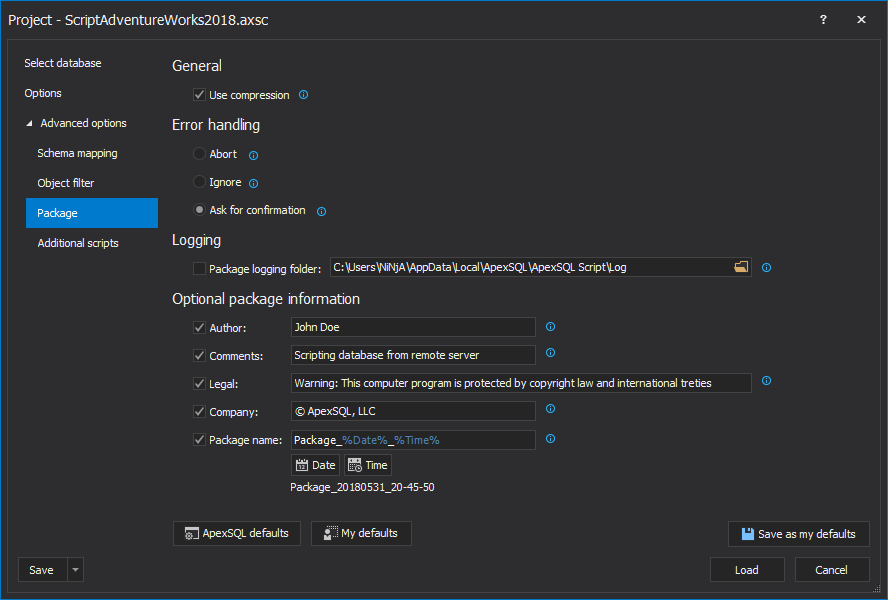
The third tab – the Package tab, contains the Compression, Error handling, Logging and Optional package information options for setting up installer packages:
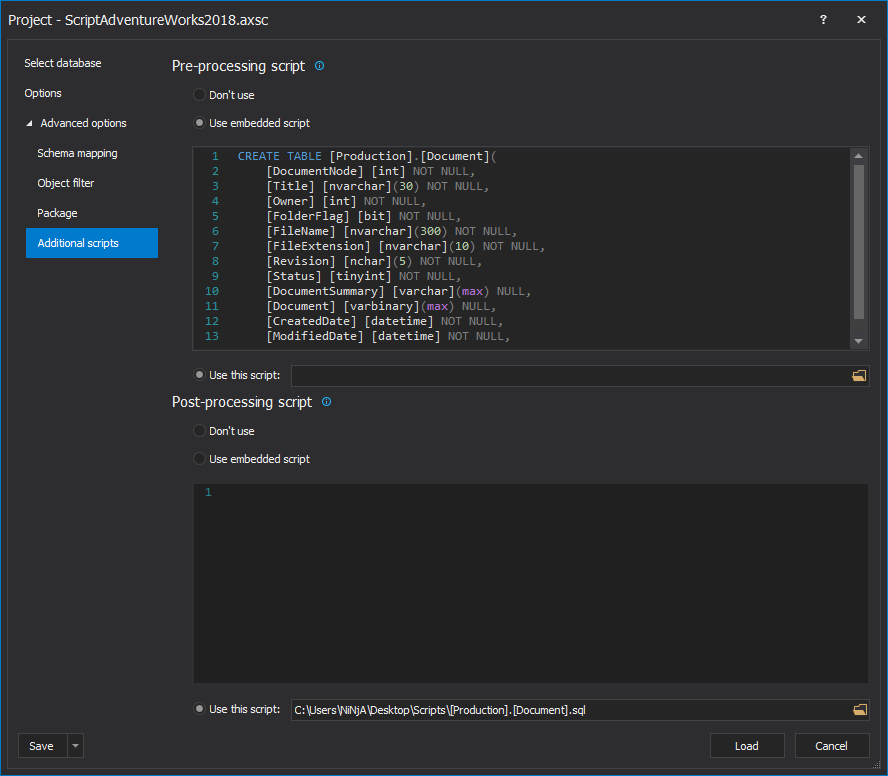
The last tab under the Advanced options is the Additional scripts tab, in which pre or post processing scripts can be entered or loaded to be executed before/after the scripting process:
Once all options are set and the Load button is clicked in the bottom-right corner of the New project window, the main application window is shown along with the Structure grid view:
The Structure grid view shows all objects types, along with their objects that can be checked/unchecked for the scripting process for the chosen database(s), organized by databases and by the object types groups.
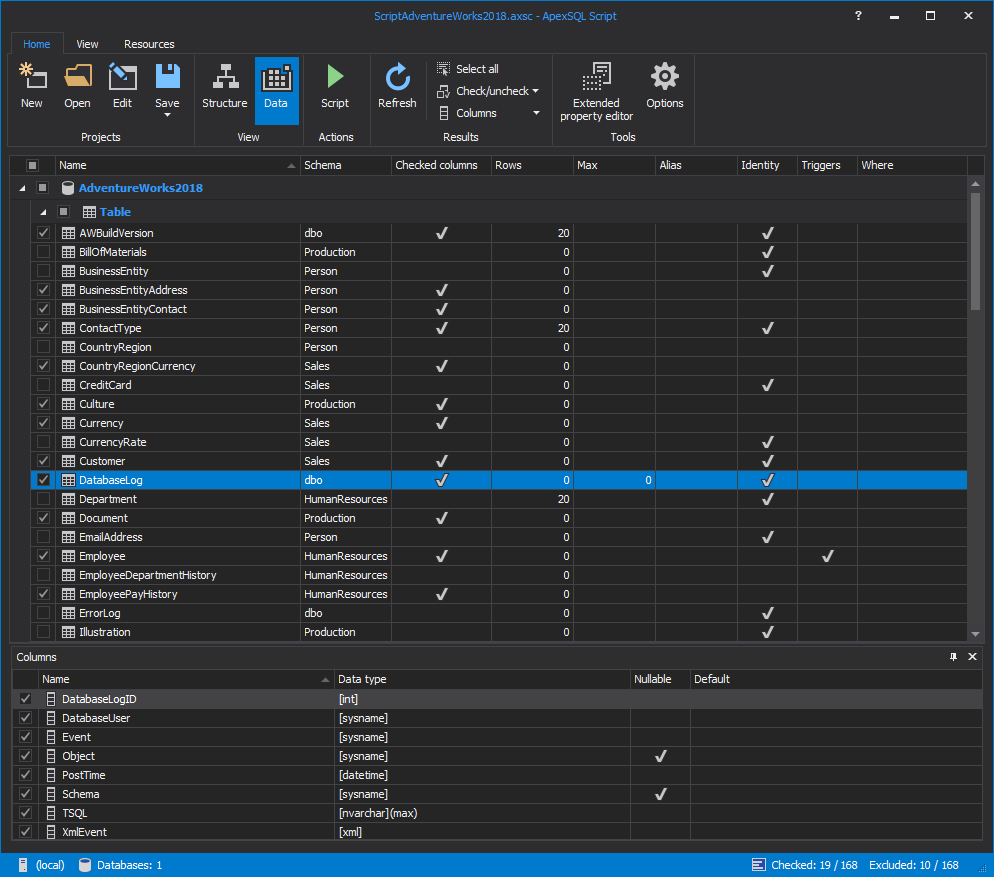
If data needs to be scripted as well, click the Data button under the Home tab and the Data grid view will be shown with all tables and views and their corresponding columns in the Columns filter panel that can be checked/unchecked for scripting process:
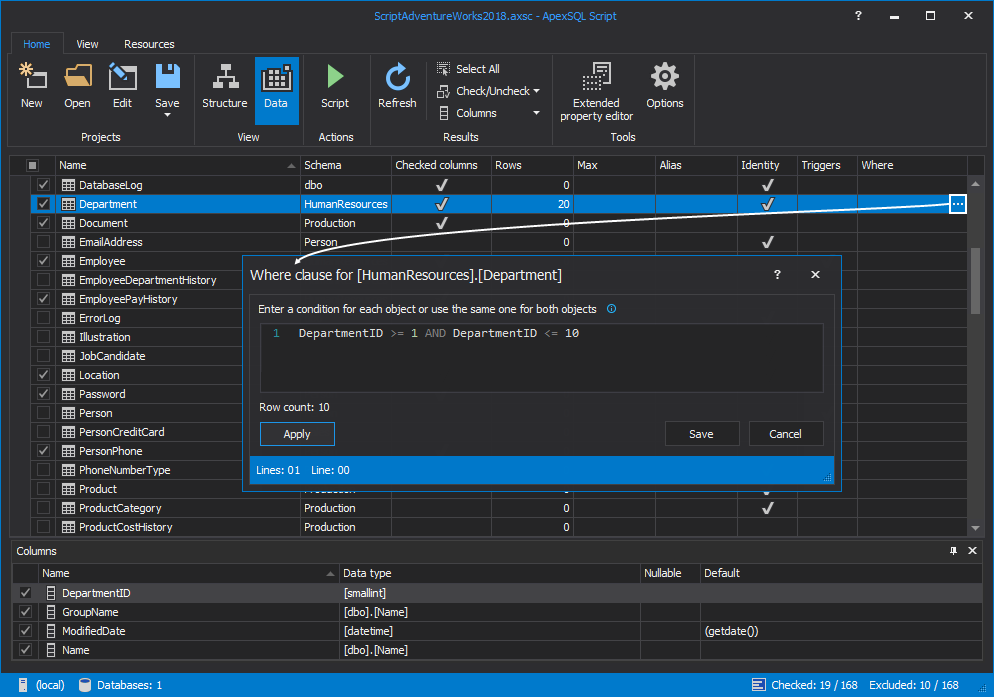
Additionally, the Where clause can be set for each table in order to filter out specific range of rows. To set up the Where clause, select a desired table/view and in the Where column click the ellipse (…) button:
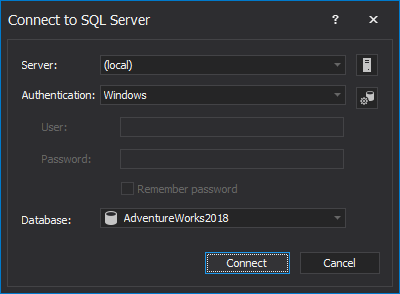
If extended property needs to be edited, click the Extended property editor button from the Home tab and the Connect to SQL Server window will be shown:
More application options can be set under the Options window that can be initiated with a click on the Options button from the Home tab. In the first tab – the General tab, the Startup action, Maximum items in the recent project list and Theme options can be set:

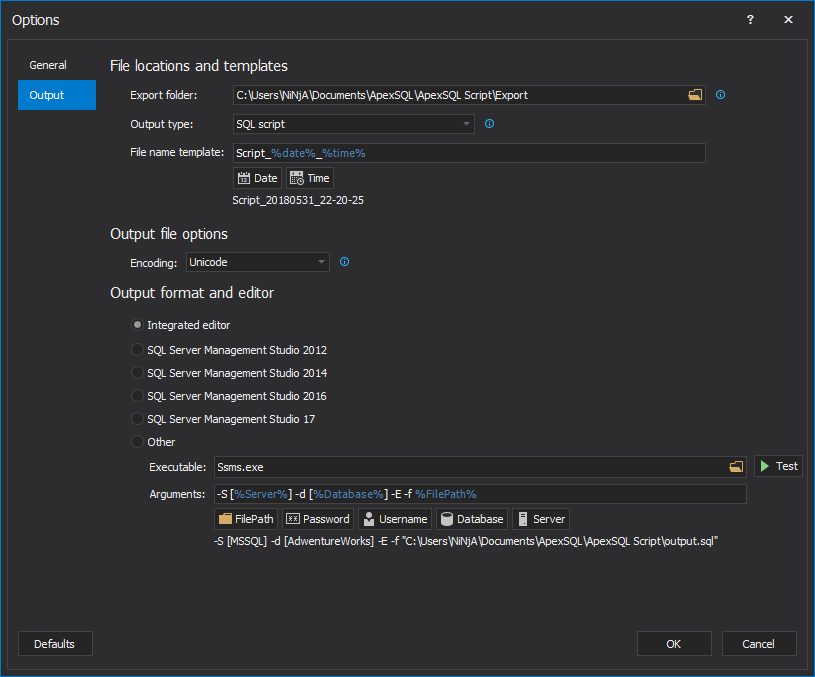
In the second tab – the Output tab, the File locations and templates, Output file options and Output format and editor options can be set:
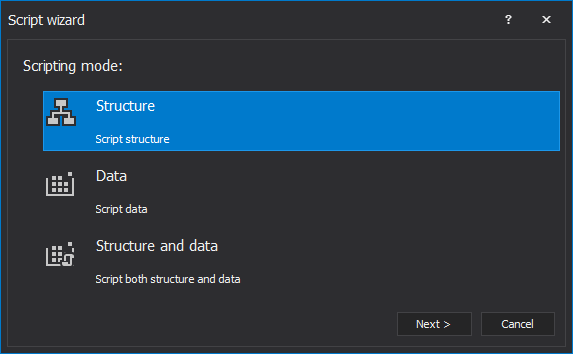
After all options are set and objects are chosen, a click on the Script button from the Home tab initiates the Script wizard. The first step in the Script wizard is to choose between three different Scripting modes:
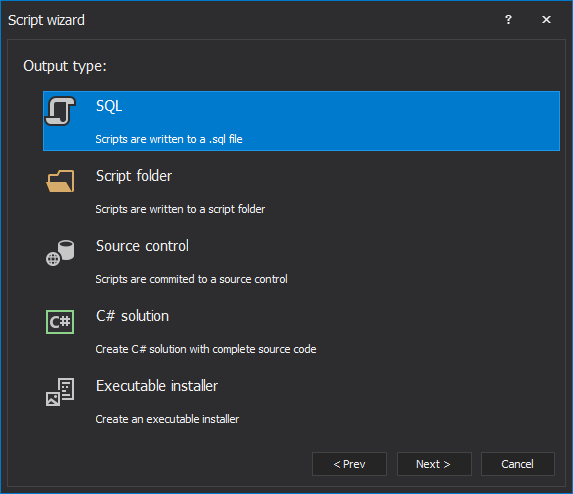
The second step of the Script wizard is to choose between five different Output types:
The third step of the Script wizard is the Dependencies step, it’s the same for all output types and by default, all dependent objects are checked in order to ensure script integrity and error-free script:
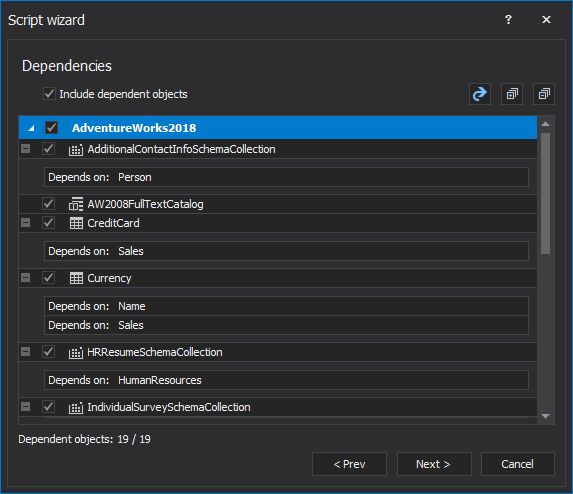
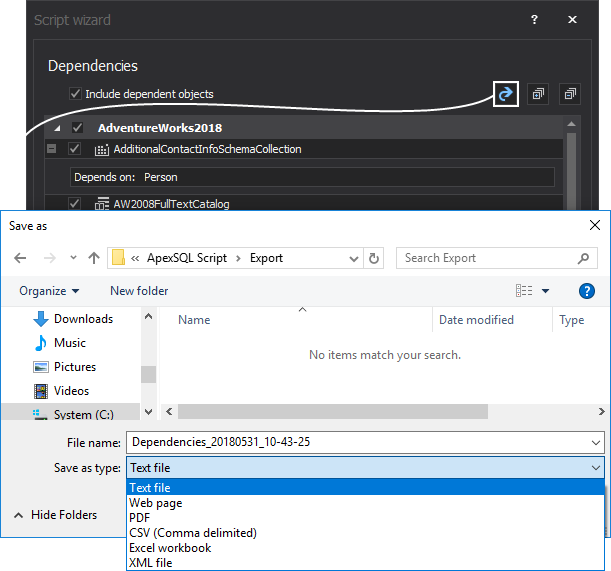
All dependencies can be exported in 6 different output type, with a click on the Export button in the top-right corner of the Script wizard window:
The last step of the Script wizard varies depending on the chosen output type in the second step of the Script wizard:
-
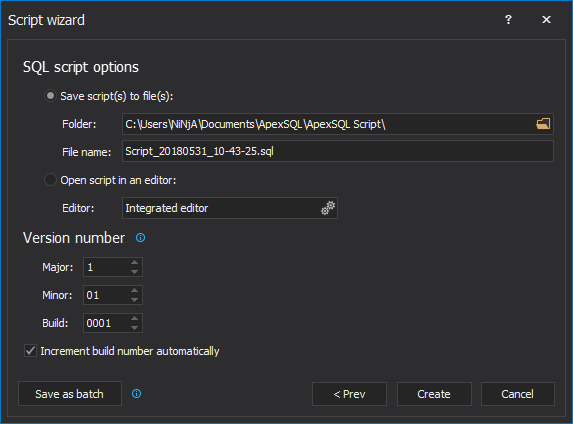
If SQL script is chosen as the output type, options to Save the script to specified location or open it in an editor and the Version number with the Increment build number automatically are shown:
-
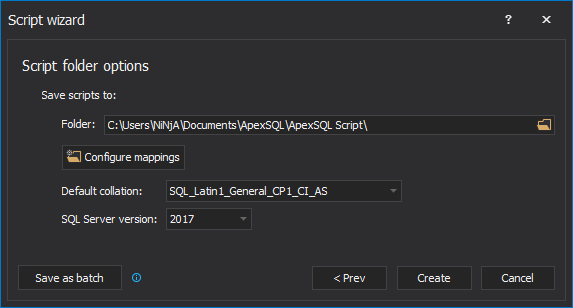
If the Script folder is chosen as the output type, options to Save scripts to specified location, Configure mappings, Default collation and SQL Server version are shown:
-
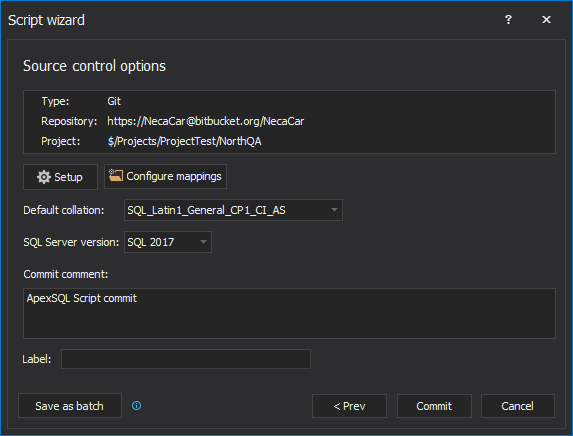
If the Source control is chosen as the output type, options to set Source control system login information, Configure mappings, Default collation, SQL Server version, Commit comment and Label are shown:
-
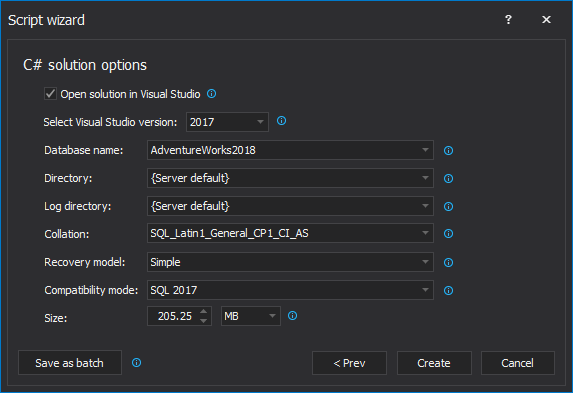
If the C# solution is chosen as the output type, the following options are shown:
-
If the Executable installer options is chosen as the output type, the following options are shown:

The Save as batch window can be initiated with a click on the Save as batch button in the bottom-left corner of the last step in Script wizard for all five output types. The Save as batch window is the same for all output types, only the CLI switches are different in the Batch script panel that can be saved for automating the process:

At the end, let’s see two created outputs once the Create button is clicked in the last step of the Script wizard for:
-
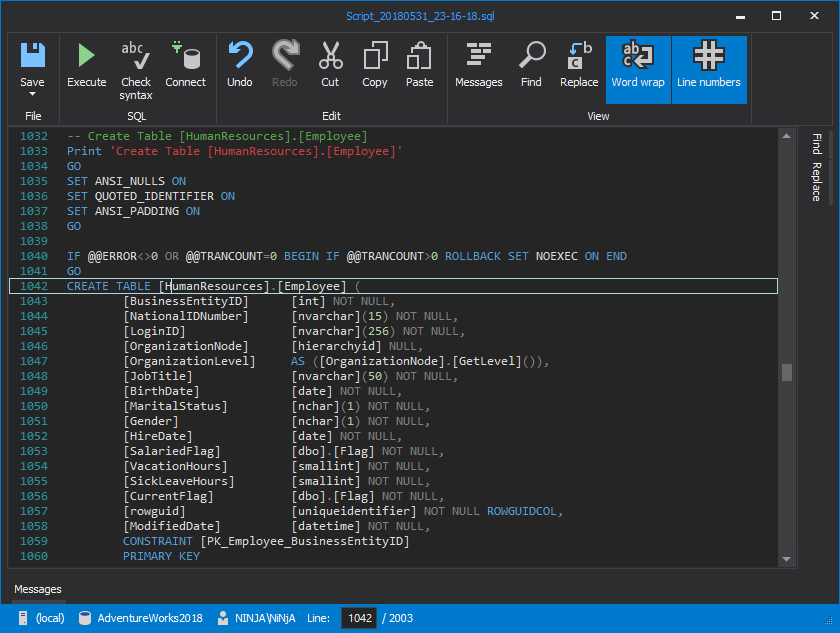
SQL script – the Open script in an editor option is chosen and the script is opened in the Internal editor:
-
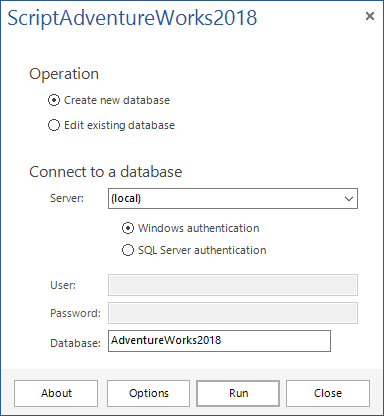
Executable installer – the Run executable now option is checked and upon creating it the following window is shown:
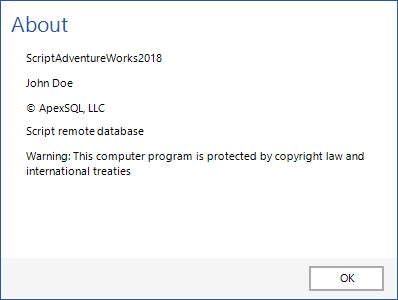
Click on the About button and all Optional package information that were set in the Package tab of the New project window will be shown:
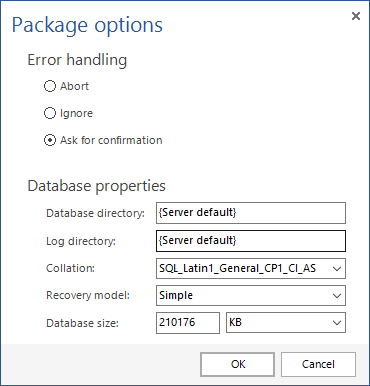
The Options button will bring up the Package options that were previously set in the Package tab of the New project window and in the last step of the Script wizard, such as Error handling and Database properties:
Resources
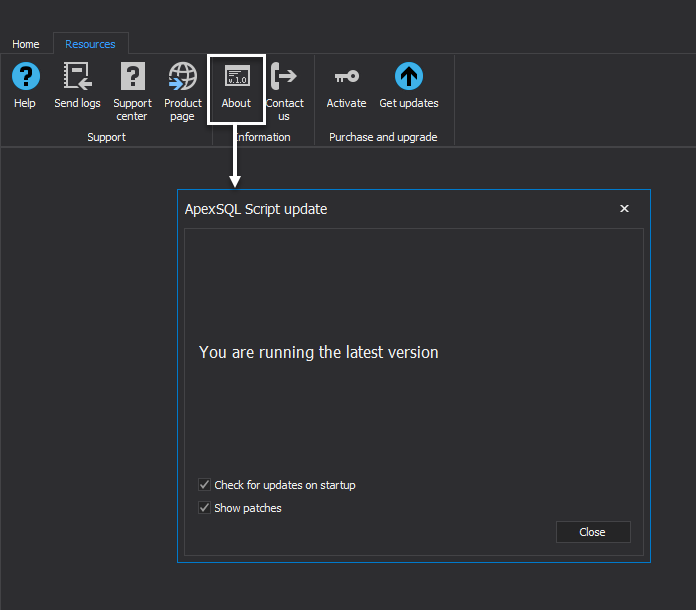
Click on the About button under the Resources tab to show the details of the application version:

Under the Get updates window, ApexSQL Script offers user enables for the latest available version of the tool, possibility for checking for updates on start and available patches. Click on the Get updates button under the Resources tab, and ApexSQL Script update window will appear:
July 4, 2018


