


Welcome to the ApexSQL Data Diff for MySQL screen shot tour. The ApexSQL Data Diff for MySQL is a standalone application for comparison and synchronization data between two live MySQL databases. The first step is to start the installation file, where the Welcome screen will be shown:
Click on the Next button guides us to the next step, which is to accept the Software Transaction Agreement:
When the Software Transaction Agreement is accepted, the next step is to choose the location for installing ApexSQL Data Diff for MySQL. By the default, the installation will be performed on the partition where the Windows operative system is installed:

On the next screen, it will be shown the progress bar of the installation process of ApexSQL Data Diff for MySQL:
When the installation is successfully finished on the left bottom side release notes link can be clicked and seen on the website, and since the checkbox Run ApexSQL Data Diff for MySQL is checked, the tool can be started right away after the Close button is clicked:
When the application is started, the first thing that shows by default is the Project management window where recently saved projects can be directly loaded:

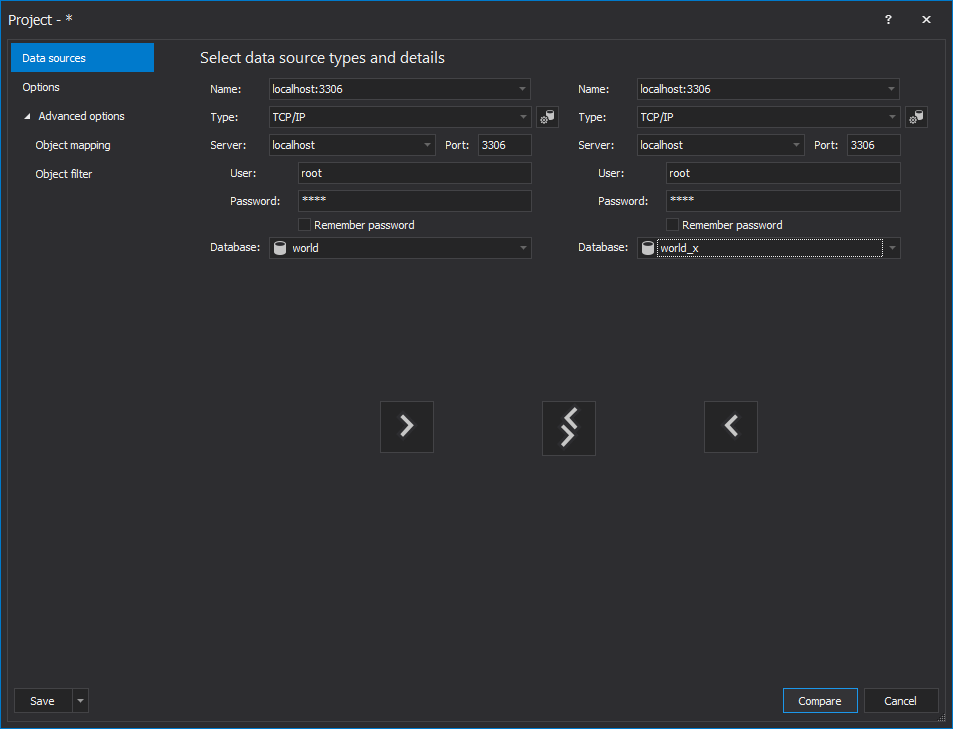
When the button New is used from the Project management window, the New project window is shown including the tab where Data source can be set:
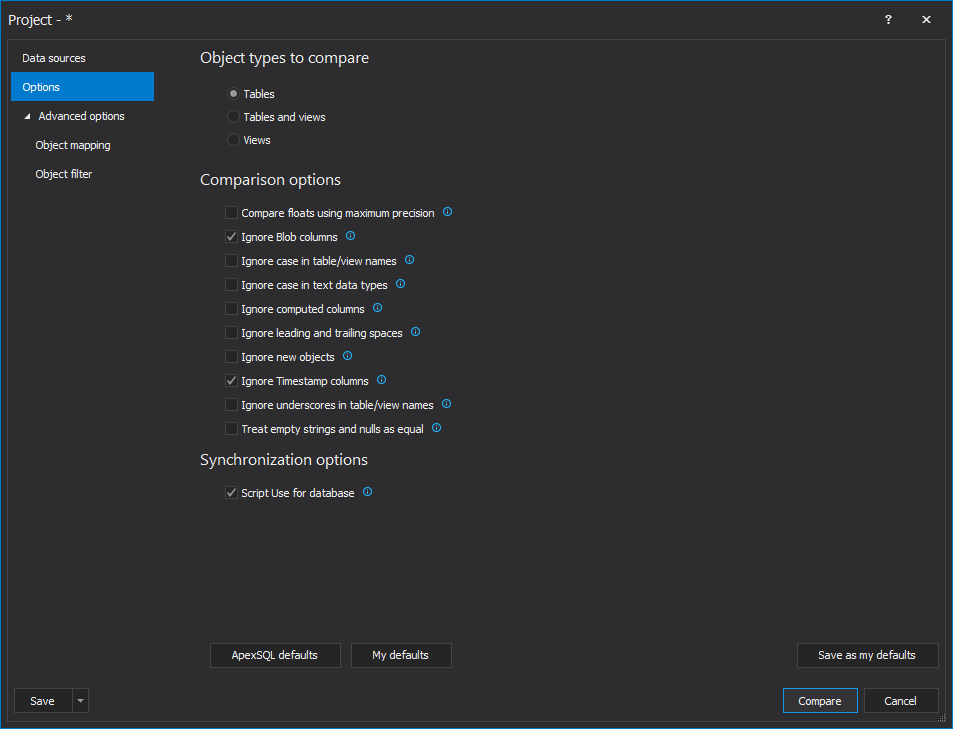
The next tab is the Options tab, where different object types, comparison data, and synchronization data options can be defined:
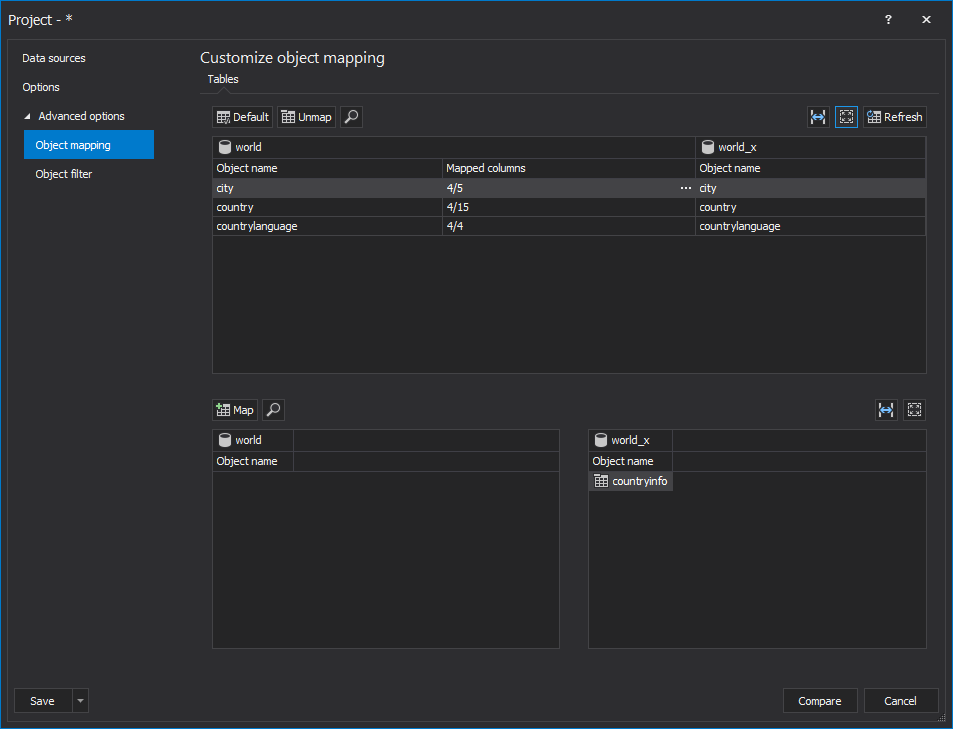
After that, comes the Advanced options which first include the Object mapping tab where the mapping between objects can be customized, objects can be mapped or unmapped, and the last is the Object filter tab where specific objects can be selected before the comparison:

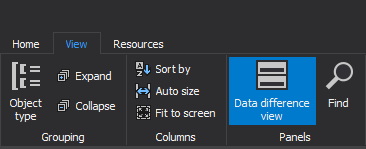
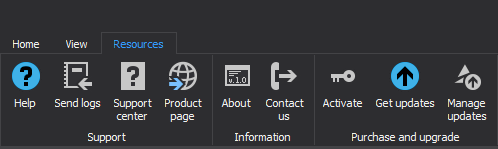
The main window of the application is divided into three tabs with different options in them. The tabs are Home, View, and Resources:

The middle section of the application shows the Results grid where objects are compared:
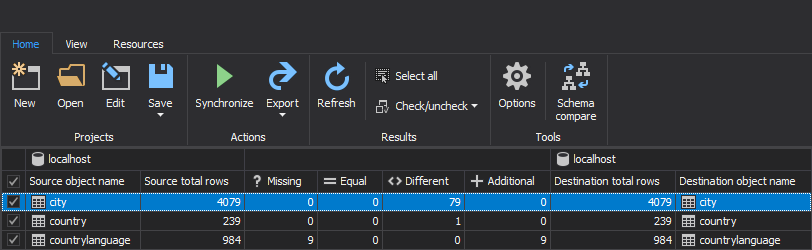
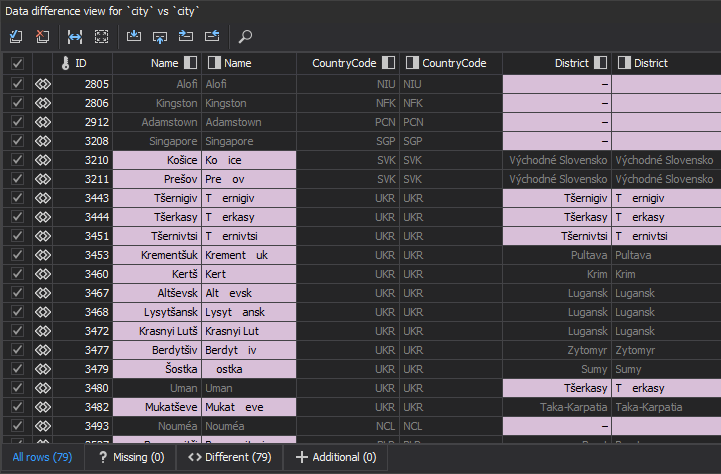
On the bottom by the default is shown Data difference view panel, where can be seen more details for compared objects:
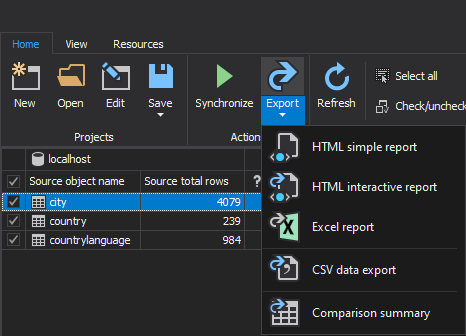
The different types of Export comparison results that users can use can be found under the Home tab:
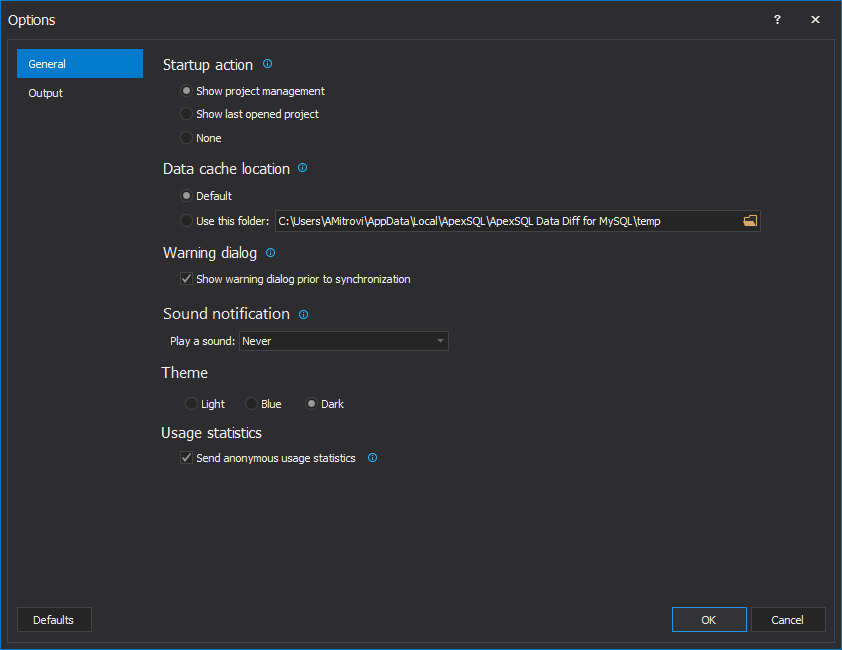
Additional options can be used when the Options button is used under the Home tab in the main window. The Options window is divided into two tabs, General tab, and Output tab. The tab General is the first shown with different settings in it:
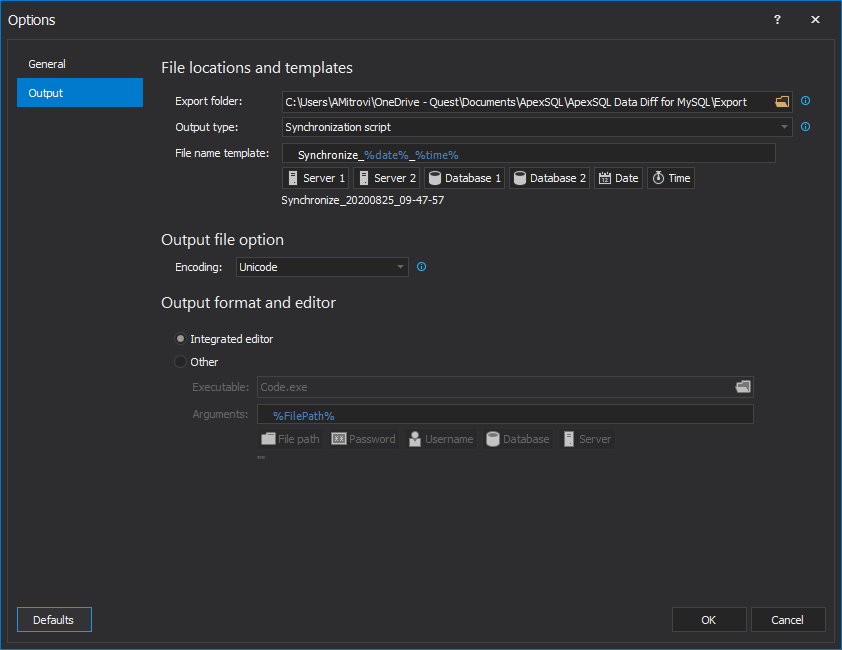
The second tab shown in the Options window is the Output tab with also various settings in it:
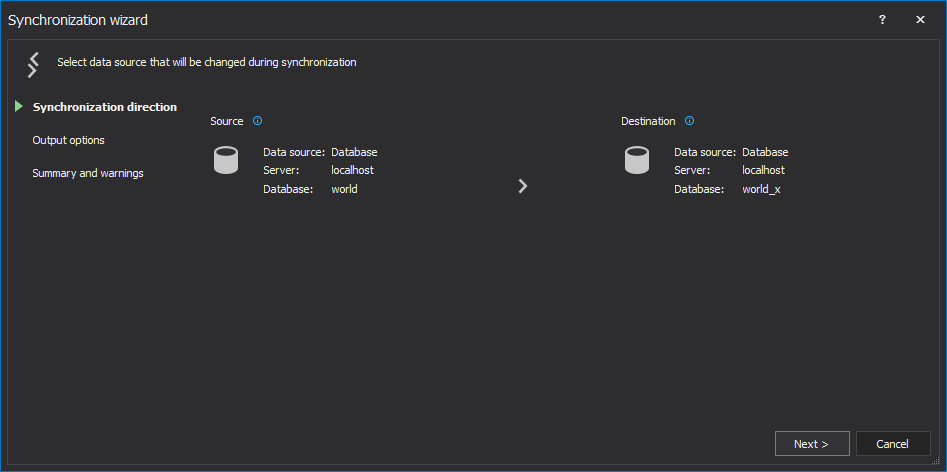
When the Synchronize button is clicked from the Home tab, it will open the Synchronization wizard window, which includes three steps before the synchronization is started. The first step is the Synchronization directions:
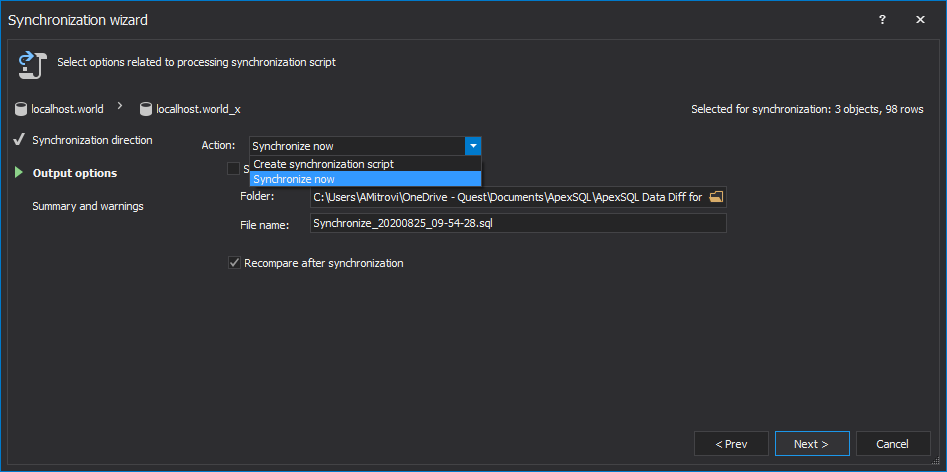
The second step in the Synchronization wizard window is the Output options:
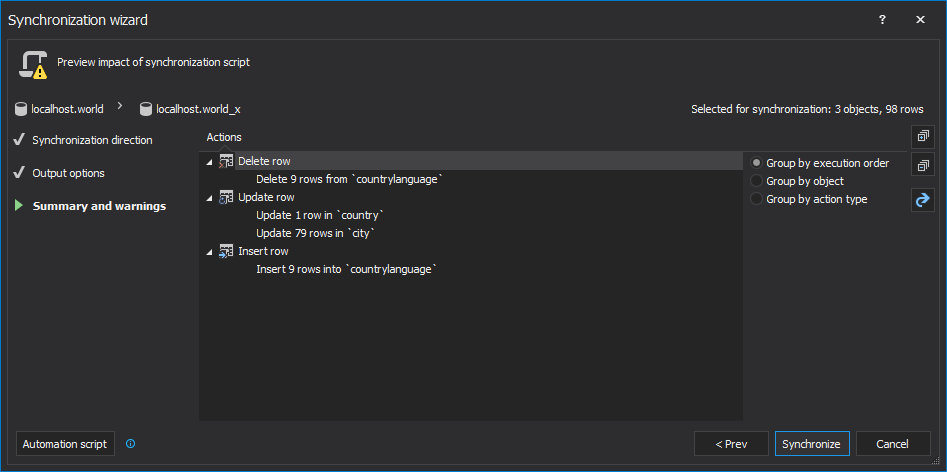
The third and the last step in the Synchronization wizard is the Summary and warnings step:
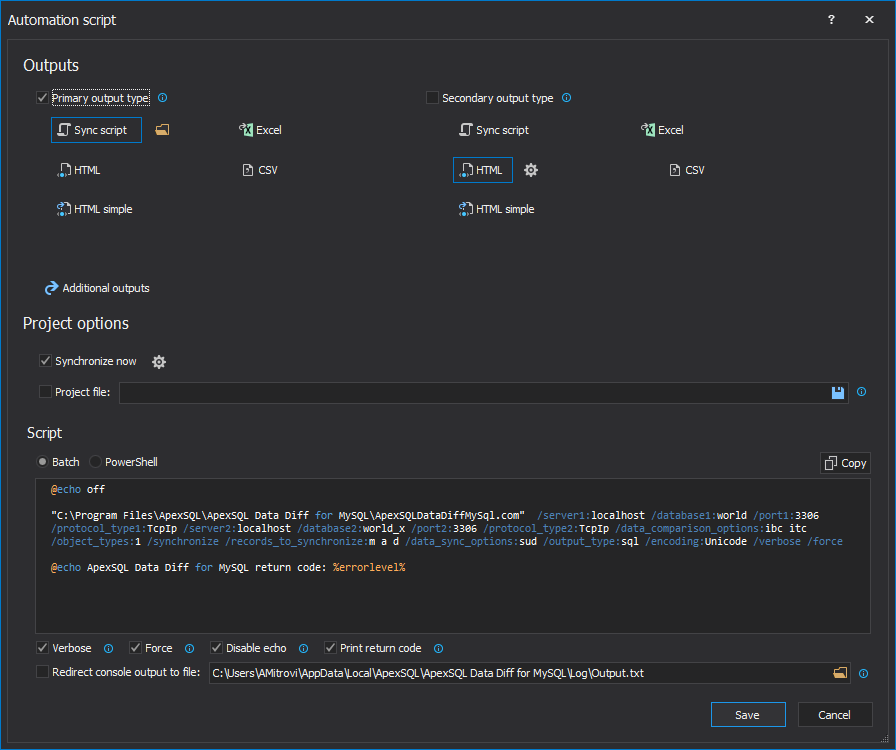
The automation script can be run from the Save as automation script button under the Home tab or in the Synchronization wizard from the bottom left side of the window by clicking the Automation script button. In the Automation script window are different options that can be defined before using the automation system for comparison and synchronization:
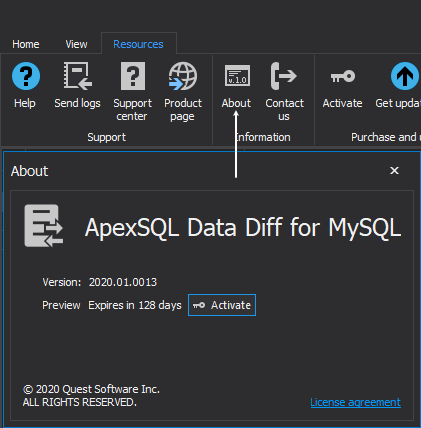
To check the expiration date of the license for the ApexSQL Data Diff for MySQL, click the About button from the Resources tab:
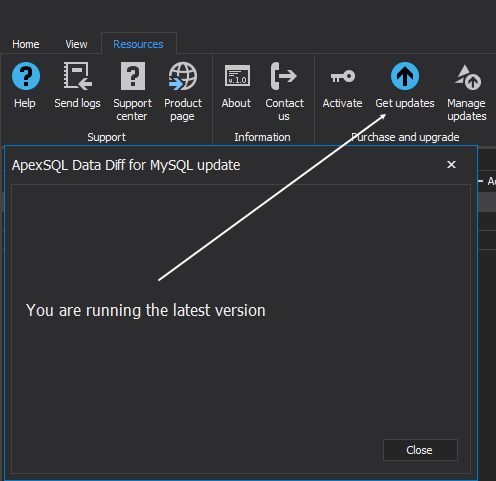
To check if the latest major or latest patch version is used, click the Get updates button from the Resources tab:
August 27, 2020


